Introduction
As an Organization Leader in Brightspace, you have the responsibility of enrolling participants into your organization’s course or group. This guide will walk you through the steps to enroll single users, search for participants, and perform bulk enrollments using a CSV file.
Enrolling Single Users
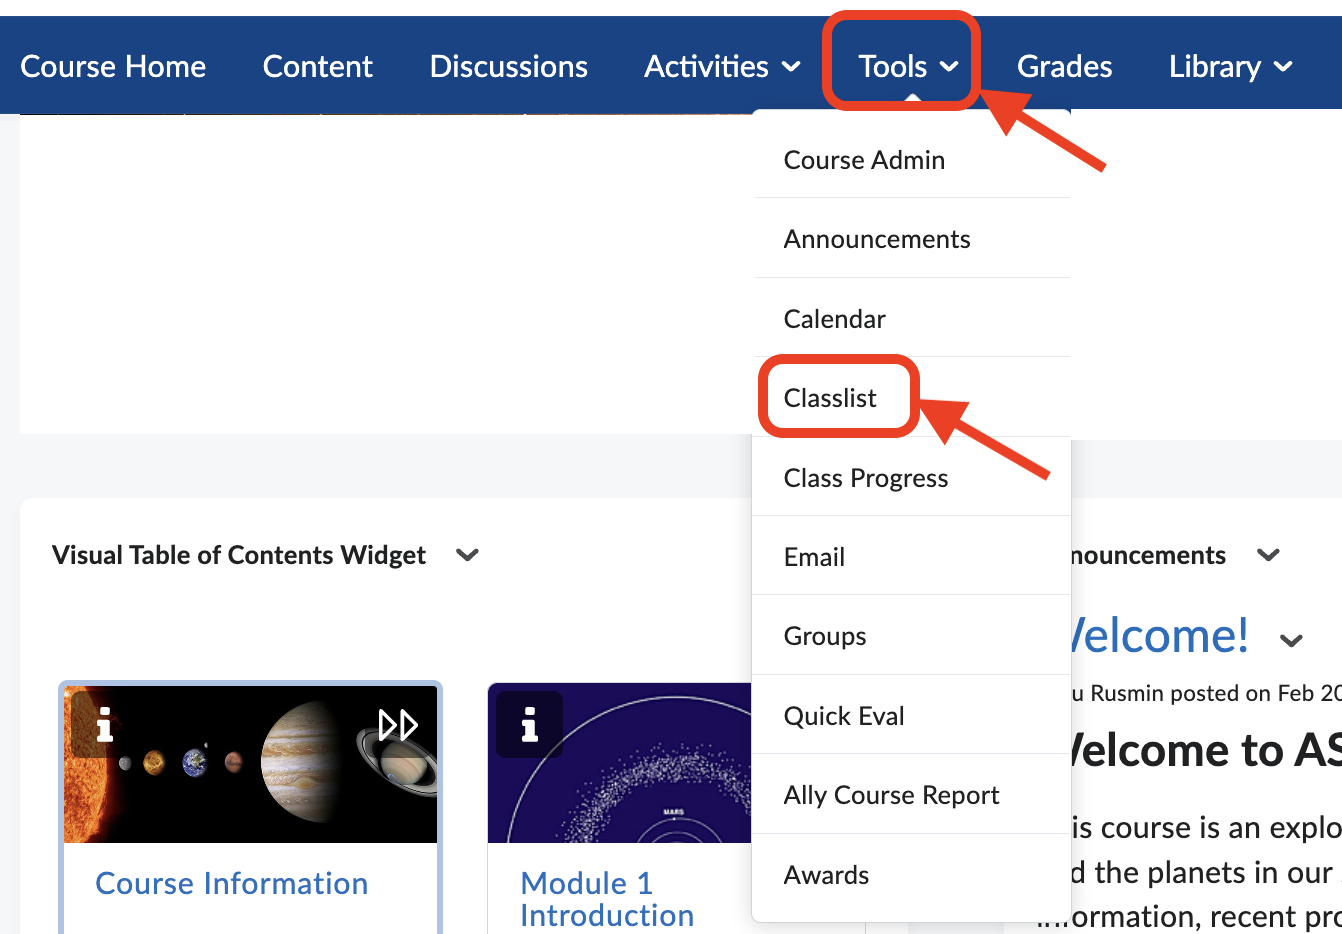
- Navigate to the Brightspace course site for your Organization. From the course navbar, select Tools and select Classlist from the dropdown menu.
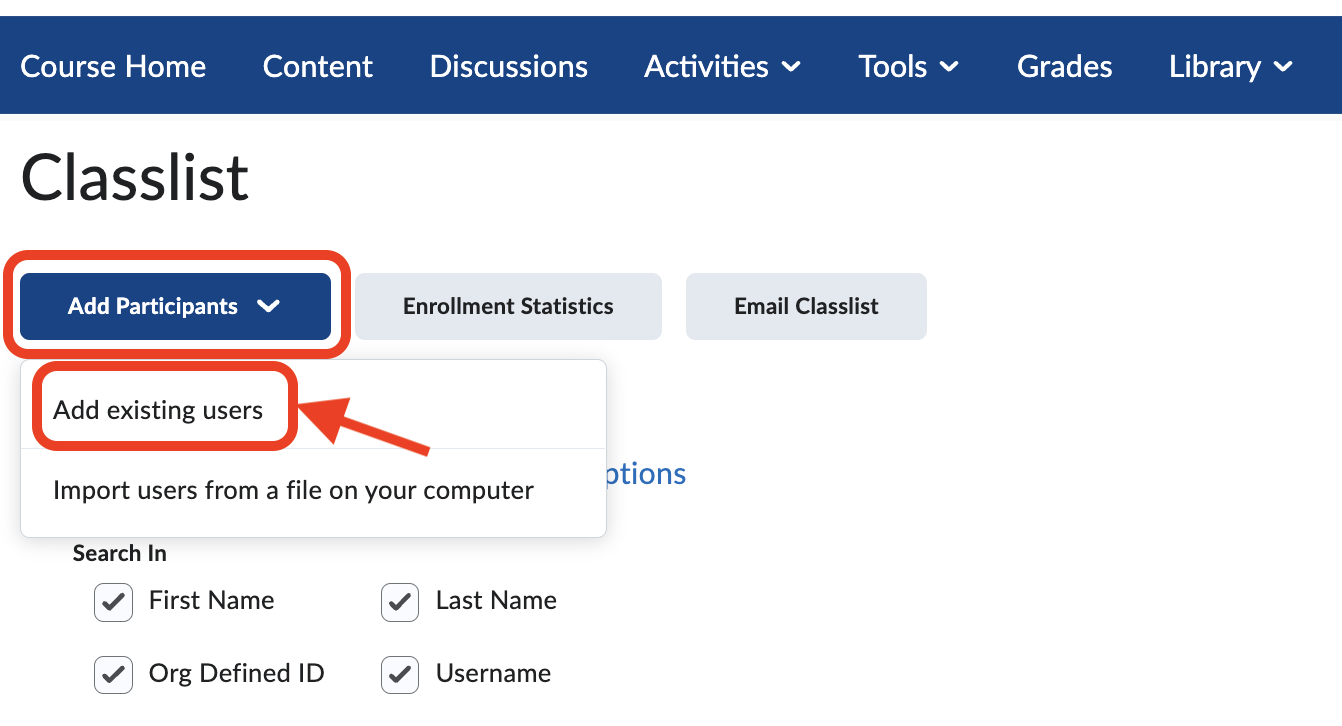
- On the Classlist page, click on Add Participants and choose Add existing users.
- On the Adding Existing Users page, enter the participant’s name or EmplID in the search bar and click the magnifying glass icon to perform the search.
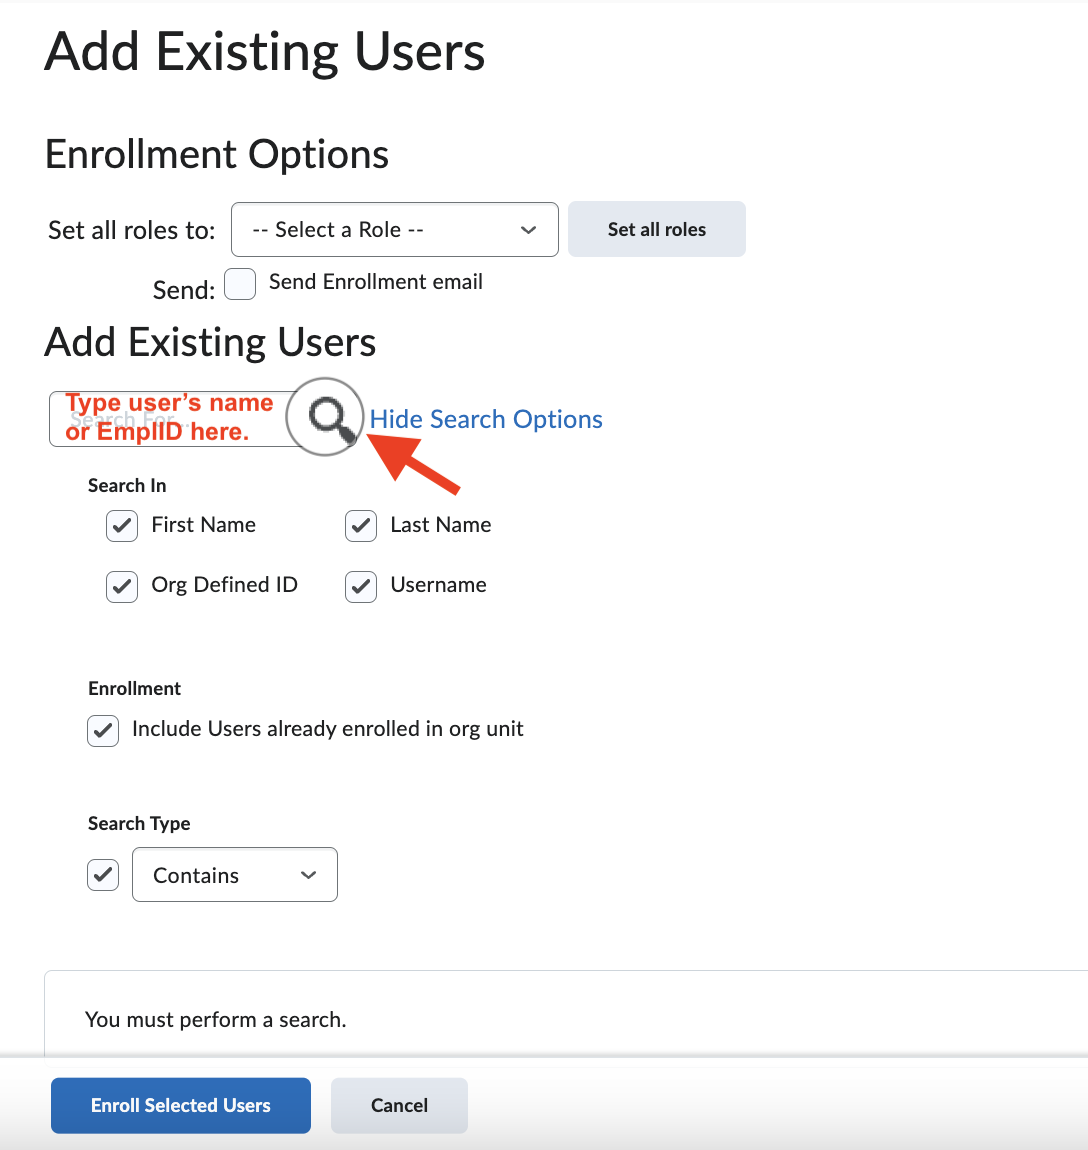
You can refine your search by adjusting the Search In parameters: select or deselect the First Name, Last Name, Org Defined ID, and Username checkboxes as needed.
- When the user appears in the search results, tick the checkbox next to their name. Use the Select a Role dropdown menu and choose Learner. If you would like to assign a different role, please consult with OFDIT first to ensure that the role permissions are appropriate.
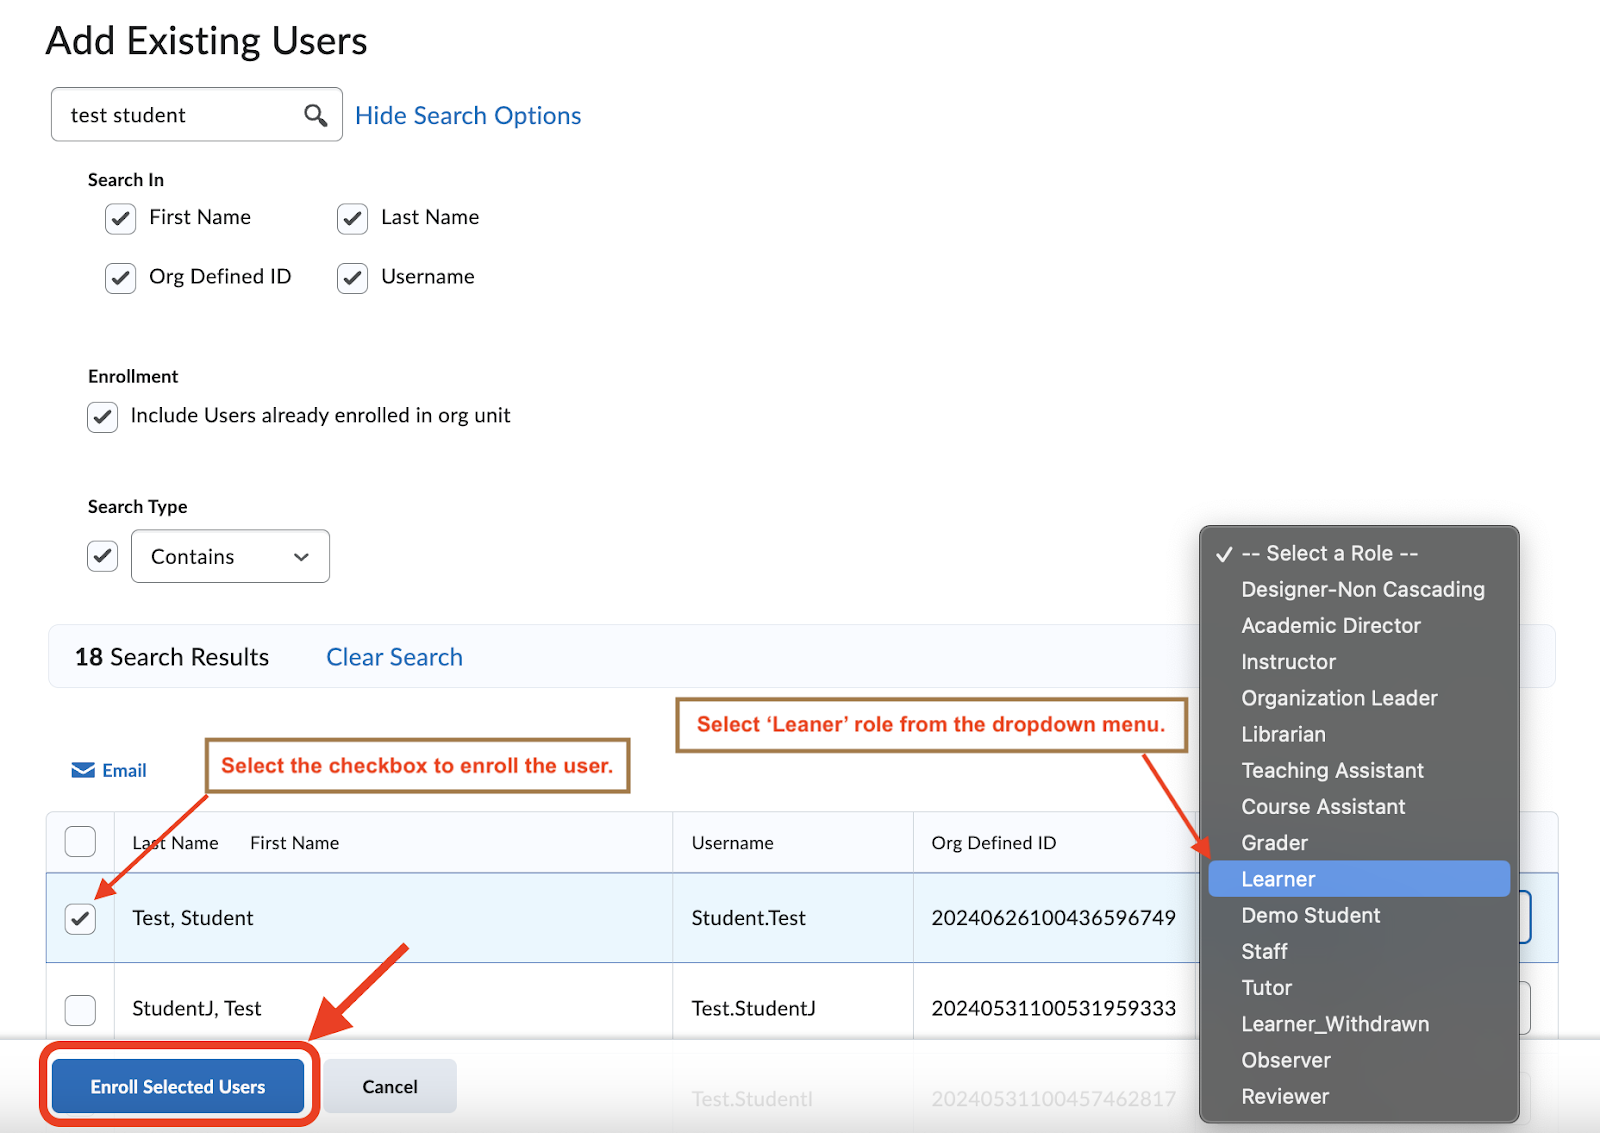
Once you’ve selected the user and specified their enrollment role, click the Enroll Selected Users button to complete the enrollment process.
Note: LMS Admins and AcademicDirectors (ADs) will not appear in the search results. If you need to enroll an LMS Admin or AD, you must use the bulk enrollment method described below.
Bulk Enrollment of Participants
To enroll multiple users at once, follow these steps:
- Navigate to your course in Brightspace. From the course navbar, select Tools and select Classlist from the dropdown menu.
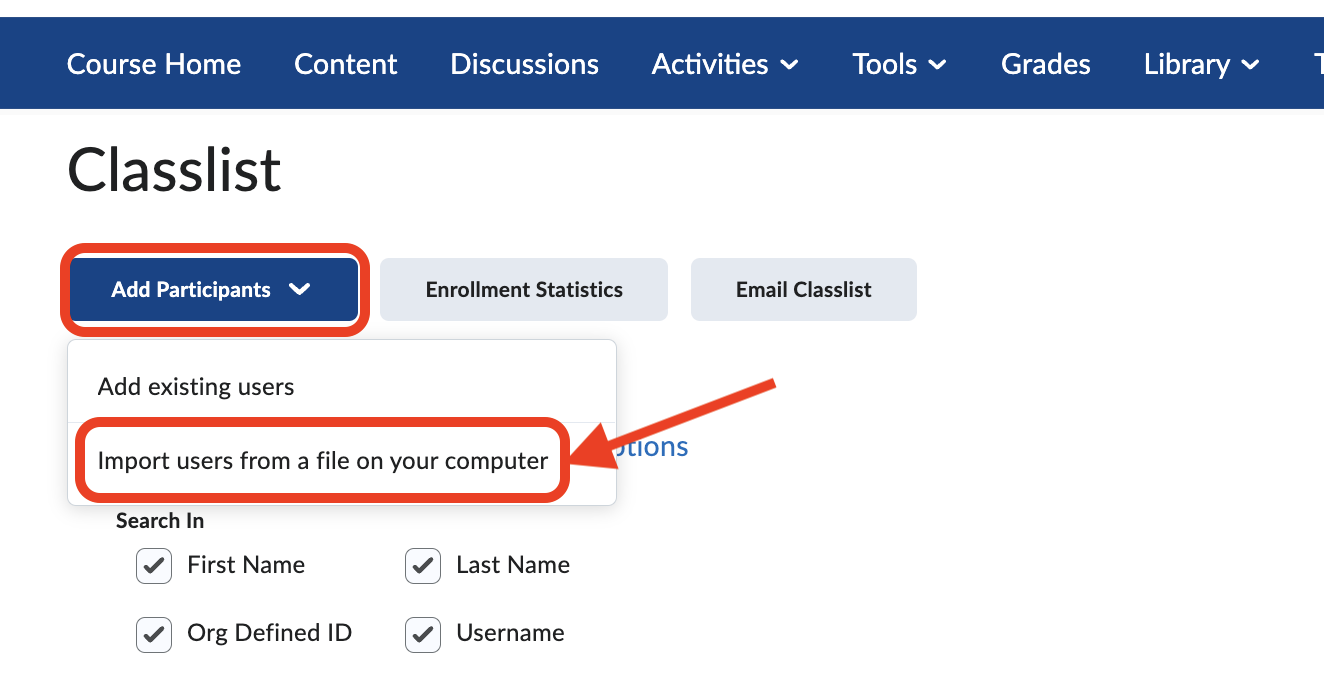
- On the Classlist page, click on Add Participants. Select Import users from a file on your computer.
- On the next page, click Choose File and select the file you wish to use from your device.
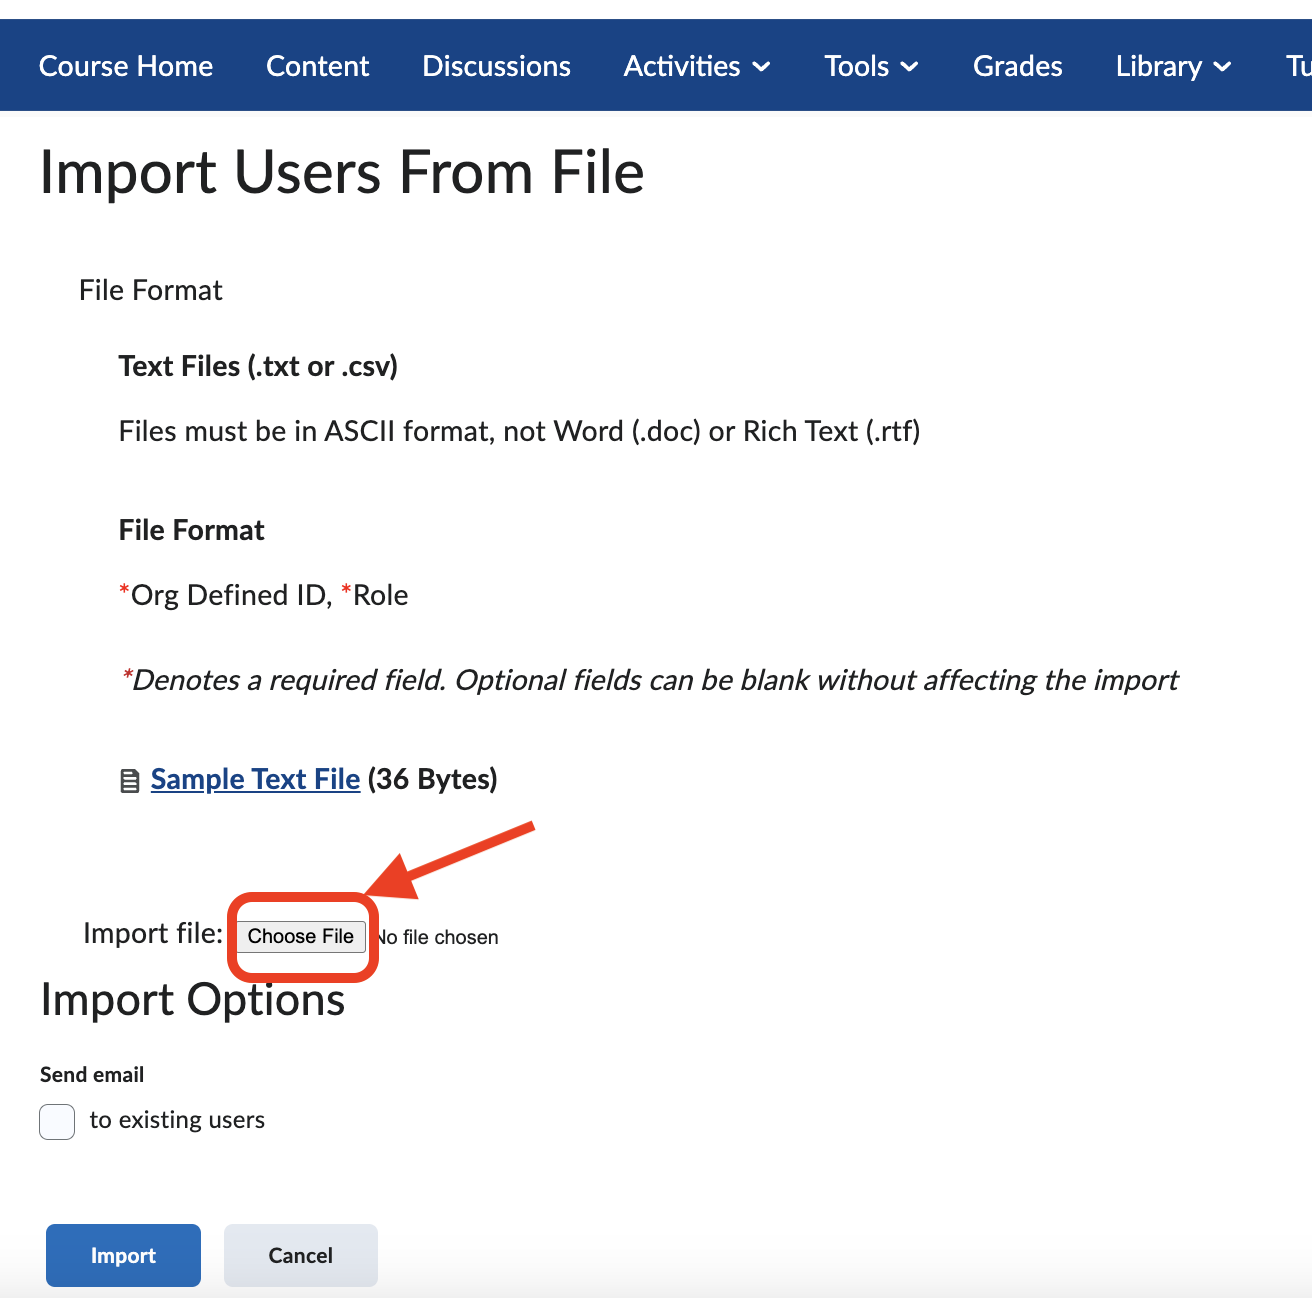
Ensure you upload the file with the user list and the information below in CSV format.
- Emplid [in the first column]
- Role [i.e., Learner, Instructor, etc., in the second column]
- After selecting the file, click Import. You will receive a success or error message depending on the outcome.

If successful, a list of the enrolled users will appear. Select Done to complete enrollment.
Additional Resources
- About Classlist (D2L Brightspace Community)
If you encounter any issues or need further assistance, feel free to reach out to FacultySupport@sps.cuny.edu for support.
Still have questions? Email us at FacultySupport@sps.cuny.edu. We’re here to help!
Was this helpful?
2 / 0