When instructors share information about themselves, students can feel more connected and more engaged in the course. Follow these steps to set up the instructor profile widget on the course home page and add additional information in the Course Information content area.
Utilizing the Instructor Profile Widget on Brightspace
The instructor profile widget appears on your course home page and should provide students with essential contact information for their instructor. Follow these steps to set up and utilize the single profile widget effectively:
Getting Started:
1. Find your Single Profile Widget and Enter Edit Mode
Once in your course, scroll down to find your Single Profile Widget.
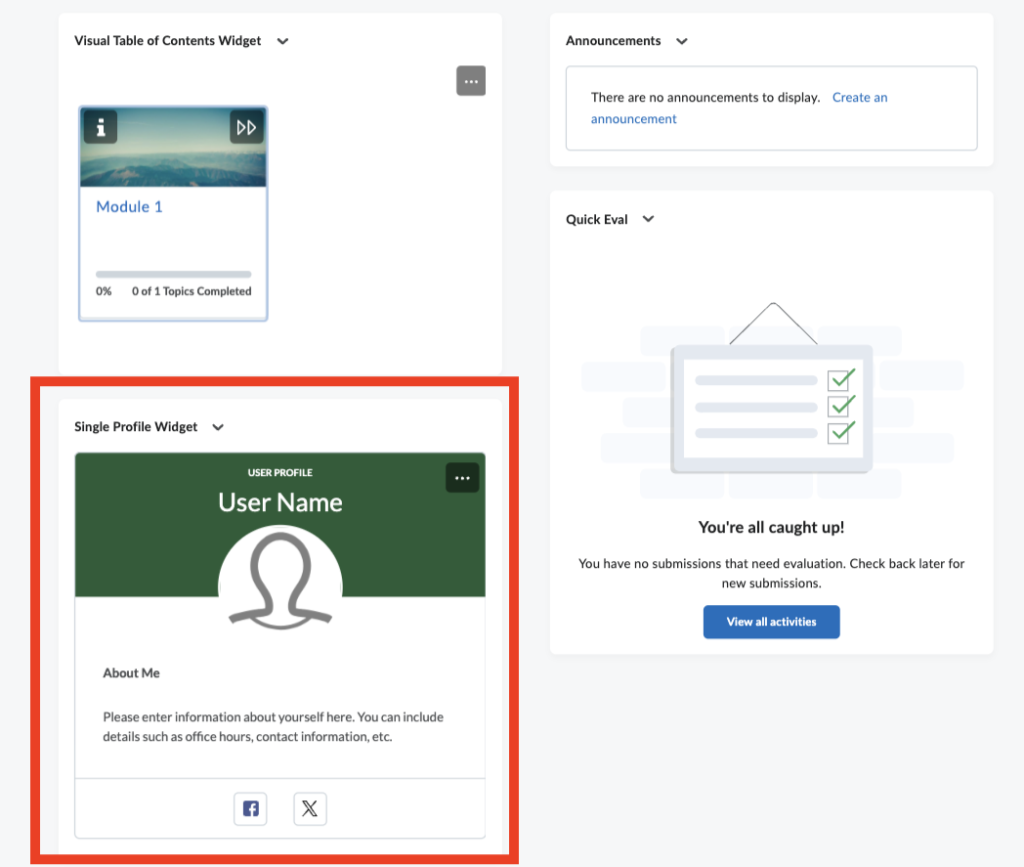
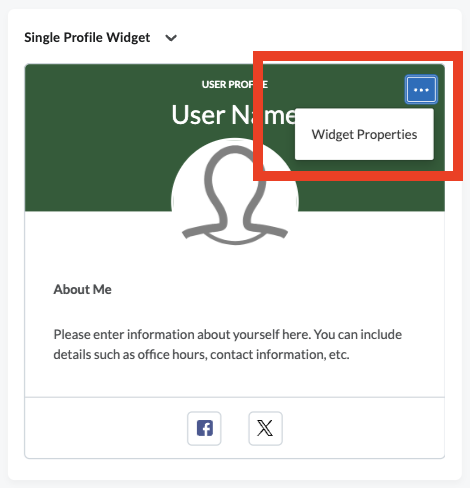
Click on the 3-dot icon on the upper right corner of your Single Profile Widget and select “Widget Properties” to enter the edit mode.
2. Edit Widget Properties
To edit each section of your profile widget, follow these steps:
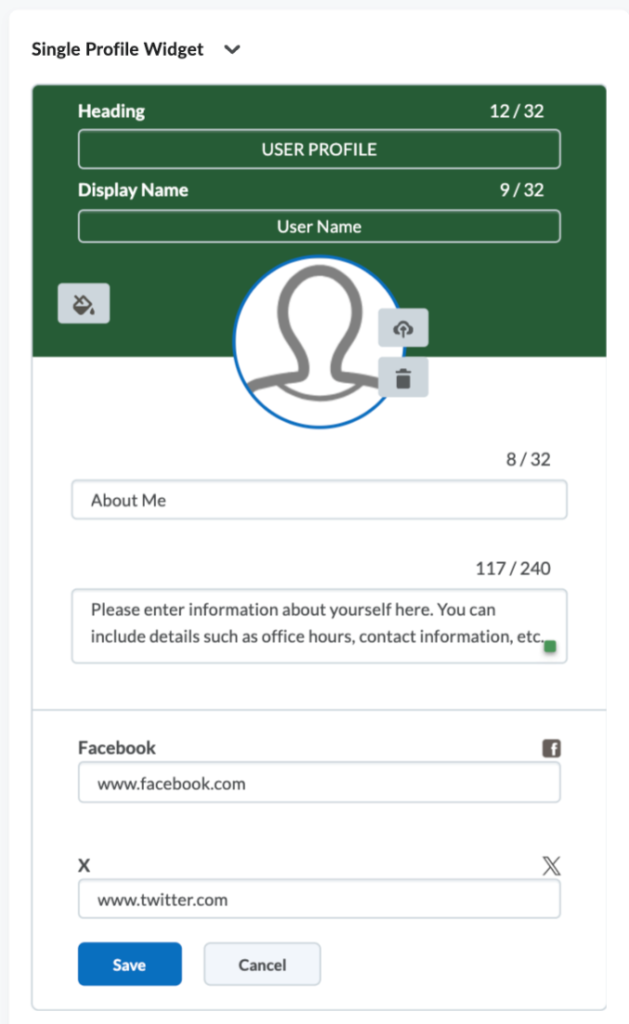
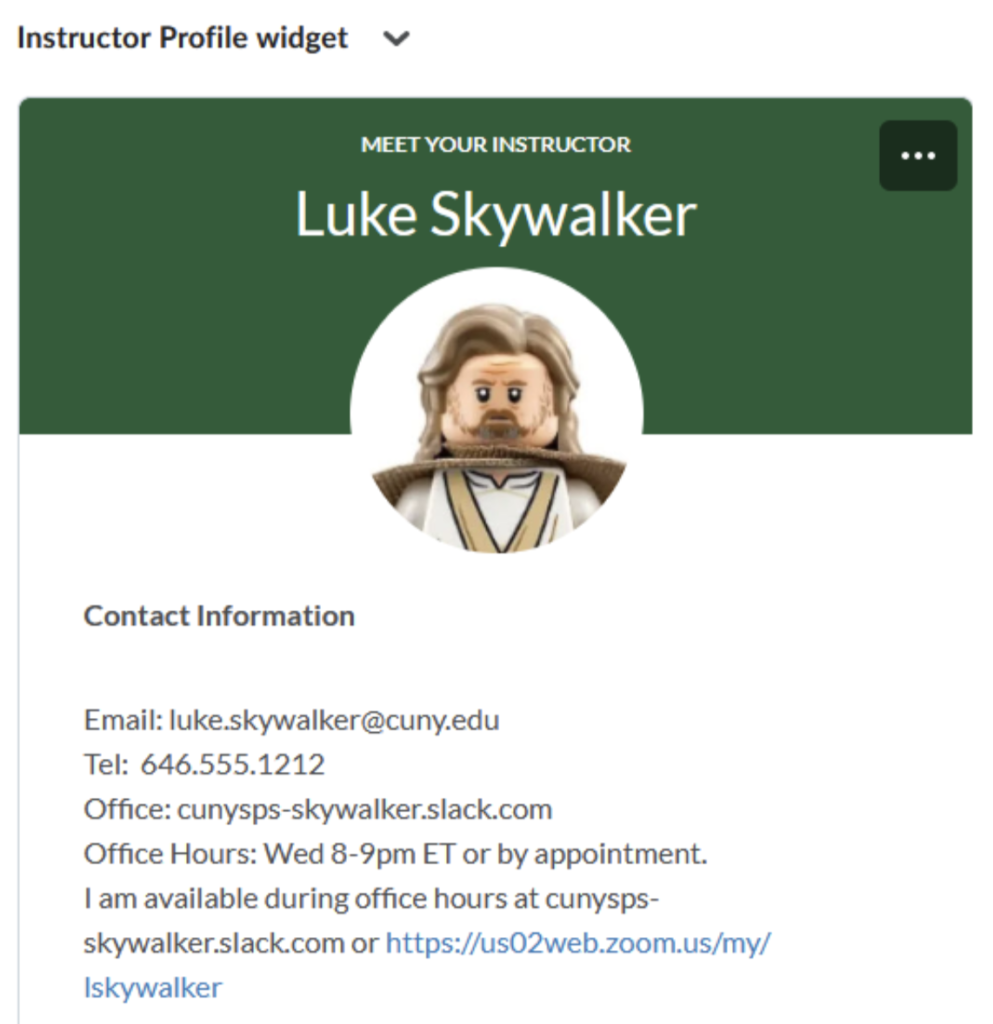
- Heading: Click on the text field next to “Heading” and delete the existing text “USER PROFILE”. Type in “MEET YOUR INSTRUCTOR” or similar.
- Display Name: Click on the text field under “Display Name” where it reads “User Name”. Delete this text and replace it with your name.
- Avatar: To upload an avatar, click on the icon that resembles a camera or picture in the avatar box. Follow the prompts to upload an image of yourself to your computer or device.
- “About Me” Section: Click on the text box titled “About Me” and type in “Contact Information”.
- Large Text Box: Click inside the large text box under your name and fill it with the information to share with your students, such as your email, contact information, office hours, and any other important details you want them to know.
- Social Media Links: If you wish to include your Facebook or Twitter (X) link, click on the corresponding text field under “Facebook” and “X” and type your profile URLs.
After making all your changes, be sure to click the “Save” button to apply the updates to your profile. If you decide not to make any changes, you can click “Cancel” to exit without saving.
3. Preview
It’s a good idea to preview your course page as a student to ensure the profile widget appears correctly and contains all the necessary information.
Troubleshooting the profile picture:
- Check Image Format: Ensure the image you are uploading is in a supported format (e.g., .jpg, .png).
- Check Browser: An uploaded profile picture may not display correctly in Firefox. Instead of showing the uploaded image, the space appears all white.

Note: The default grey “blank” avatar silhouette is displayed if no image is uploaded.

Solution:
To ensure your profile picture displays correctly, follow these steps:
Use an Alternative Browser
If you encounter issues with Firefox, try using a different browser to view your profile picture. Recommended browsers include:
- Google Chrome
- Microsoft Edge
- Safari
Adjust Firefox Settings (Optional)
If you prefer to use Firefox, you can adjust the browser settings by turning off enhanced tracking protection to resolve the issue:
- Open Firefox and navigate to the Brightspace site where you upload your profile picture.
- Click on the shield icon located at the left of the address bar. Locate the switch and toggle to turn off Enhanced Tracking Protection for this site.
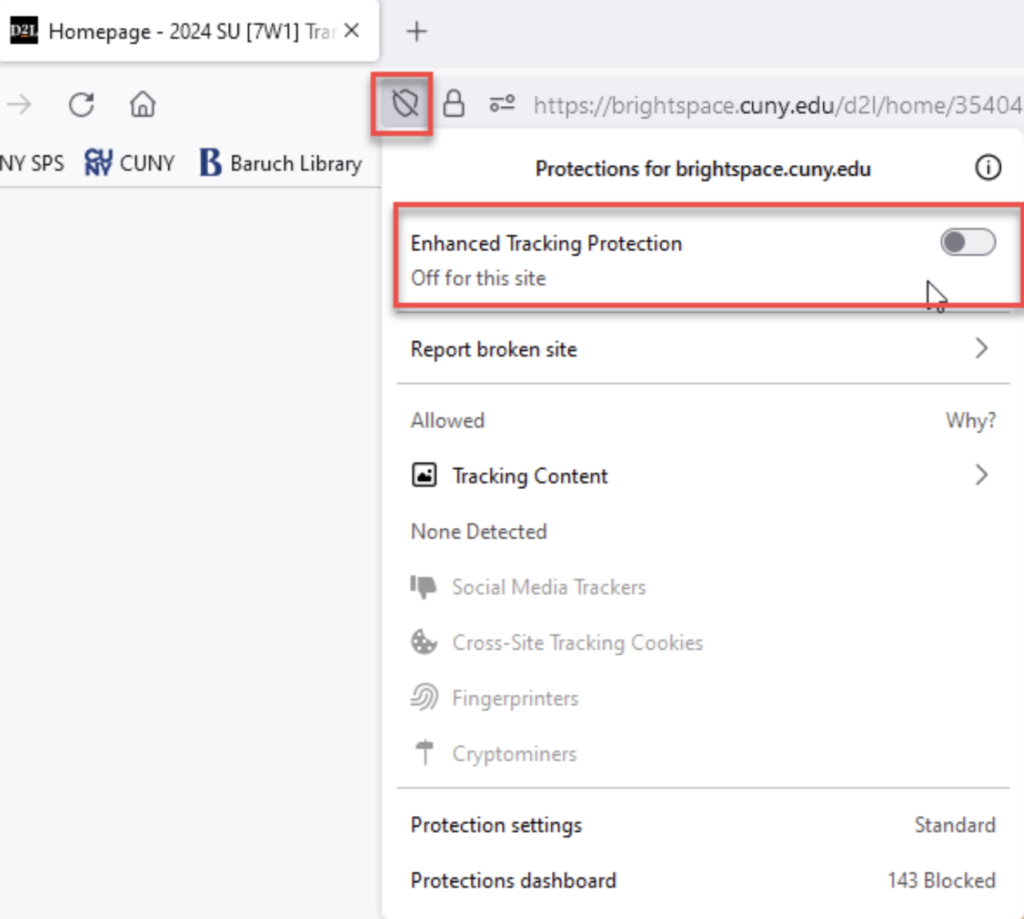
- Reload the page and check if your profile picture displays correctly.
Adding Instructor information in Content
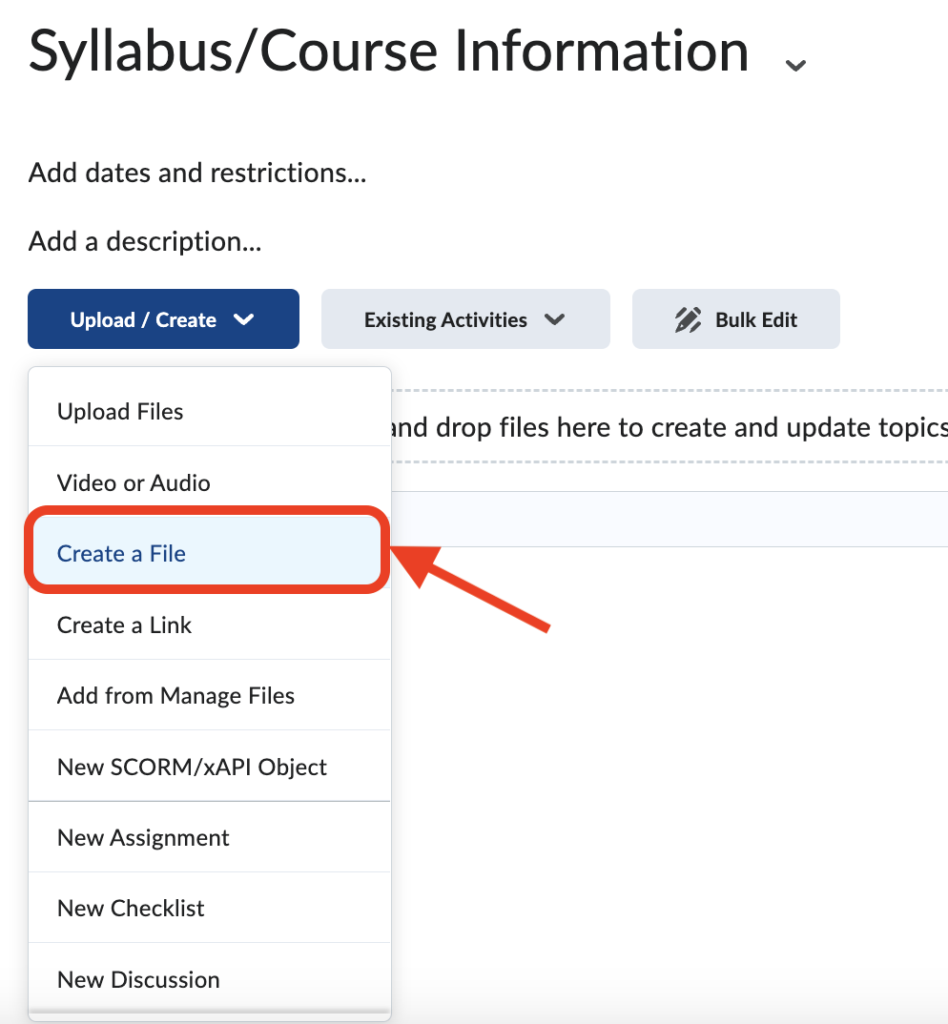
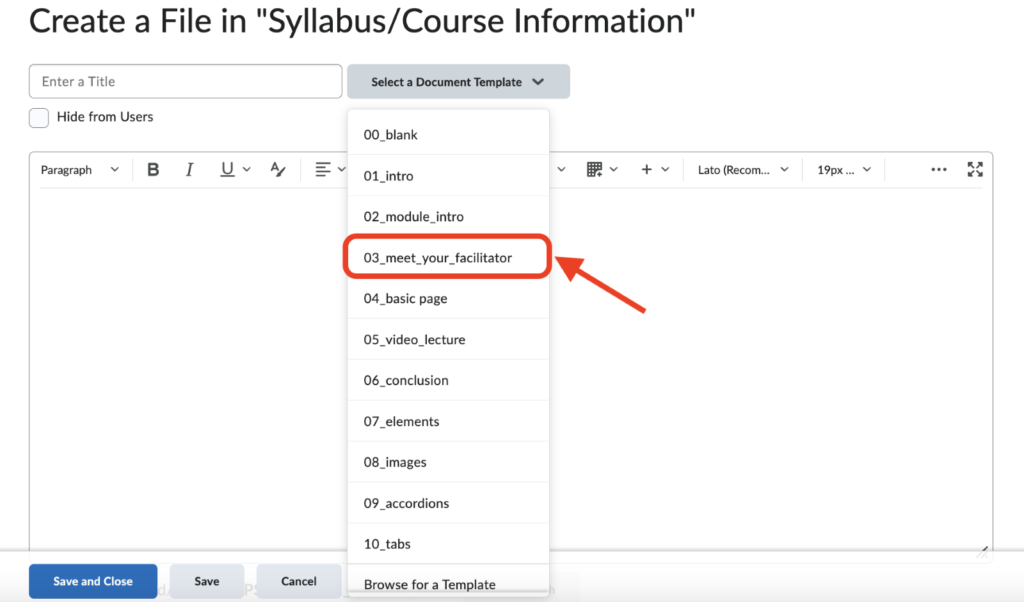
You will want to have a section or item in the Syllabus/Course Information module for instructor information such as your “about me” video, your professional background, contact info and any other information you wish to share with students. If you do not already have an item or template for instructor info, you can select Create a File and use the Meet your Facilitator document template.
If you have any questions or feedback, please contact facultysupport@sps.cuny.edu.
Still have questions? Email us at FacultySupport@sps.cuny.edu. We’re here to help!
Was this helpful?
1 / 1