Table of Contents
- Exporting/Archiving a Blackboard Course
- Downloading Blackboard Collaborate Recordings
- Downloading Blackboard Grades
Exporting/Archiving a Blackboard course
Which do I Choose?
- The export course feature creates a ZIP file of your course content that you can import into other LMS platforms. The export course feature doesn’t include any users or user interactions with the course.
- The archive course feature creates a frozen snapshot or permanent record of your course. An archive includes all the content, course statistics, users, and course interactions, such as blog posts, discussions, attendance data, and grades.
Blackboard Collaborate recordings are not included in course exports/archives. Please see below for information on downloading Collaborate recordings you may wish to retain.
Important: Course archives or recordings containing student data should not be stored on non-CUNY devices or storage platforms, as they are subject to university and federal data, privacy, and security policies. CUNY CIS will maintain course archives as required by university policy and by applicable law.
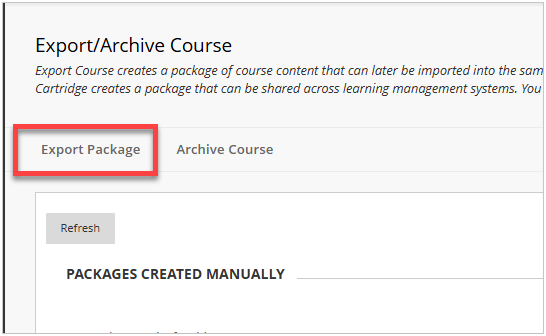
Exporting a Course
- Go to the course that you would like to export. Under Course Management, go to Course Management –> Packages and Utilities, Export/Archive course. Click Export package.

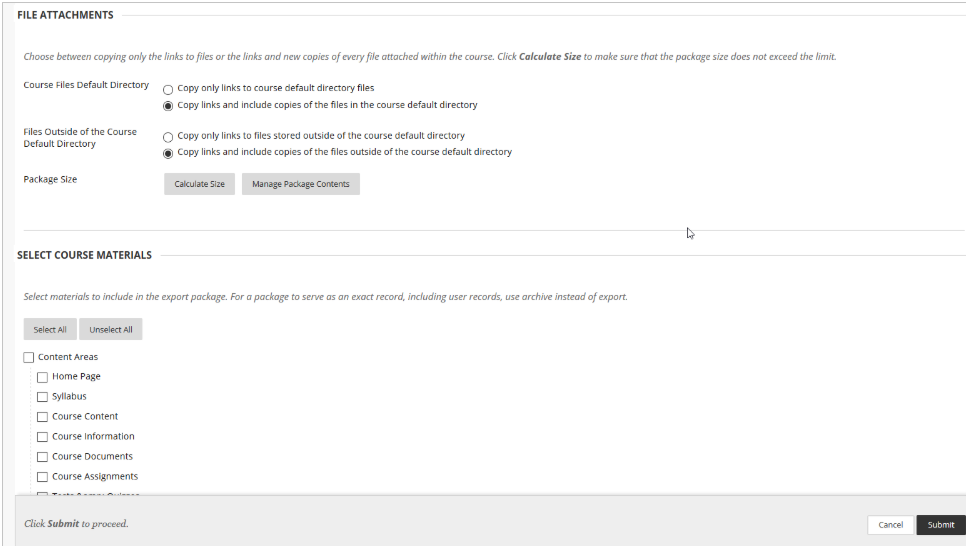
- Choose how you want to copy your file attachments (most leave the default selected options), and then select your course materials that you want to copy over. Once you are finished, click submit.
- You will receive a message that the action has been queued, and you will receive an email when the process is complete.
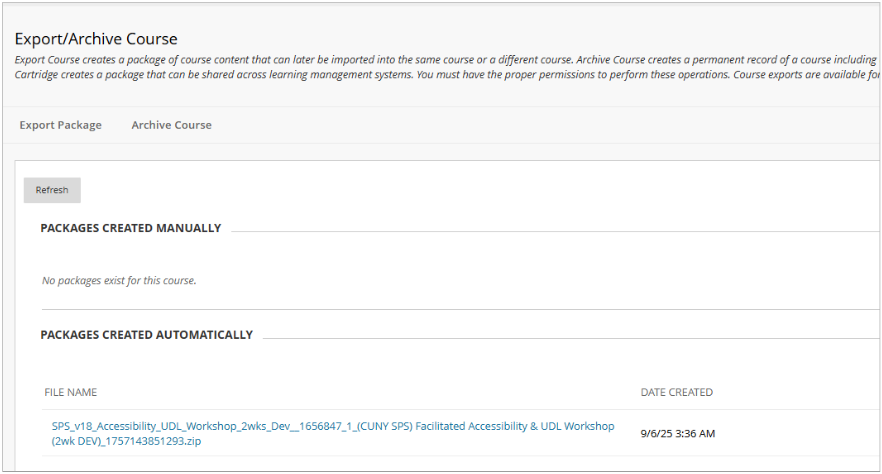
- Go back to the Export/Archive course menu. There should now be a downloadable package of your course. Click the file name to download the package.
Note: Blackboard Course Export files cannot be opened outside of an LMS. These files can be imported into Brightspace.
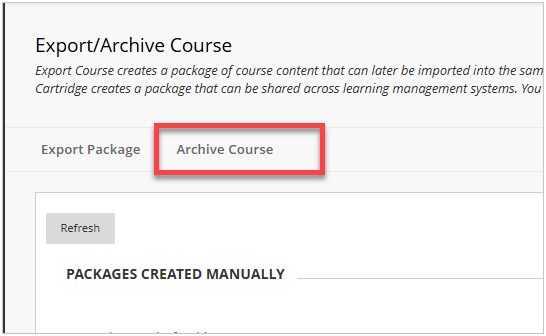
Archiving a Course
- Go to the course that you would like to export. Under Course Management, go to Course Management –> Packages and Utilities, Export/Archive course. Click Archive Course.
- OPTIONAL: Under Select Copy Options, check Include Grade Center History. The file size and processing time will increase.
- Choose how you want to copy your file attachments, and then select the course materials that you want to copy over. Once you are finished, click submit.

Downloading Blackboard Collaborate Recordings
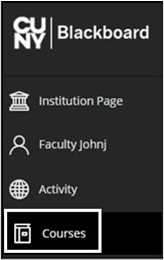
- Within Blackboard, select the Courses icon on the left side menu.
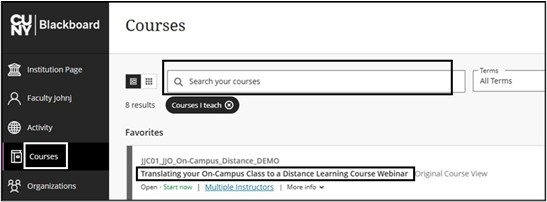
- Select the Course from which you want to download Collaborate recordings. Use the Search your courses or Terms tools to filter for a specific semester. Select the Course Name to access the course.
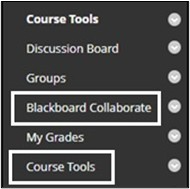
- On the Course menu, select Blackboard Collaborate. If Blackboard Collaborate is not listed on the Course menu, select Course Tools. Select Class Collaborate Ultra link.
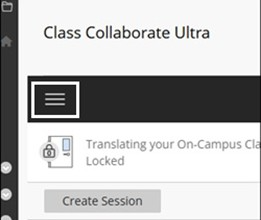
- On the Class Collaborate Ultra page, select the three-dash menu in the upper left corner.
- Select the Recordings tab.

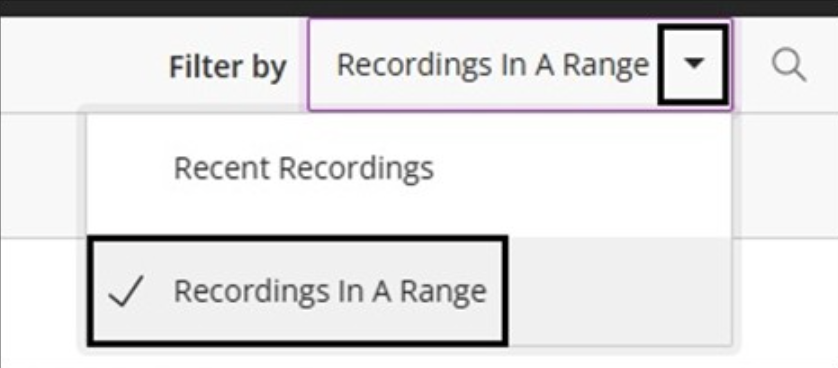
- In the upper right corner, select Recordings in a Range from the drop-down filter menu.
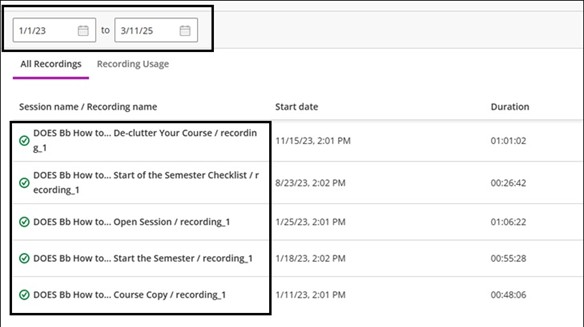
- Enter a date range for the recordings. Any recordings within that date range will appear below.
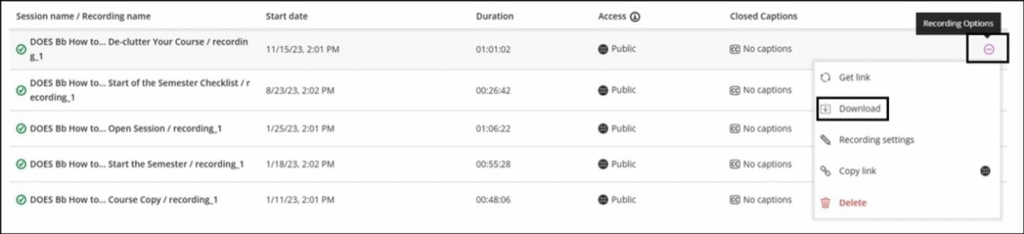
- To download a Collaborate session recording, select the Recording Options (circle with three dots) on the far right-hand side. Select Download from the drop-down menu. The recording will automatically begin downloading within the browser and be saved in your device’s download folder. It is recommended to move recordings to a CUNY Storage platform, such as CUNY Microsoft Office 365. The recording will be downloaded as an .mp4 file.
Note: These steps need to be followed for each session recording.

Downloading Blackboard Grades
Download grades from the Grade Center
Important: Files containing student data and grades should not be stored on non-CUNY devices or storage platforms, as they are subject to university and federal data, privacy, and security policies. Faculty have access to secure CUNY platforms such as OneDrive or DropBox. CUNY CIS will maintain course archives, including grades, as required by university policy and by applicable law.
You can download full or partial data from the Grade Center.
Items with anonymous grading enabled won’t be included in the downloaded file.
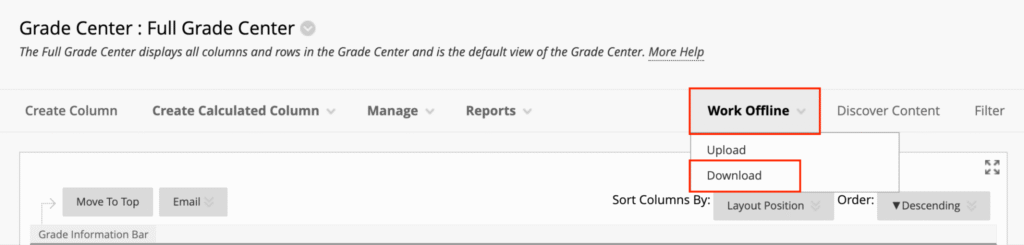
- Access the Work Offline menu and select Download.
- Select the data to download as described in this table.
| Option | Description |
| Full Grade Center | Contains all columns and associated data.Comments won’t be included, and you can’t addthem offline. |
| Selected Grading Period | From the menu, select a grading period. You must create grading periods before you can choose any. |
| Selected Column | From the menu, select one column and its data. Select the check box to Include comments for this Column. Comments will download from the Quick Comment feature or Manual Override tab. You can edit included comment text offline. |
| User information | Columns containing student data such as username are included. |
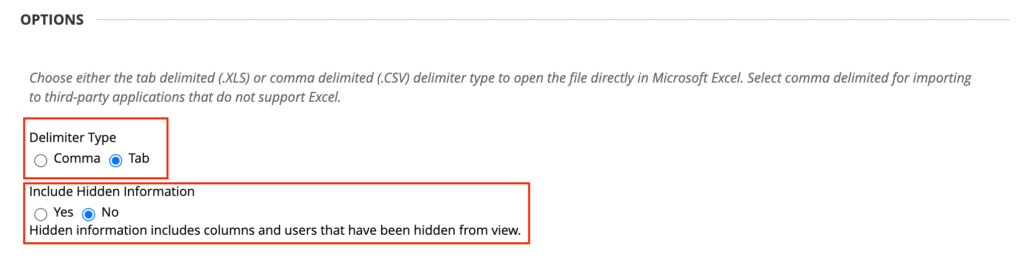
- Select the file delimiter, Comma or Tab.
- Select whether or not to Include Hidden Information in the downloaded data. Hidden information includes columns and students you hid from view in the downloaded file.
- Select the location for the download. Browse to select a folder in the Content Collection if you have access to it.
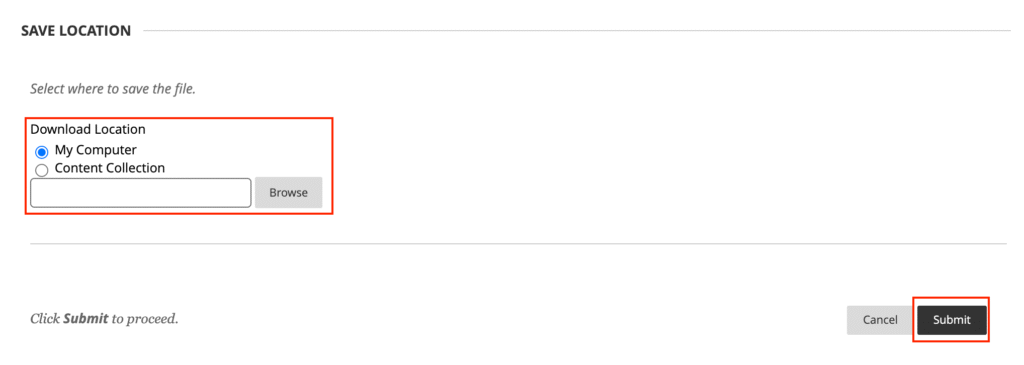
- Select Submit.
- On the next Download Grades page, select Download to save the file.

Download Grade History Data
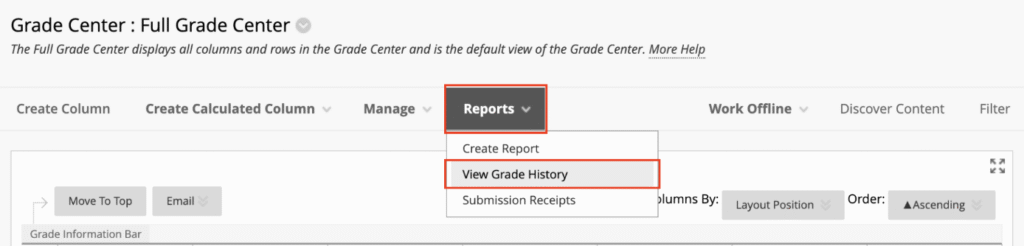
- Access the Reports menu and select View Grade History.
- On the Grade History page, select Download and select the Delimiter Type for the file.
- Select Yes to Include Comments or No to exclude them from the download.
- Select Submit.

- Select Download to save the file to your computer.

Still have questions? Email us at FacultySupport@sps.cuny.edu. We’re here to help!
Was this helpful?
0 / 0
[…] Want to preserve materials from a past Blackboard course? Steps to archive can be found in our teaching guide, Downloading Blackboard Content. […]