How to Record with Panopto Capture
Below are streamlined steps to record with your webcam, microphone, and a shared screen using Panopto Capture. Panotpo Capture is a browser based tool that can create and upload video and it is built into Brightspace. The steps below uses a Chrome browser. Firefox browsers look slightly different. For a detailed guide, which includes a video tutorial and written steps, see this article: Using Panopto Capture.
- Navigate to your Panopto Portal in your Brightspace course. If you don’t have one, it’s easy to create a Panopto Portal.
- Open the Panopto Portal in Brightspace. Note: on some browsers, opening the portal can take a full minute. Please be patient.
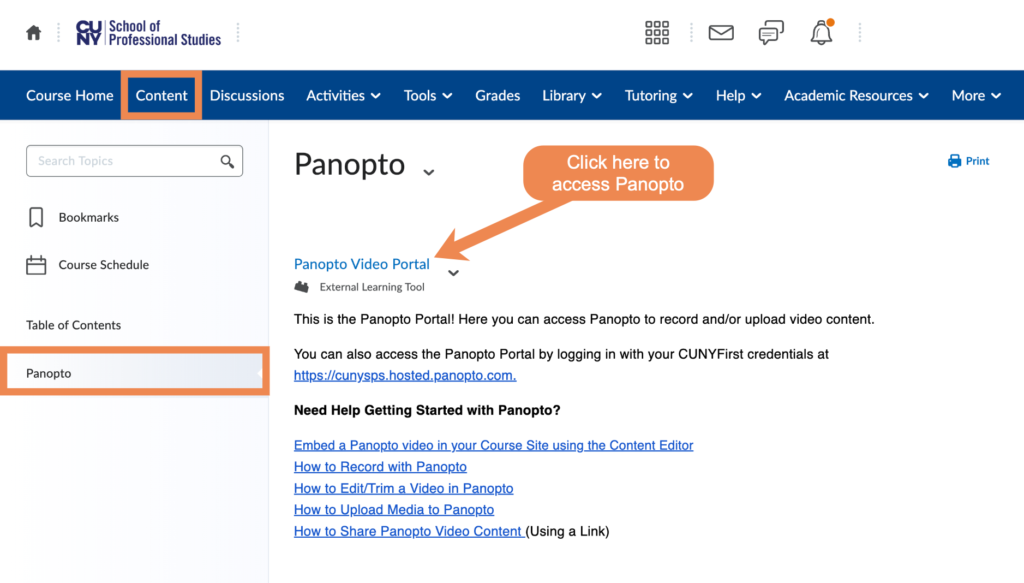
- In the portal, you can select which folder in Panopto you’d like to save your video. Each course site has a unique folder. In the example below, we changed this to be the “My Folder.” This will save the recording to a folder private to you.
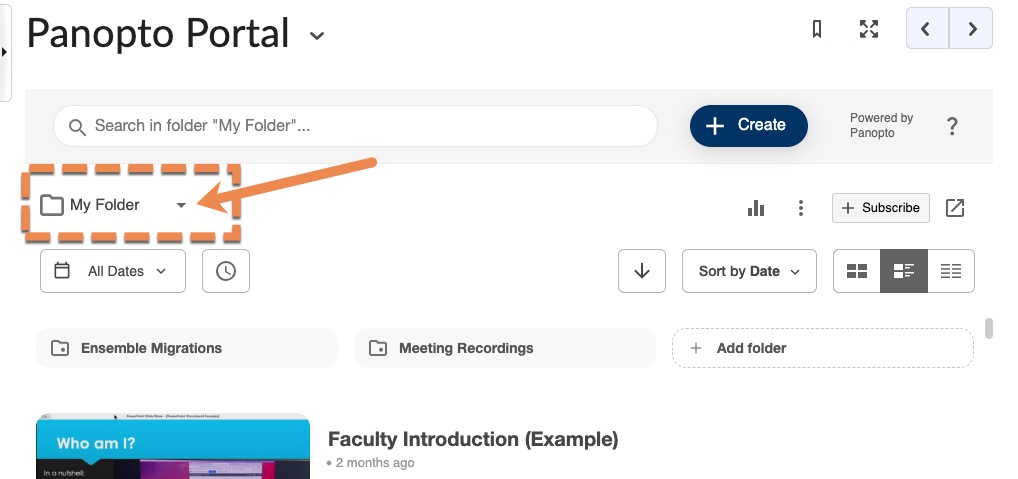
- Click the blue “Create” button.
- Select “Panopto Capture.” A new browser window will open to launch Panopto Capture. This is a recording tool that uses your microphone, webcam, and screen capture.
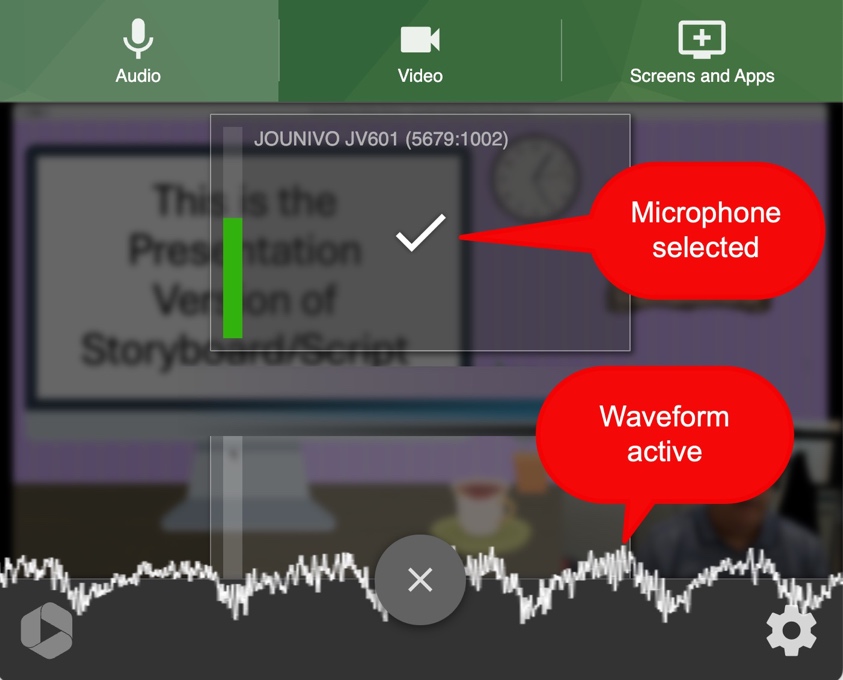
NOTE: Pay attention to your browser alerts. Your first time using Panopto Capture will require you to allow permissions for the browser to access your camera, microphone, and screen capture. - Set up Audio– Click the top right “Audio” tab. Make sure your microphone has a checkmark over it indicating it’s active. When you speak, you should see a waveform.
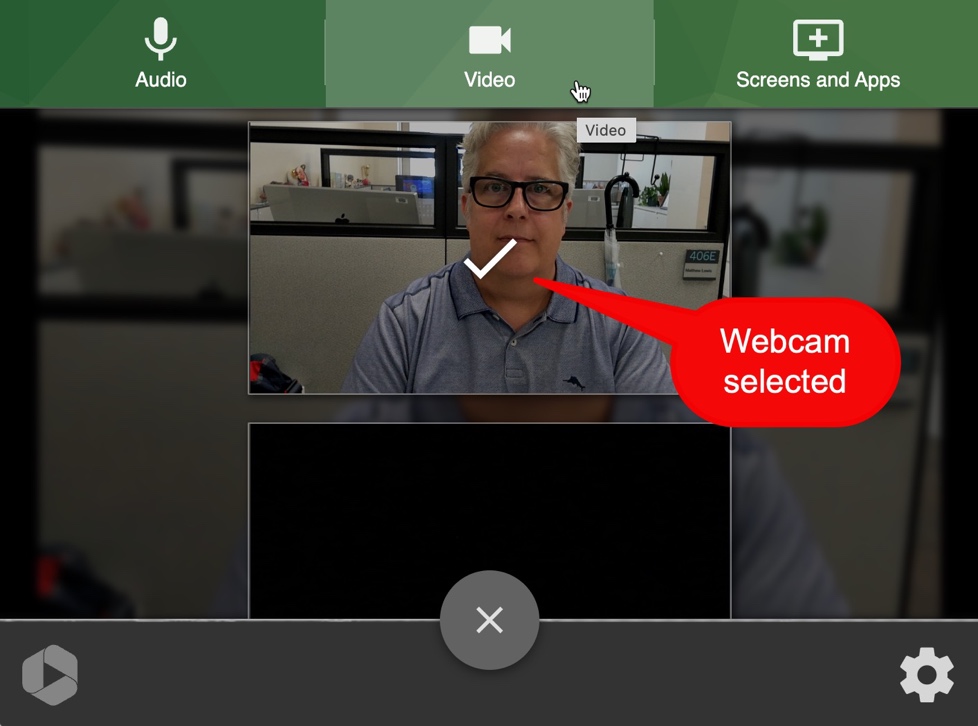
- Set up Video– Click the top middle “Video” tab. Make sure your webcam image has a checkmark over it. You should see your image in the browser.
- Set up Screen capture– Click the tab on the right called “Screens and Apps.” A window or dialog box will appear asking what you’d like to share. 1) Select “Window,” and 2) select your presentation window. 3) Click “Share.”
Note: the file or window you want to share must be open BEFORE you click the Screen and Apps tab.
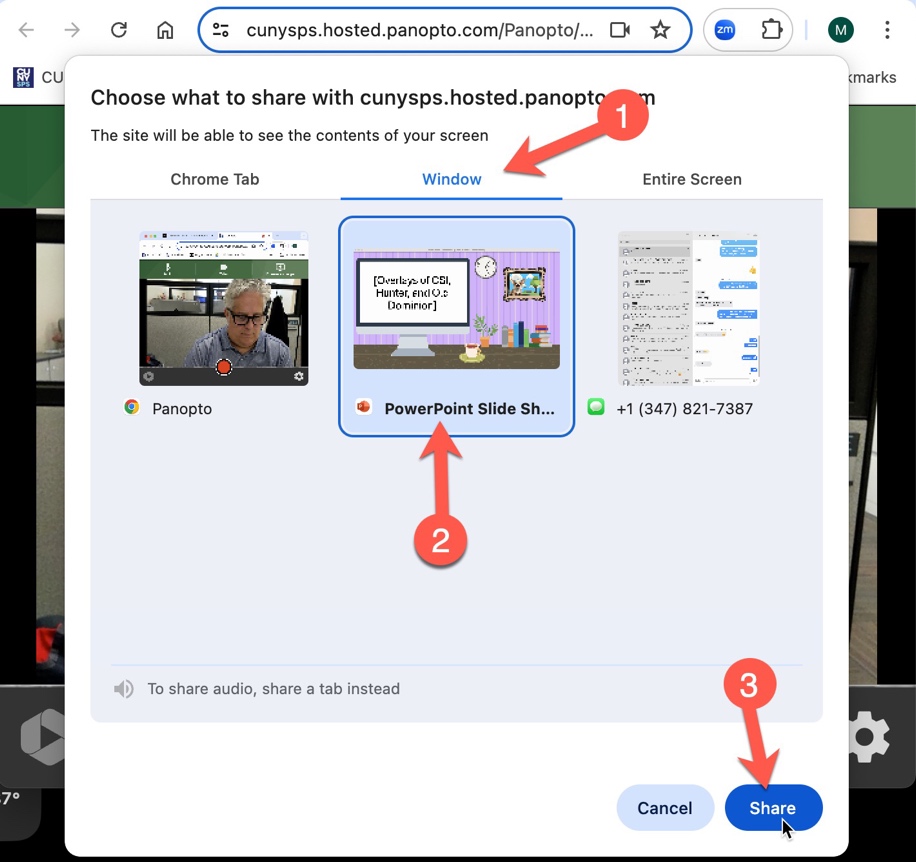
- After making a selection, the window you selected moves to the front of your screen. Navigate back to the browser window with Panopto Capture running to move to the next step.
- From the browser window running Panopto Capture, do a quick visual check. You should see a) the shared screen to be captured in the main Panopto Capture window, b) the Audio waveform when you speak into the mic, and c) your webcam image as a picture in the picture on the bottom right. Make sure you see all three. If not, go back to the tabs in Panopto Capture (steps 6, 7, 8) to select the input that is missing.
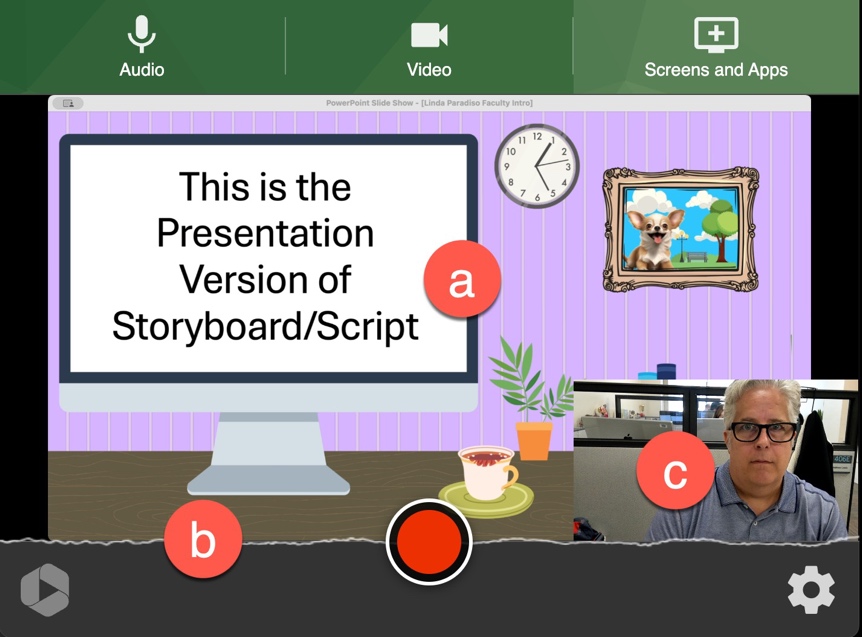
- When you are ready to start recording, click the red circle at the bottom center of the screen to start your recording.

- After you click the red button, you’ll see a 5-second countdown. If you shared a window to record, then in those 5 seconds switch back to the window you shared.
- Once the 5-second countdown is done, record your video!
- When finished recording, switch back to the Panopto Capture window. Click the red square button (bottom middle of the screen) to stop the recording. When you click the stop button, your screen changes giving you several new options.
- Name your video! Be sure to give your video a title, by default the title is the time/date.
- Double-check that the video is saved to the desired destination. In this example the video will save to “My Folder.” Click on the folder to change it, if needed.
- At the top of the window, look for a message that says “Upload complete. It’s safe to close your browser window” or “Putting on the finishing touches.” With either of these messages, you may safely close the browser as the video has been uploaded.
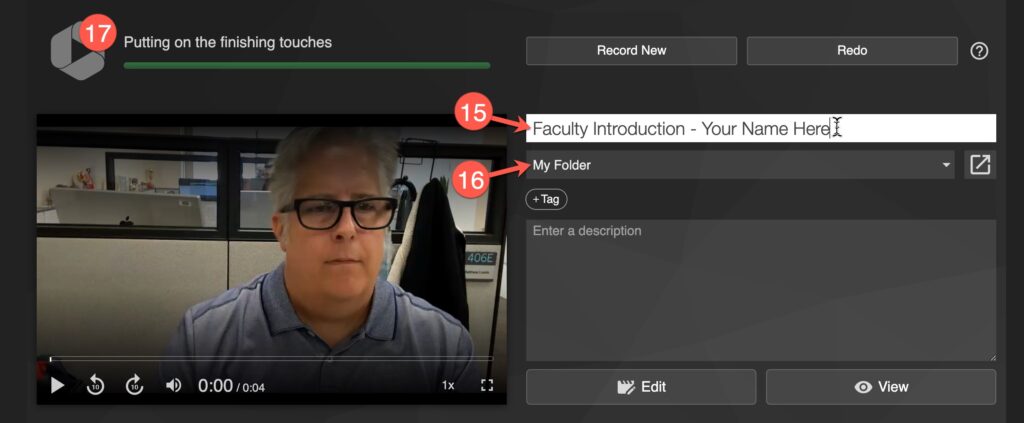
Your video is automatically uploaded to Panopto and Panopto continues to process the video making it ready for streaming.
NOTE: The video is finished, but it is not visible to students yet. You still need to embed this video in your course for students to see it. Here is how to embed a Panopto video using the Brightspace content editor.
Learn More
For video support please email facultysupport@sps.cuny.edu. You can request one-on-one help or book a session in the OFDIT Media Studio to create video for your course. For more details on using Panopto, see Panopto for SPS Faculty.
Still have questions? Email us at FacultySupport@sps.cuny.edu. We’re here to help!
Was this helpful?
7 / 0
[…] How to Record with Panopto […]