Overview
Rubrics in Brightspace help instructors establish clear, consistent grading criteria for assignments, discussions, and other assessments. They support transparency for students and simplify the grading process.
This guide walks instructors through the steps to create a new rubric in Brightspace.
How to Create a New Rubric
To get started:
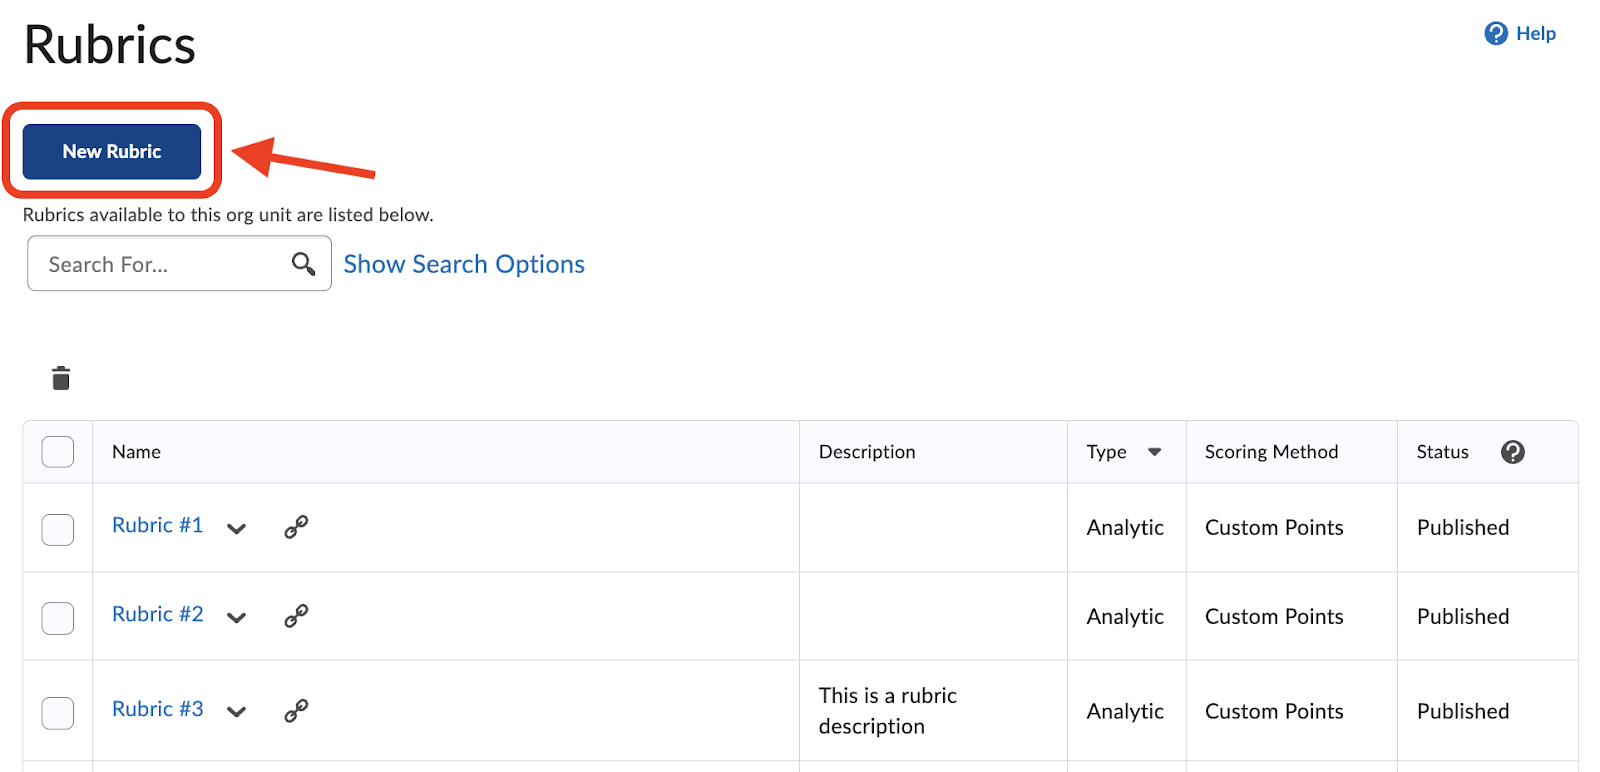
- From your course homepage, click Tools on the navigation bar and select Course Admin from the dropdown menu.

- On the Course Admin page, select Rubrics.

- On the Rubrics page, click the New Rubric button to start creating your rubric.
Please note that rubrics cannot be imported directly from external documents. You will need to manually recreate the rubric within Brightspace by entering the criteria and descriptions.
- On the Edit Rubric page,
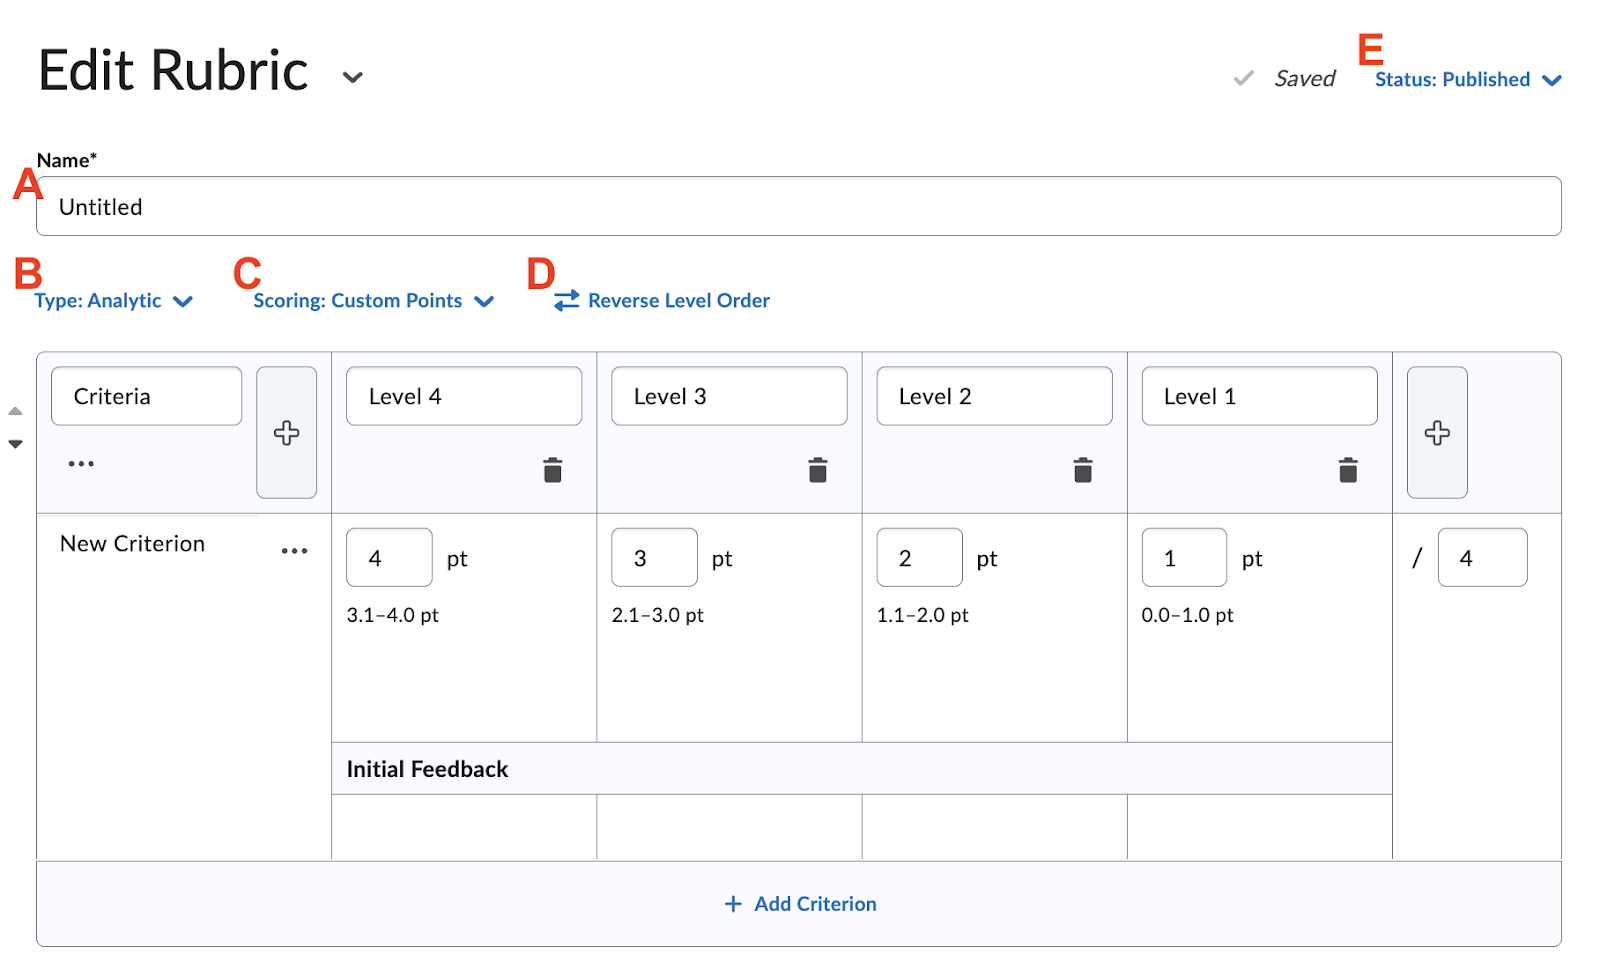
- A. Name: Enter a name that identifies the rubric’s purpose.
- B. Type: Select the rubric type:
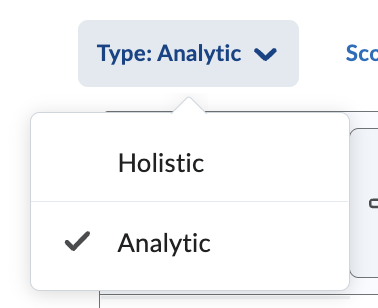
- Analytic (default): multiple criteria with separate scoring
- Holistic: one overall score for the entire assignment
- C. Scoring: Choose how the rubric will be scored:
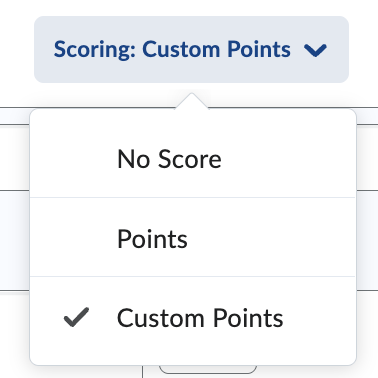
- Custom Points (most flexible)
- Points (standardized across levels)
- No Score (for feedback only)
- D. Reverse Level Order: Click to flip the order of performance levels (e.g., Level 1 → Level 4 becomes left to right). Useful for aligning visual flow with grading logic.
- E. Status: This controls the availability of your rubric:
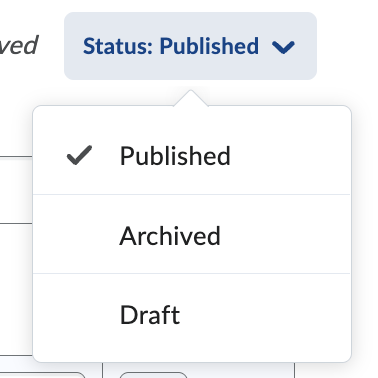
- Published (default): The rubric is ready to use and can be attached to assignments, discussions, etc.
- Archived: The rubric is no longer active. It won’t appear when selecting rubrics for new activities but is retained for recordkeeping.
- Draft: The rubric is still being worked on. It cannot be attached to activities.
- In the table layout, enter descriptions and point values for each cell to clearly define performance expectations. When creating the rubric:
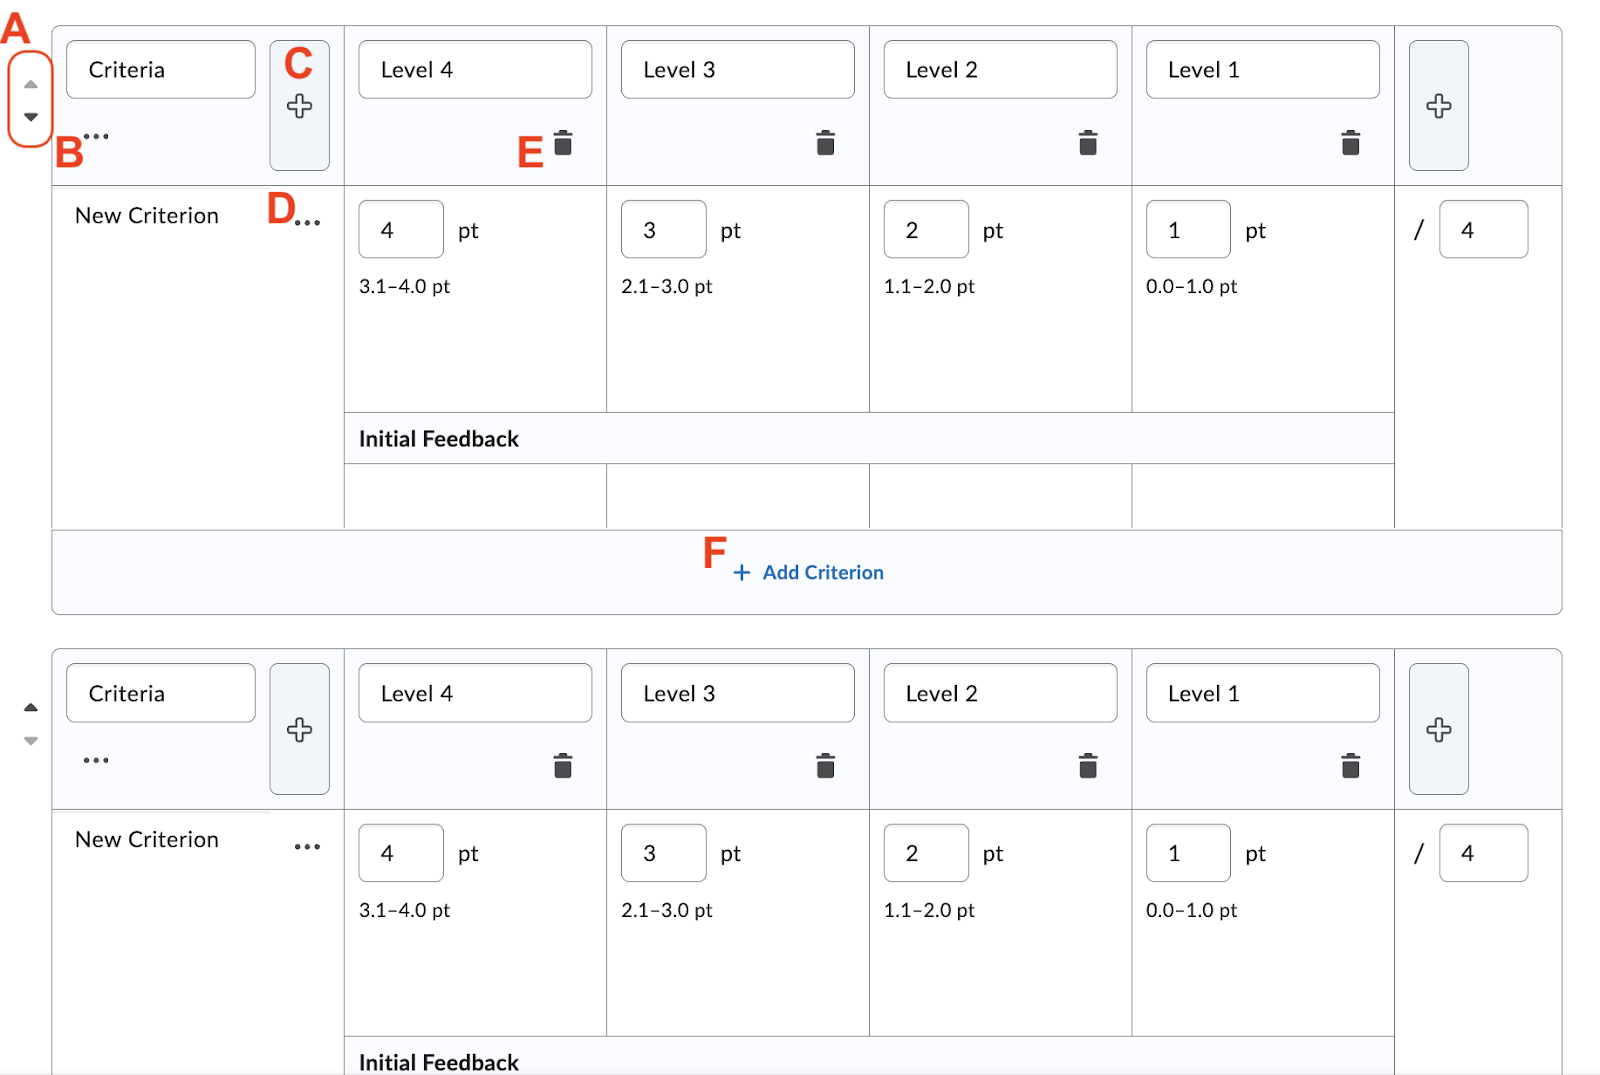
- A. Move Criteria Up/Down: Use these arrows to reorder criteria rows. This affects the order students and graders will see.
- B. Criteria Options Menu: Click this to copy or delete the criterion.
- C. Add Criteria Column: Adds a new performance level (e.g., Level 5 or Level 0) to the rubric. This helps customize grading scales.
- D. Criterion Row Options: Similar to B, but applies specifically to the individual criterion row, such as deleting or duplicating it.
- E. Delete Level Column: Removes that performance level (column) from the rubric. Use cautiously, especially after entering scores or descriptions.
- F. Add Criterion: Click to add a new criterion row, such as “Organization,” “Clarity,” or “Grammar.” Each row assesses a different aspect of the work.
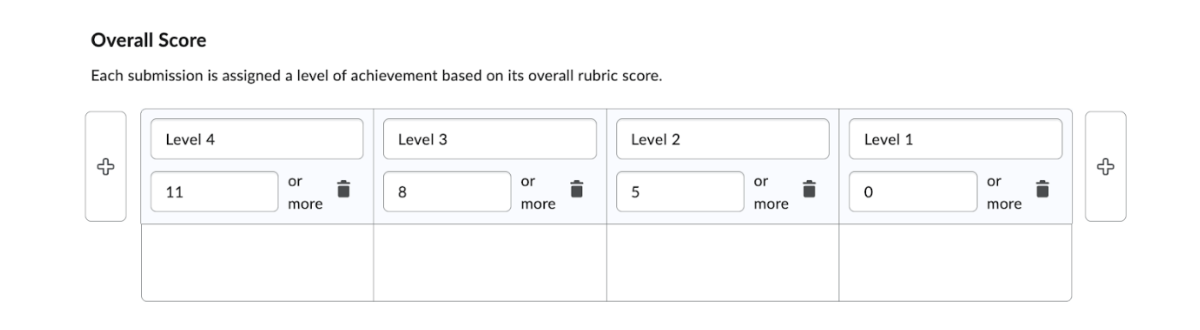
Set the Overall Score
Set the Overall Score levels based on the total number of points available for the Activity. The point values for each Overall Score level should represent the different ranges of accomplishment on the overall Activity. The descriptors will default to Level 1–4, but it is possible to customize the descriptor title.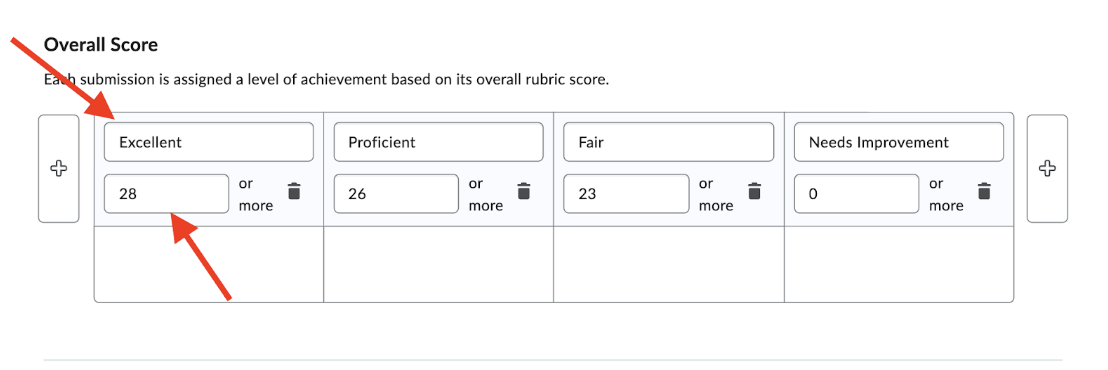
NOTE: The overall score section does NOT automatically update when you set the point values for a rubric and must be updated manually. If it is not updated, Brightspace will default to the point values and number of columns as below:
- After building your rubric, scroll down to the Options section to set important visibility and reference preferences:
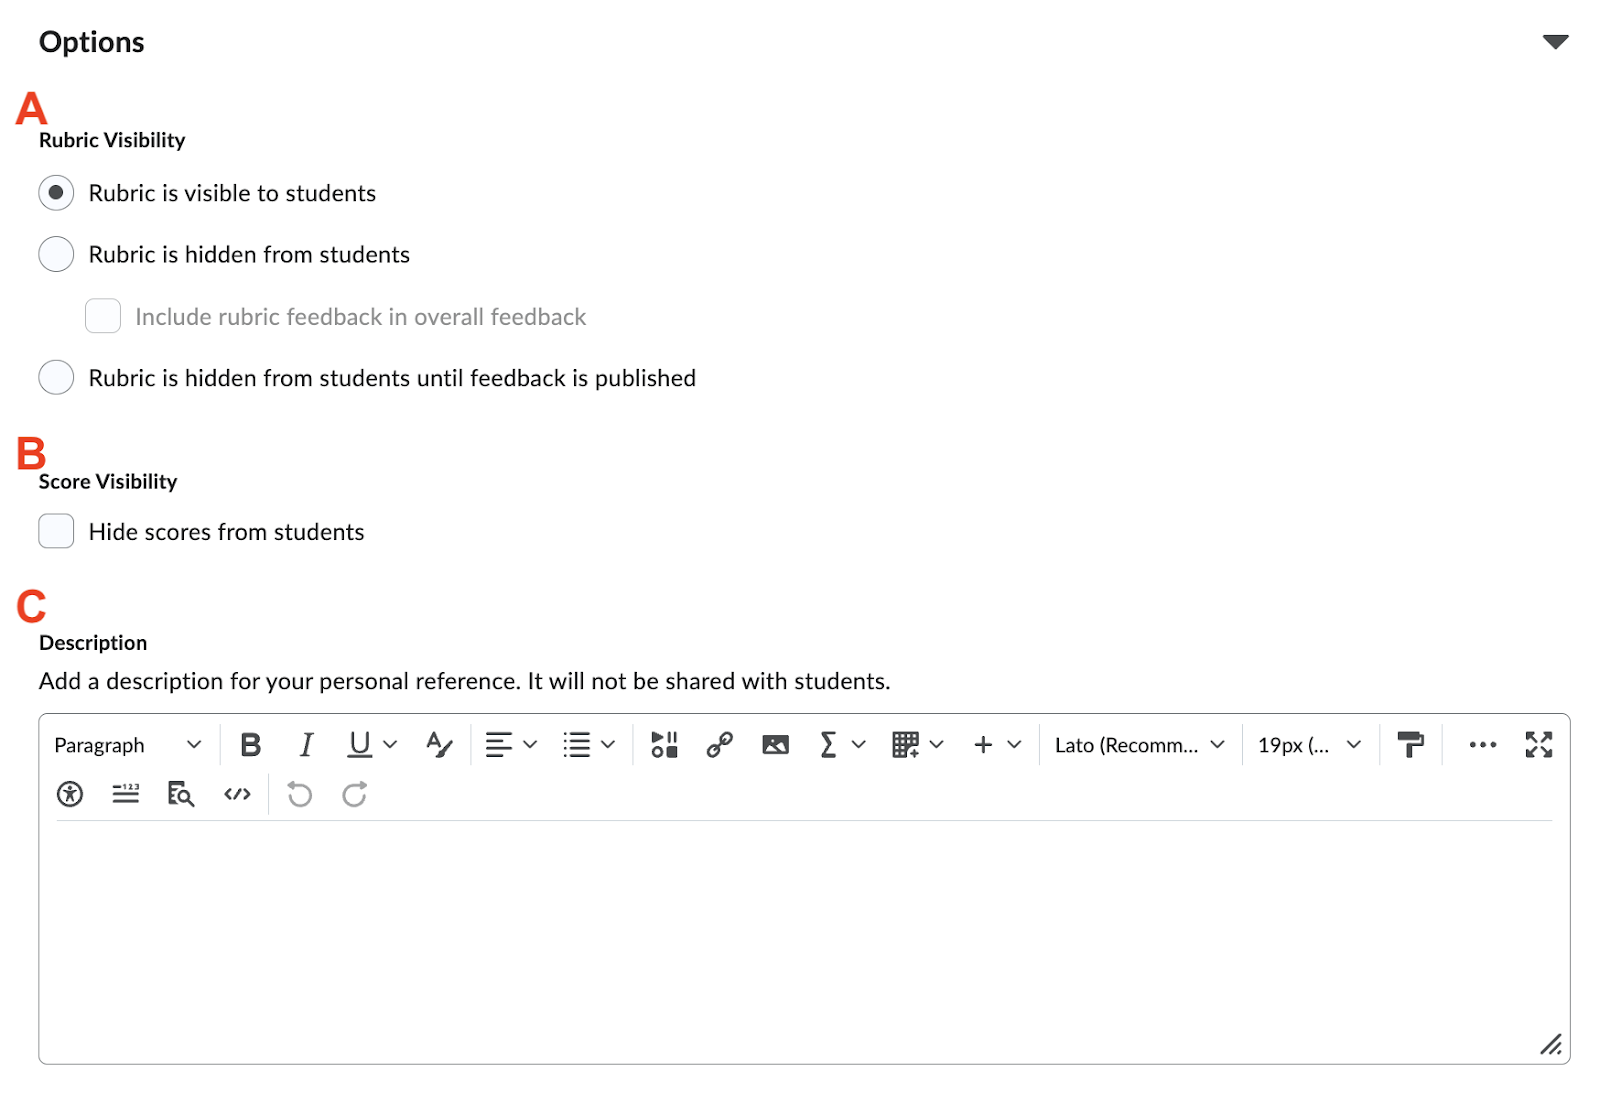
- A. Rubric Visibility: Choose when and how students can see the rubric.
- B. Score Visibility: Check “Hide scores from students” if you only want to show qualitative feedback, not point values.
- C. Description: Add an internal note for your own reference. This text will not be visible to students.
Brightspace auto-saves your changes. Before closing, scroll to the top and make sure you see the “Saved” checkmark near the rubric title.

Once your rubric is created, you can attach it to assignments or discussions to streamline grading. View our guide on Linking Rubrics to Course Activities in Brightspace.
More Resources
For additional support with rubrics and assessment in Brightspace, explore the following resources:
Still have questions? Email us at FacultySupport@sps.cuny.edu. We’re here to help!
Was this helpful?
0 / 0
[…] If you need to create a new rubric first, view our guide on Creating Rubrics in Brightspace. […]