The Brightspace Assignments tool provides the functionality of creating and editing assignments, setting up submission details, associating rubrics, viewing and grading submissions, and providing feedback. This unit will guide you through the steps to create a simple Brightspace Assignment.
Glossary
Brightspace Assignments
The place where all assignments can be accessed, edited, graded, and created. Students can see all course assignments that the instructor has made visible.
Special Access
An option in Brightspace assignments that allows you to set exceptions or special access to specific students or groups of students, used for creating group assignments and granting accommodations.
Anonymous Marking
A feature that hides student names when you are grading, used to reduce the effects of unconscious grading bias. Anonymous grading can also increase students’ confidence in the fairness of evaluation.
Quick Tips
Consider Multiple Submission Formats
Can the learning outcomes you are measuring be achieved by written submissions only or also by other types of student work, such as video submissions, audio only, or even visual artwork? All of these submission formats are possible in Brightspace assignments.
Let students know how they will be graded
In the assignment description, tell students how they will be graded. If you are using a rubric, share it with them. If you are going to grade anonymously, let them know. This helps students understand the expectations for the assignment.
Evaluate Originality Checker Needs
The Brightspace Assignments tool does not have a built-in originality checker. If you are creating a high-stakes assignment, you may want to create it in Turnitin, an external tool integrated into Brightspace and accessed from the Existing Activities menu in content modules.
How to
Access the Assignments tool
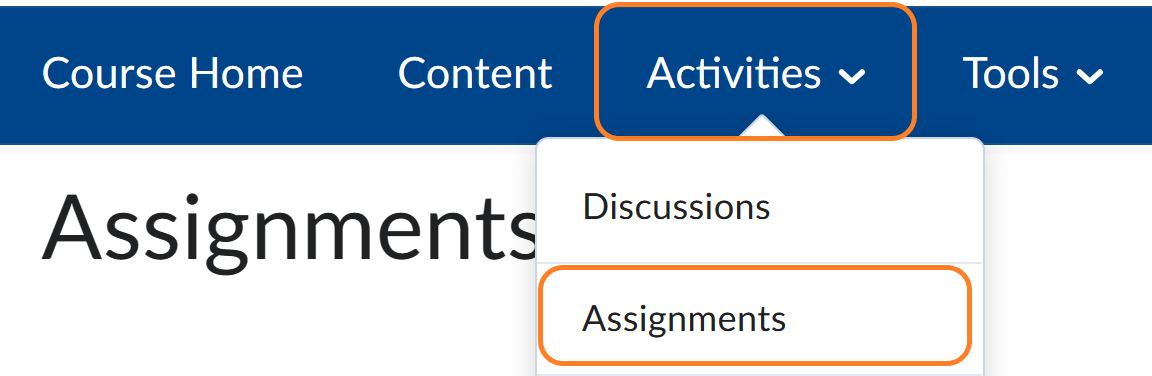
Option A – From the Assignments
- Click on the Activities tab from the top navbar in the course shell.
- Choose Assignments from the pull-down menu.
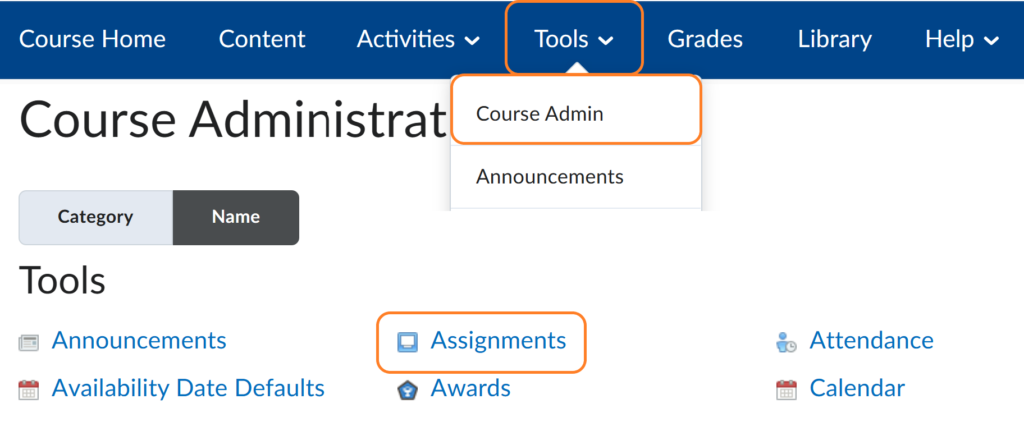
Option B – From the Course Admin tab
- Click on the Tools tab at the top menu bar and choose Course Admin.
- Click on the Assignments link.
Create a new assignment
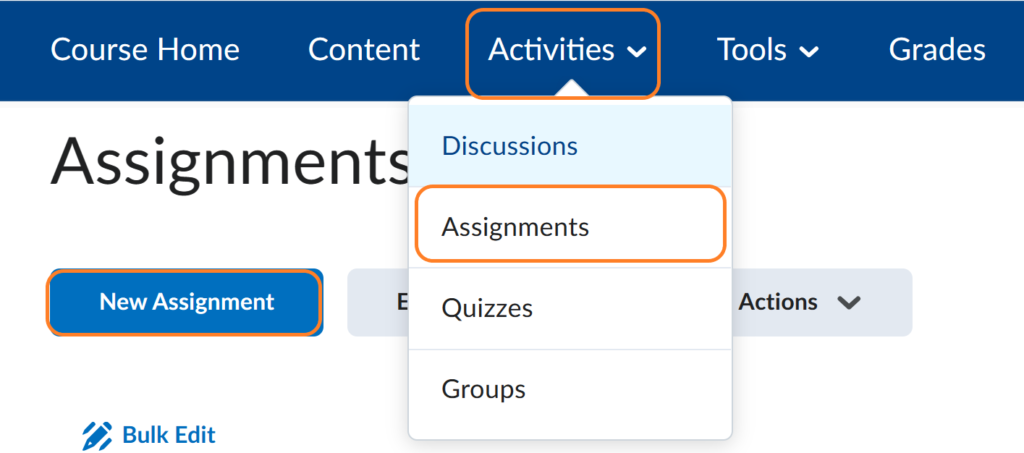
Option A – From Assignments
- Navigate to the Assignments tool.
- Click on the New Assignment button.
Note: Assignments created in the Assignments tool will not automatically appear in content modules. To create a link to an assignment from a module, from within the module click Existing Activities, and then click on Assignments, and select the assignment you wish to link to.
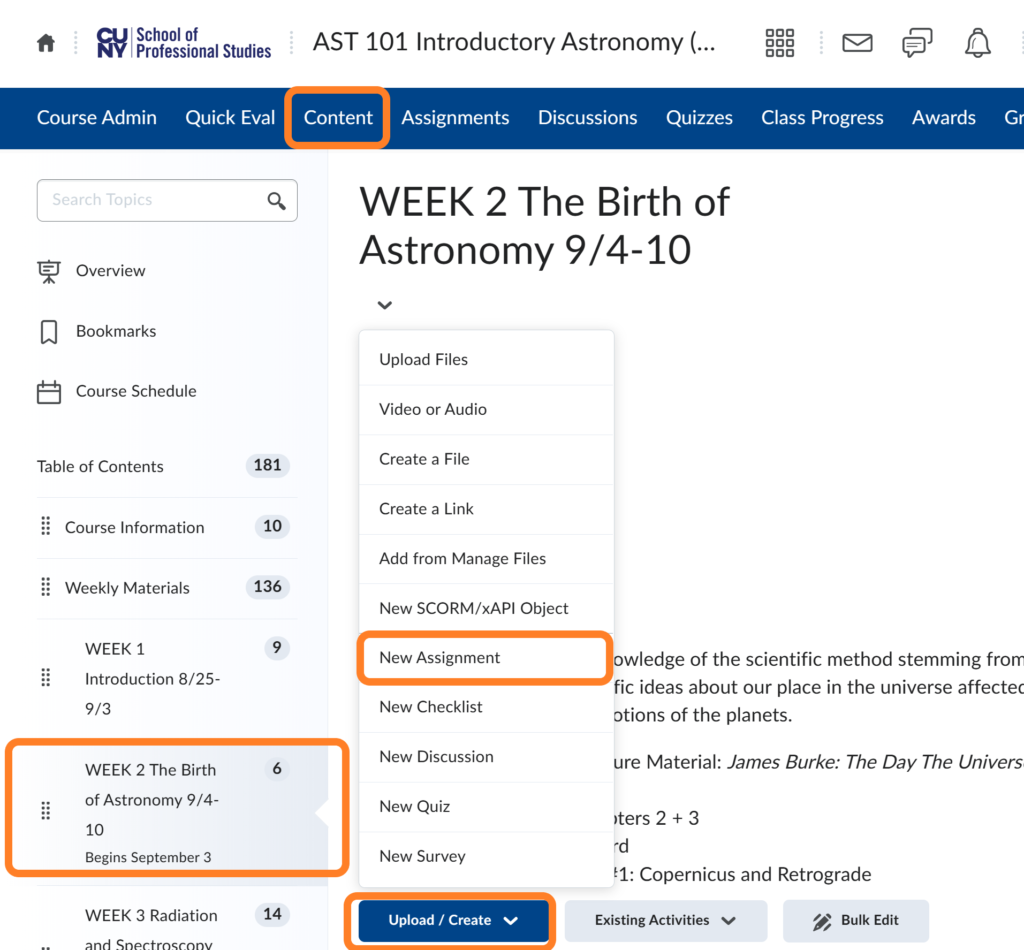
Option B – From a module
- Navigate to the module where you want to create an assignment.
- Once in the module, open the Upload/Create menu.
- Select New Assignment.
Note: When you create an assignment in a module, it is automatically added to the Assignments tool.
Fill in the assignment’s basic requirements
- Type in the assignment name.
- Click into the ‘Grade Out Of’ field and enter the maximum points possible.
- Set the due date.
- Type in instructions.
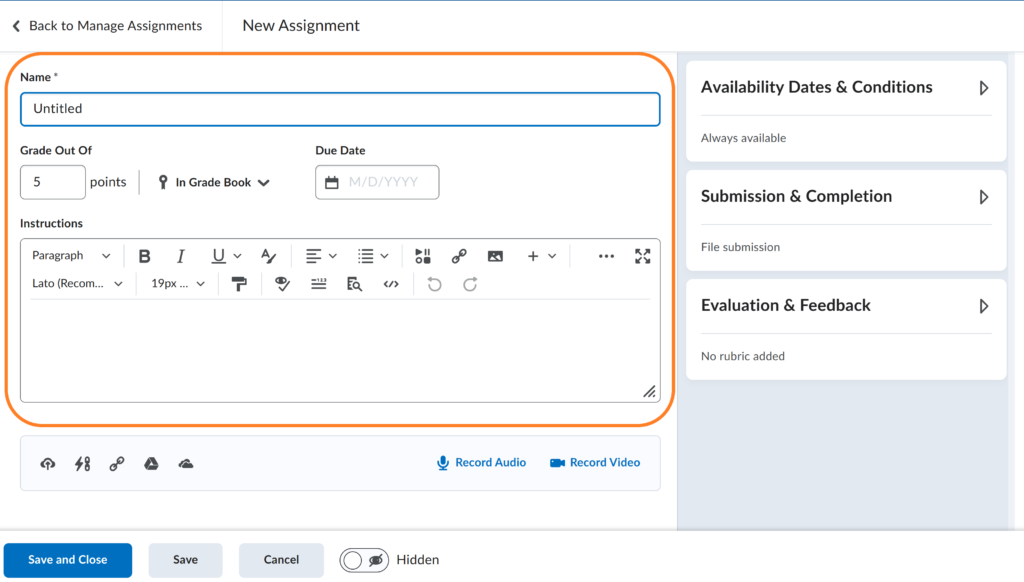
Note: When you add points to the ‘Grade Out Of’ field, the ‘In Grade Book’ icon will appear with a dropdown menu indicating that the assignment has been added to the Grades tool.
In the New Assignment window, you can also set up:
- Availability Dates & Conditions
- Submission & Completion
- Evaluation & Feedback
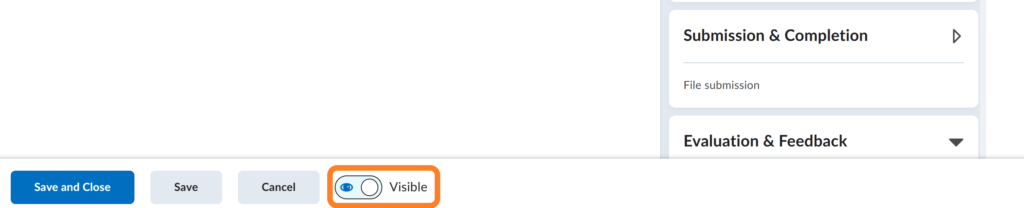
Make the assignment visible
- Click on the visibility toggle at the bottom of the screen and set it to the Visible option.
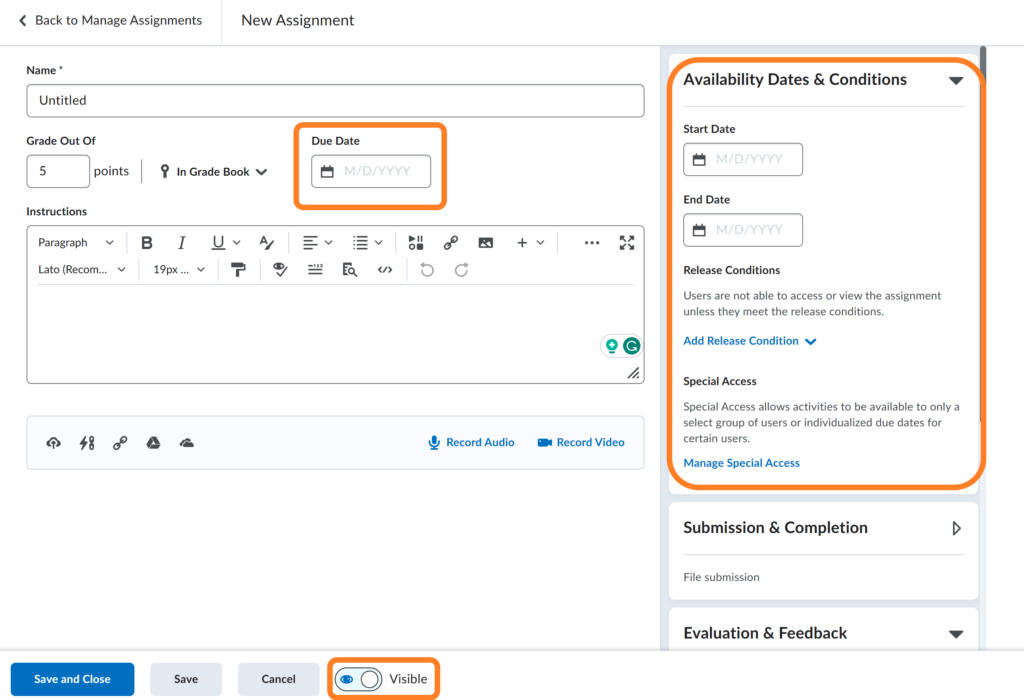
Set Availability Dates & Conditions
In most cases, the default availability settings are appropriate. If you want to set release dates or conditions, or special access conditions to grant an accommodation or an extension, follow these steps.
- Click on Availability Dates & Conditions on the right side of the New Assignment window.
- Define the start and end points of the assignment visibility.
Note: The assignment must be set to “Visible” using the visibility toggle at the bottom of the window for availability date restrictions to work properly.
- Click the Add Release Condition button to create new release conditions for this assignment.
- Click on the Manage Special Access button to change due dates or availability dates for selected students.
Note: Students can submit assignments up until the End Date. Assignments submitted after the Due Date will be marked late. If you set the End Date and Due Date to the same date, to give a student an extension you will have to grant them Special Access.
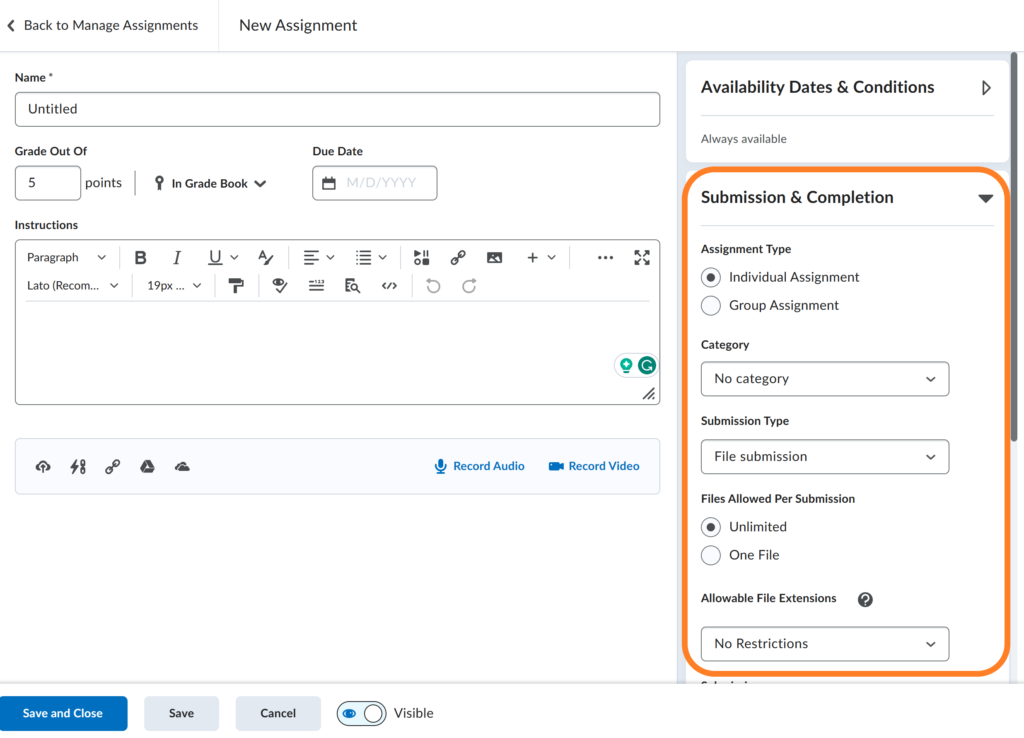
Set Submission & Completion options
In most cases, the default submission options will be appropriate. The most common exception is if you are creating a group assignment.
- Expand the Submission & Completion section on the right side of the New Assignment window.
You can specify assignment types (individual or group), file submission types (PDF, Word, PPT, etc.), number of files allowed in a submission, the number of submissions that are allowed and kept, and whether you want to be notified by email when there are submissions to the assignment.
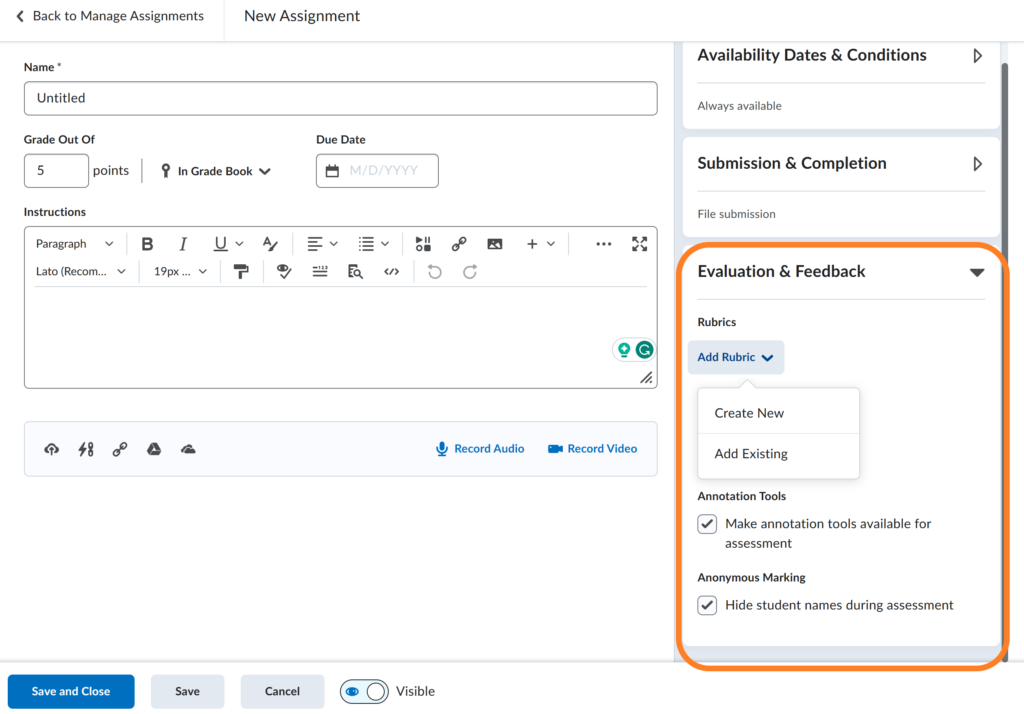
Set Evaluation & Feedback options
- Click on the Evaluation & Feedback section on the right to expand the options.
- Select Add Rubric if you wish to use a grading rubric. Either create a new rubric or add an existing one.
- Leave the Annotation Tools checked so that you can comment on student submissions using Brightspace annotation tools.
- Check Anonymous Marking if you want to have students’ names hidden while grading their submissions.
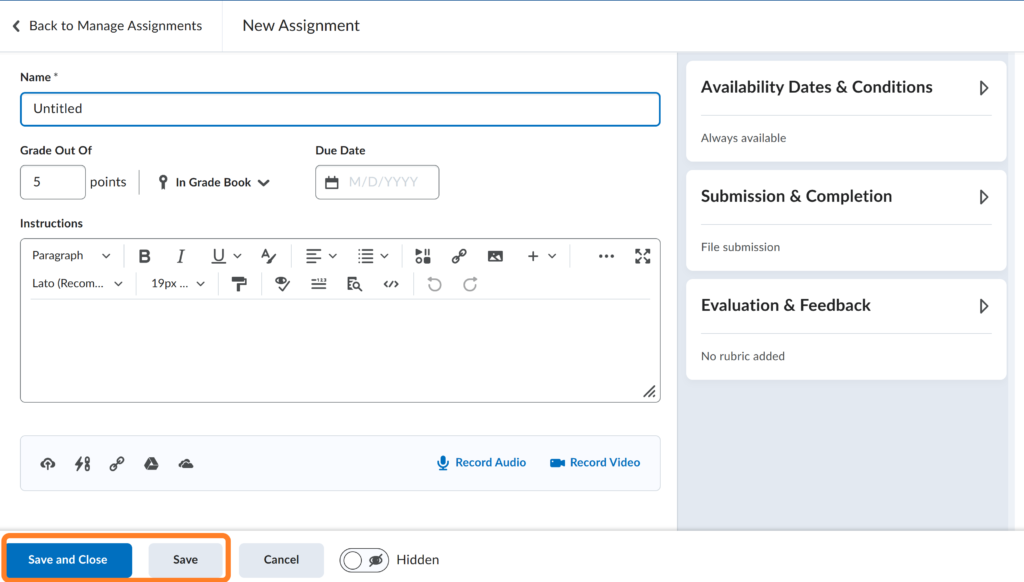
Save the assignment settings
Save: allows you to save your progress without exiting the editing mode. It is useful if you want to continue working or need to double-check settings.
Save and Close: saves your changes and takes you out of the editing mode, bringing you back to the assignment list.
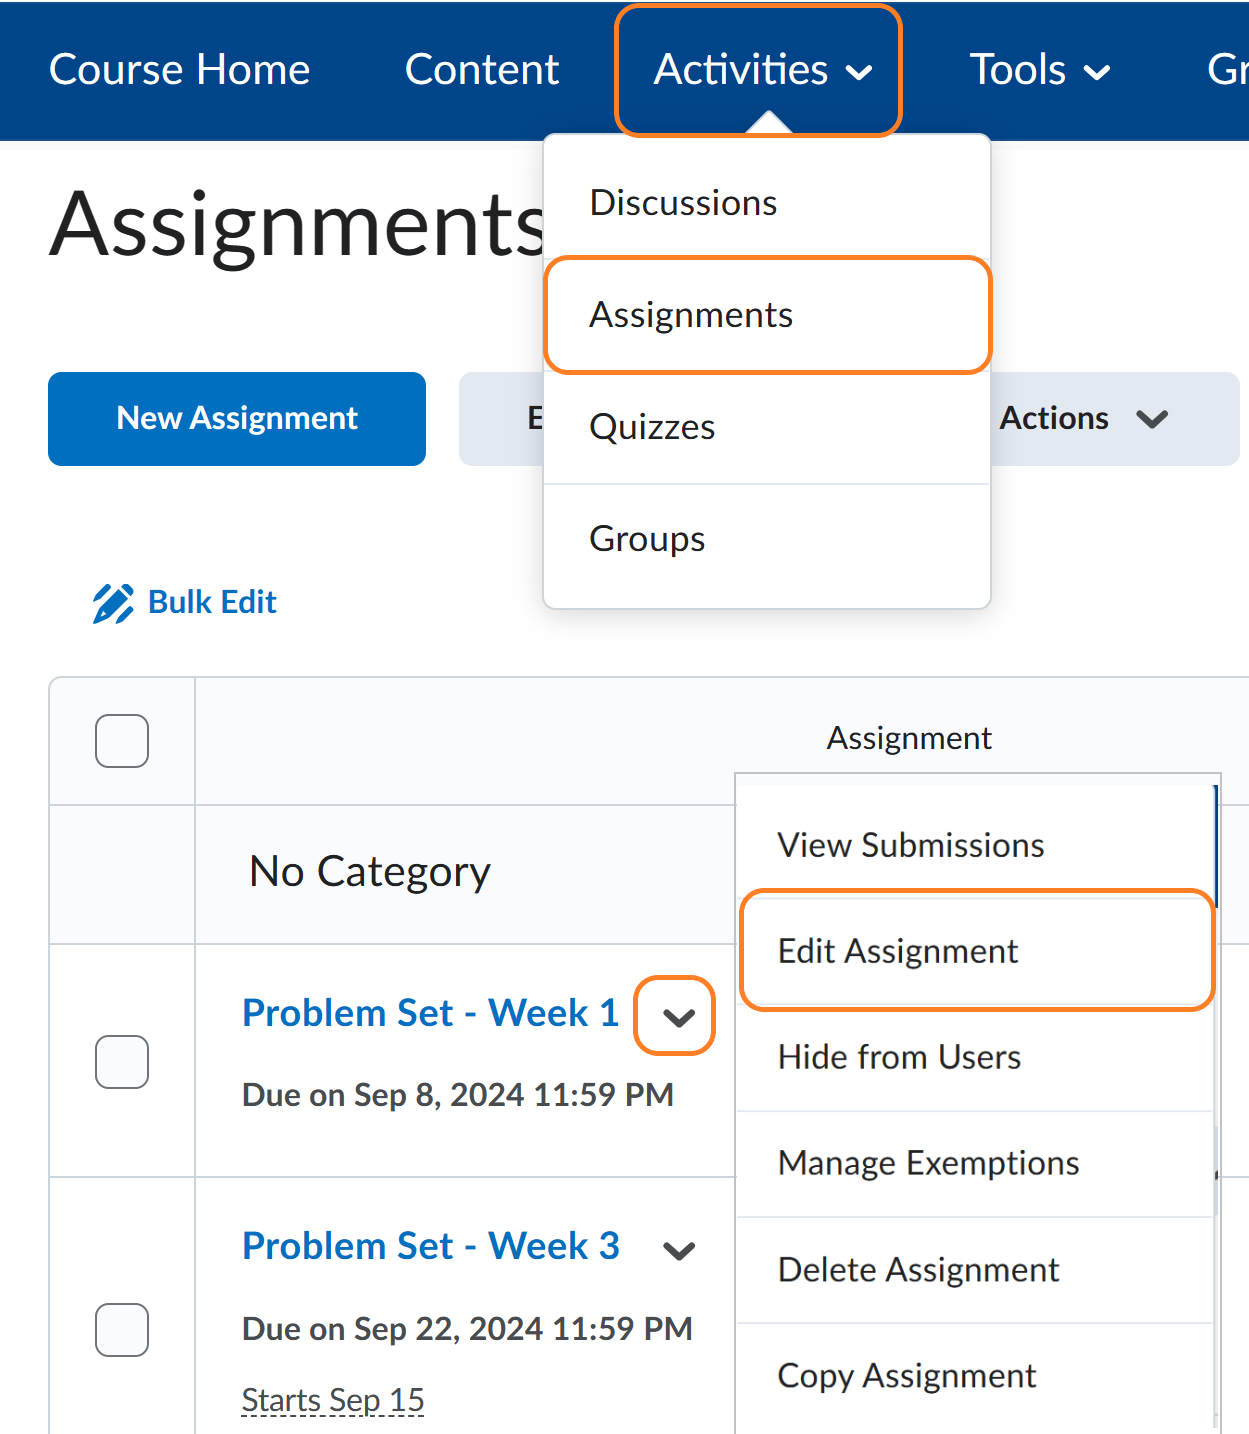
Edit an assignment
- Click on the Activities tab on the Nabar and choose the Assignments tool.
- Locate the assignment you wish to edit in the list of assignments.
- Click the arrow next to the assignment’s name to open its settings.
- Click on the Edit Assignment option.
- Make edits to instructions or settings.
- Click Save and Close to update the assignment after making all desired edits.
Test Your Knowledge
Take Action
- Using the steps above, create at least one assignment in your Brightspace course. Review them to ensure they are aligned with your course objectives and are accessible to all students.
Resources
Text
D2L Brightspace Community: Create an assignment
D2L Brightspace Community: Reorder, edit, and delete assignments
D2L Brightspace Community: Set release conditions and special access in Assignments
D2L Brightspace Community: Set availability and due dates for an assignment
D2L Brightspace Community: Restricted File Extensions
CUNY Brightspace Transition: Training and Resources
CUNY SPS Accessibility Toolkit