Brightspace relies on a modular course structure for navigation. In Brightspace, learning modules serve as major instructional units, corresponding to the organization of your course according to learning objectives, content subjects, temporal units like weeks in the semester, or ideally all three. You can think of them as folders containing scaffolded course material. Rather than merely presenting information, each module should be designed to actively involve students through features like interactive discussions, group tasks, or hands-on activities.
Brightspace’s modular structure is versatile, suitable for different learning modalities, and suitable for course design centered on educational goals or themes. Adopting a well-organized modular strategy in Brightspace sets a predictable course for students, allowing them to focus on content rather than navigation. This also ensures that each module is in sync with the overarching aims of the course, optimizing the learning experience.
Glossary
Module
A large container for organizing course content.
Submodule
A smaller container (folder) that can be nested within the module to organize content.
Content Topics
Individual content items within modules or submodules (files, videos, assessments, external links, etc.).
Quick Tips
Organize Content
Use modules and sub-modules to organize your course according to thematic units or the course schedule. To ease navigation, use at most two levels and try to keep module titles short. Course content items, called ‘Content Topics’, are placed within modules and sub-modules.
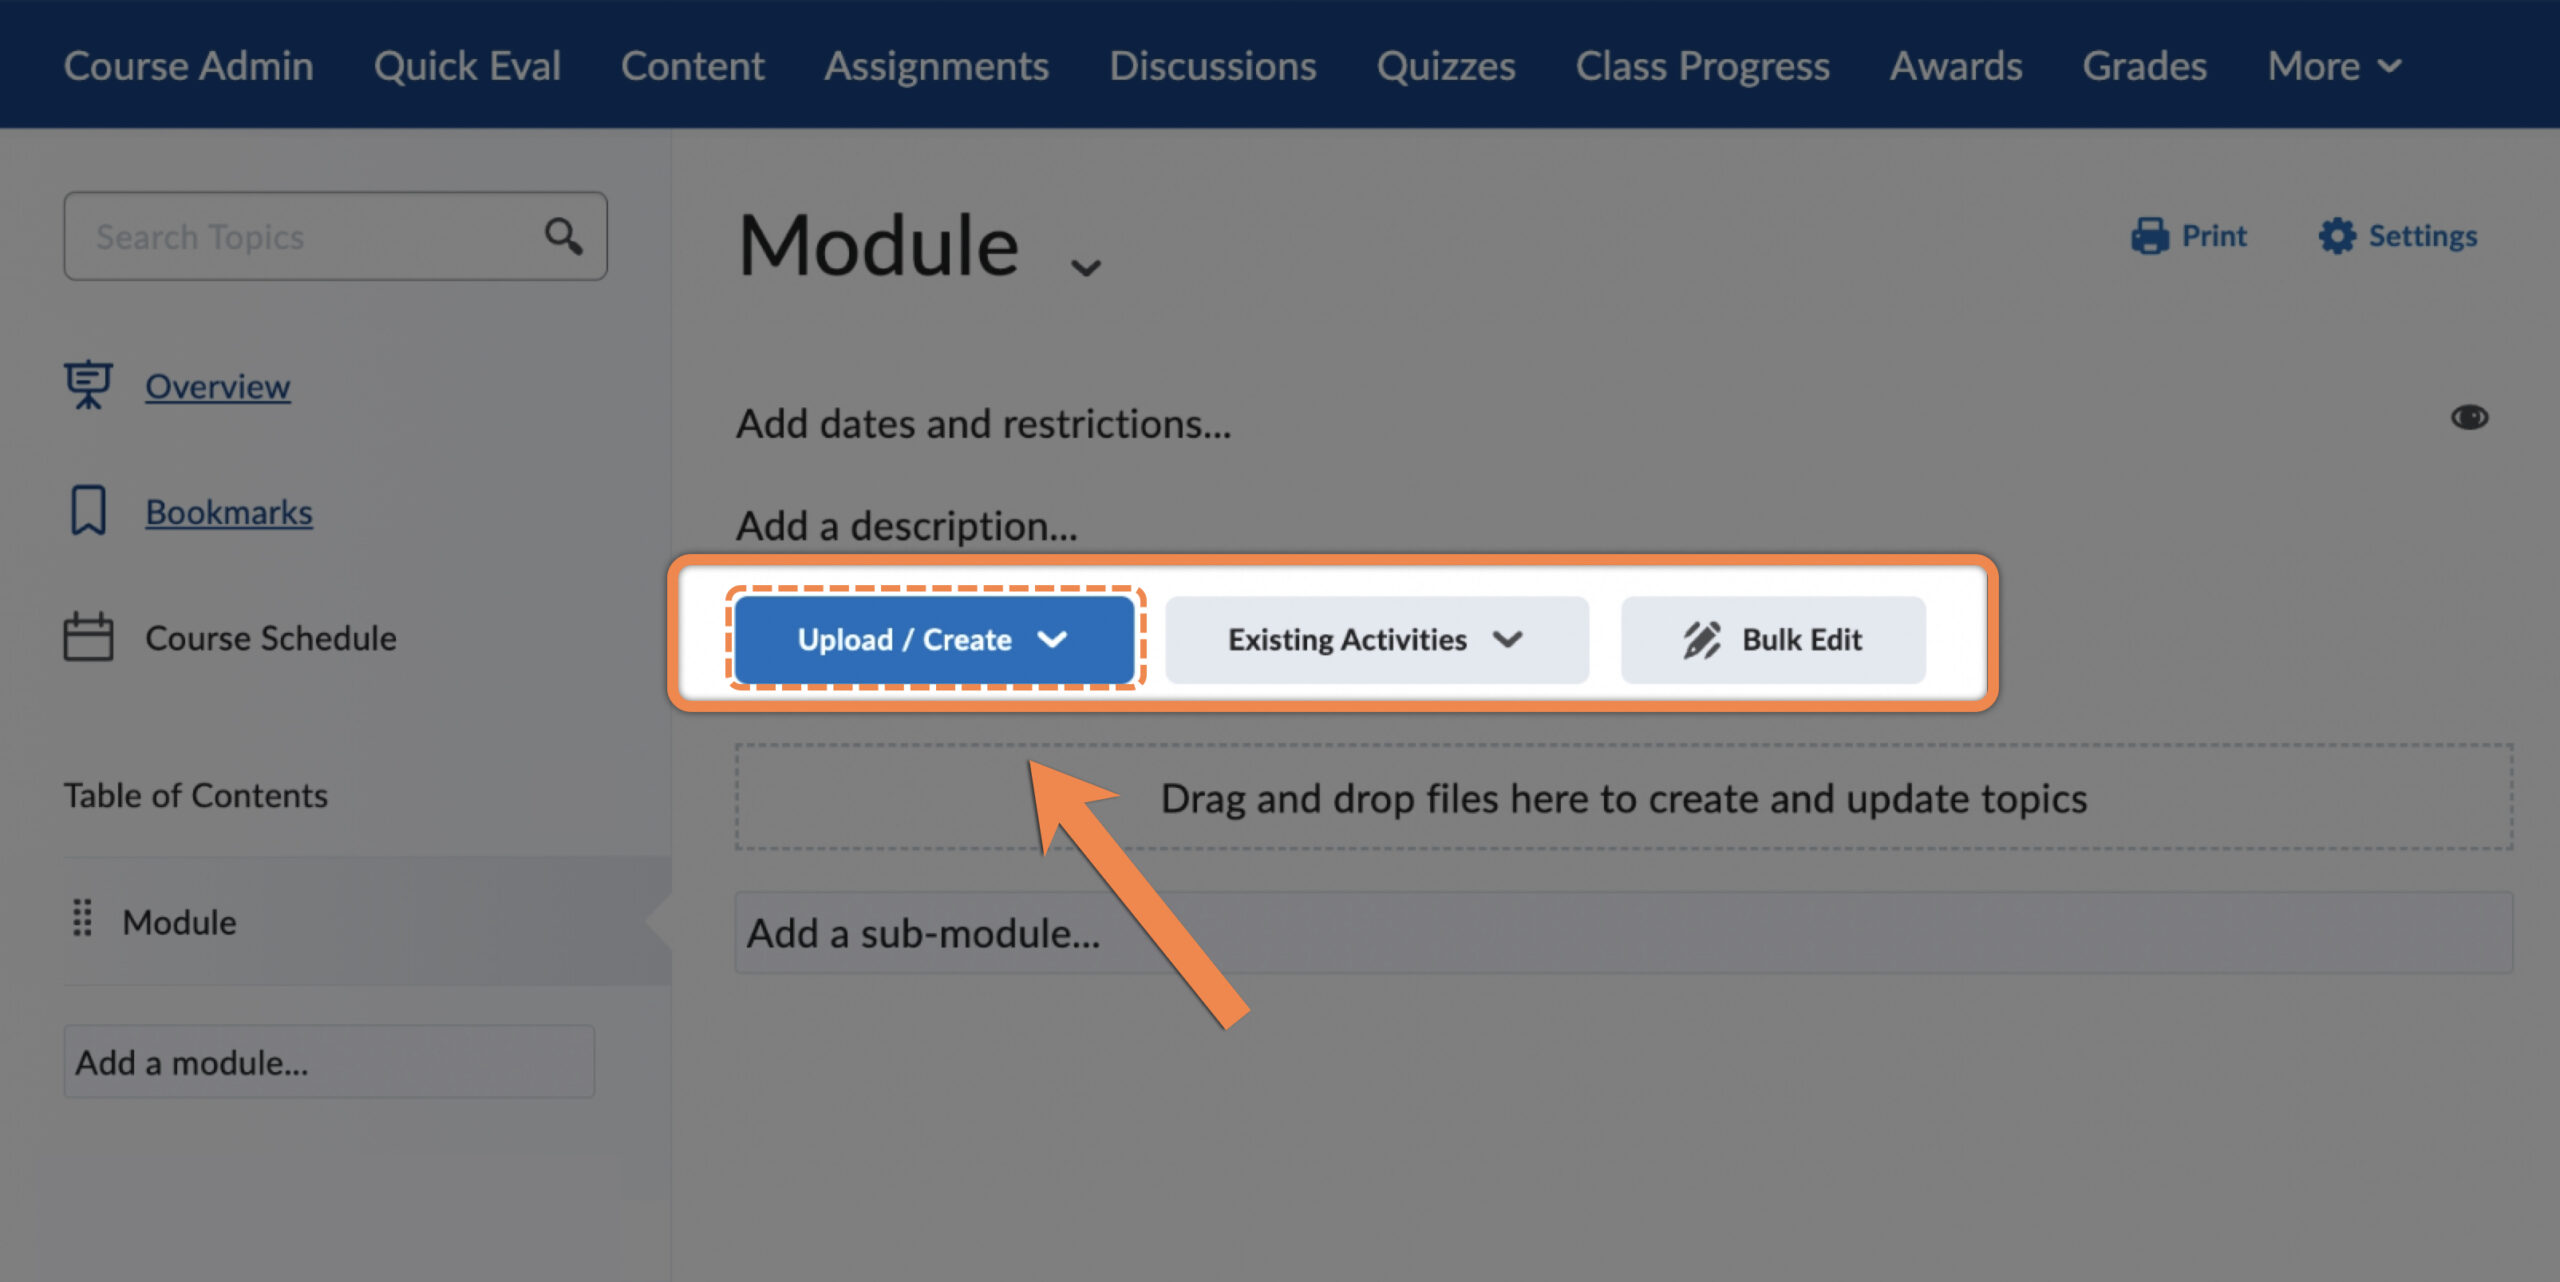
Upload/Create
The Upload/Create menu allows you to add new course content, either by uploading it from your computer, or from cloud storage services, or by creating new Brightspace items, such as discussions, assignments, etc.
Existing Activities
The Existing Activities menu allows you to select from existing Brightspace items, such as discussions, assignments, or quizzes that you created previously, or to import content from external applications that are integrated into your Brightspace organization, such as Turnitin, VoiceThread, Panopto, and textbook publisher platforms.
How to
Add a module in Brightspace
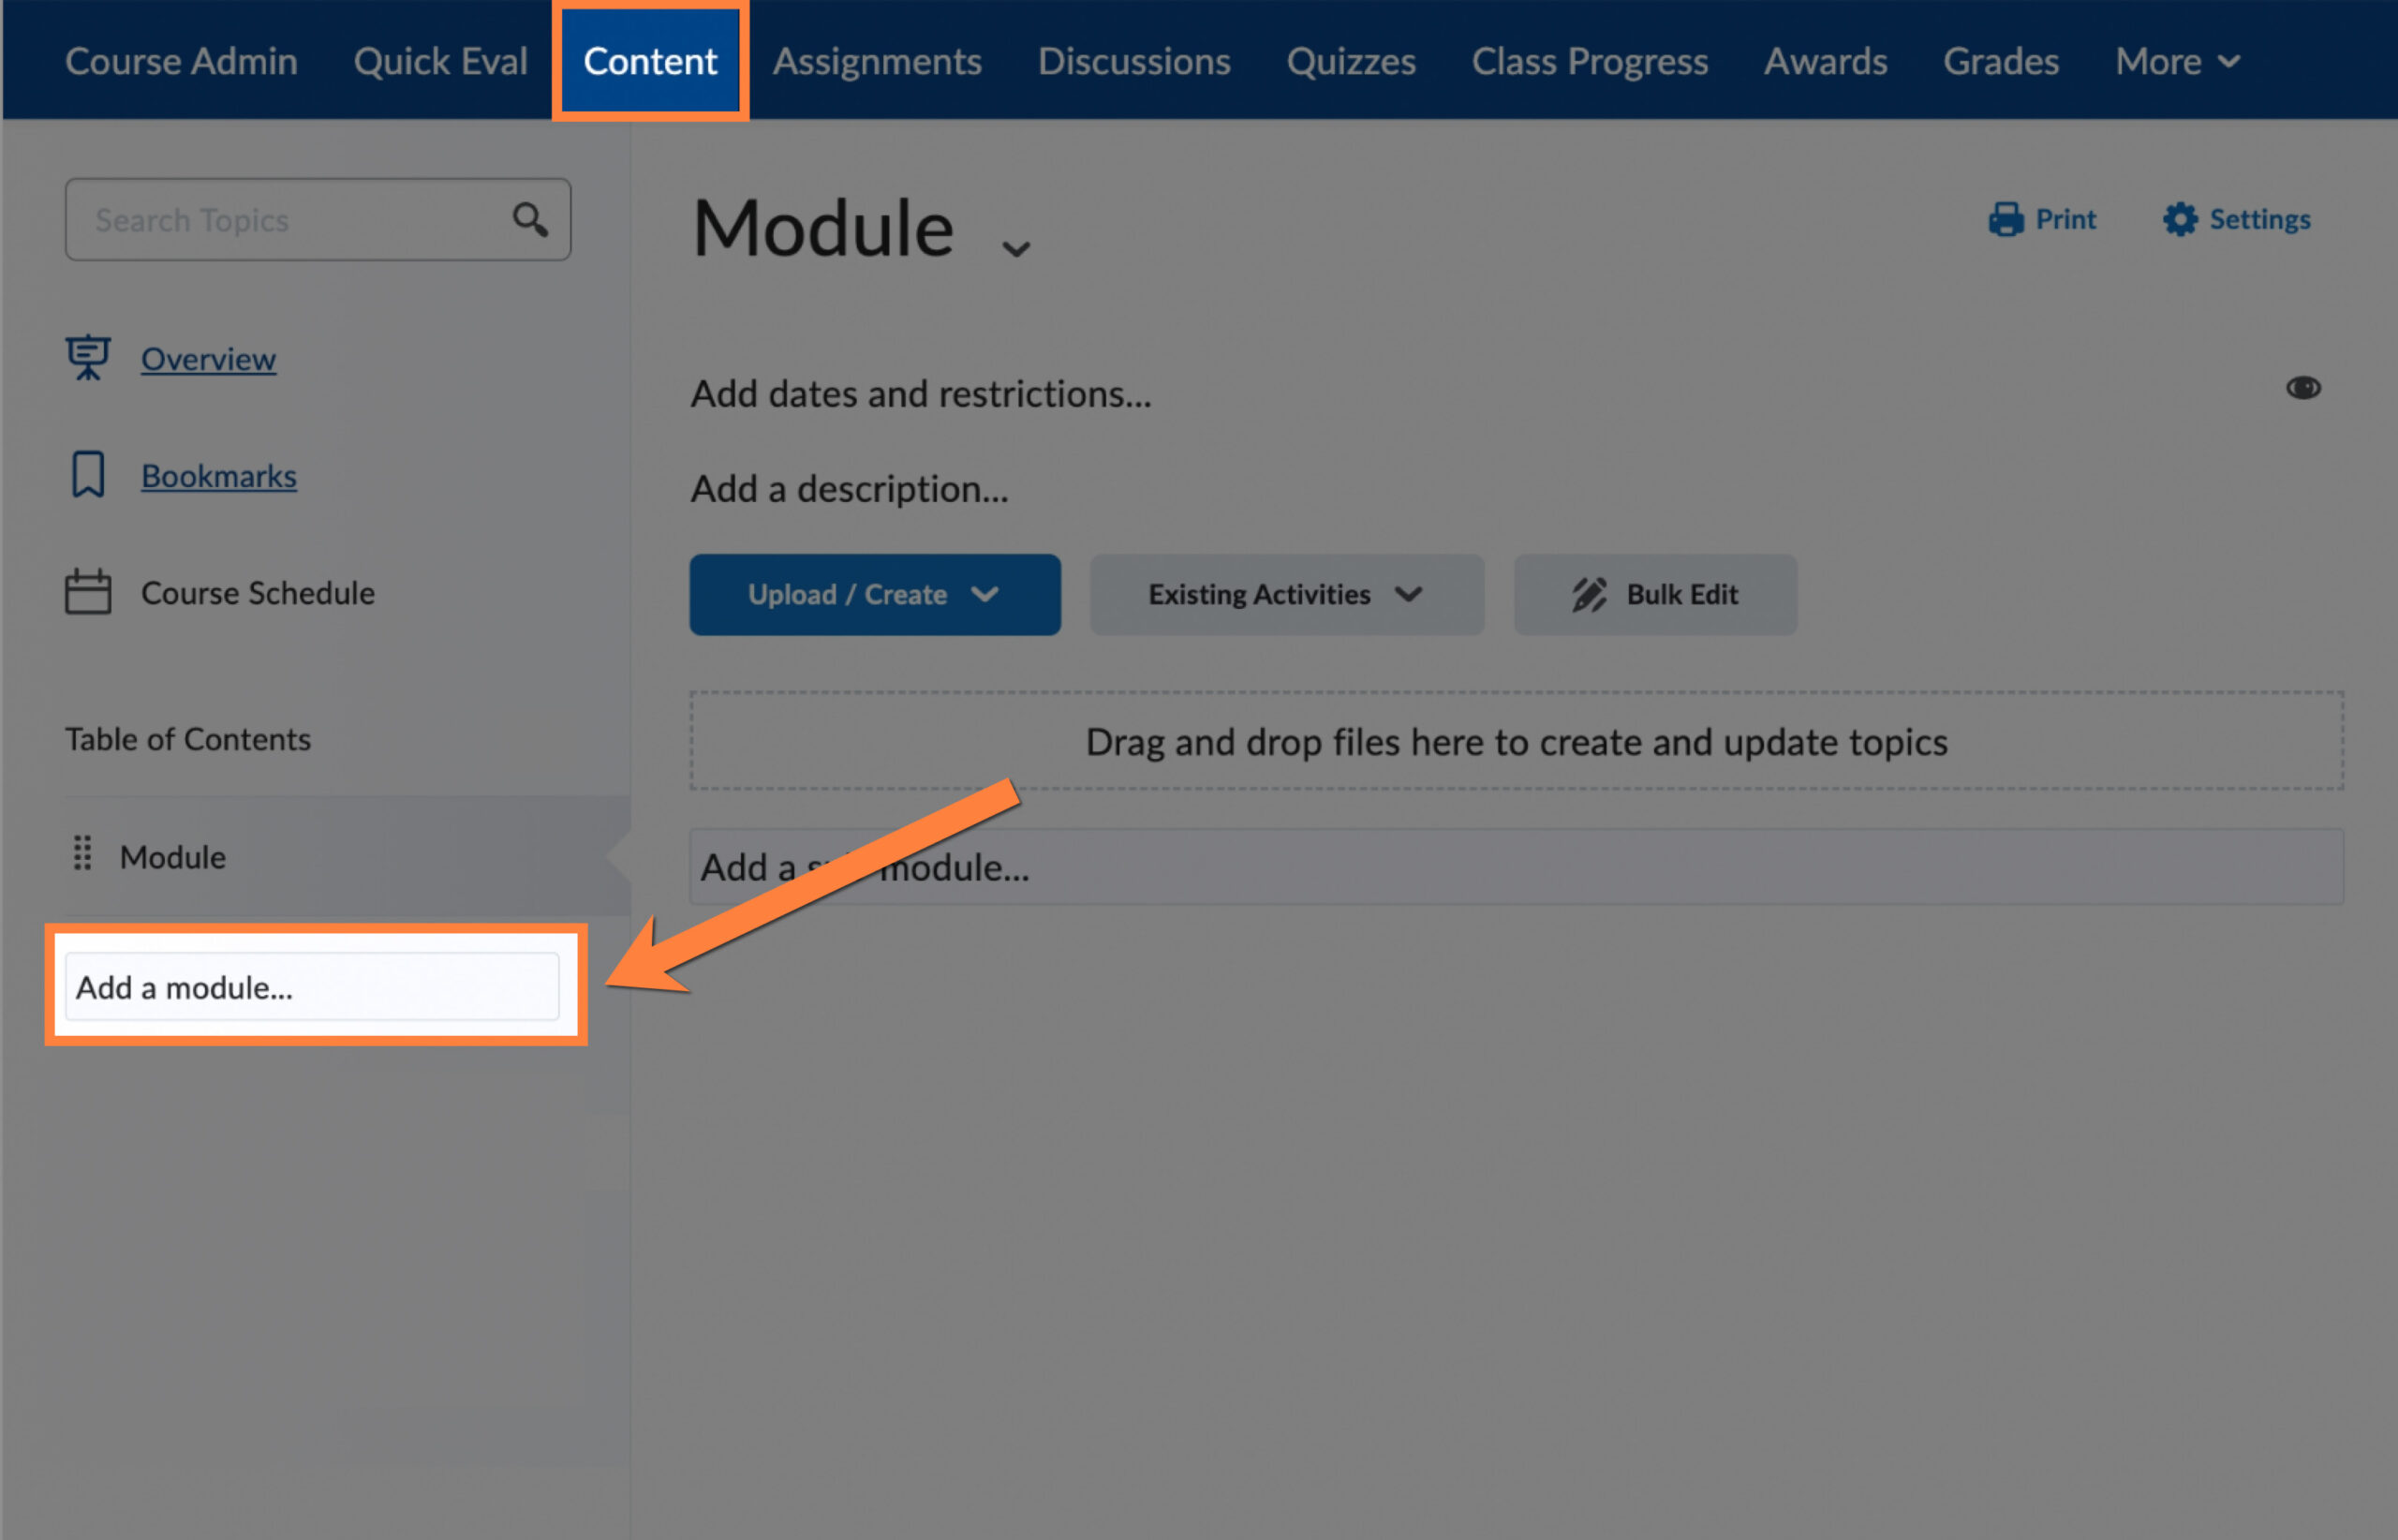
- Click on the Content link in the Navbar.
- Click on ‘Add a module…’ in the Table of Contents, on the left side of the window, and type in the module title. Then simply hit ‘Enter’ or click anywhere in the window. Brightspace automatically creates and opens the module you’ve just created.
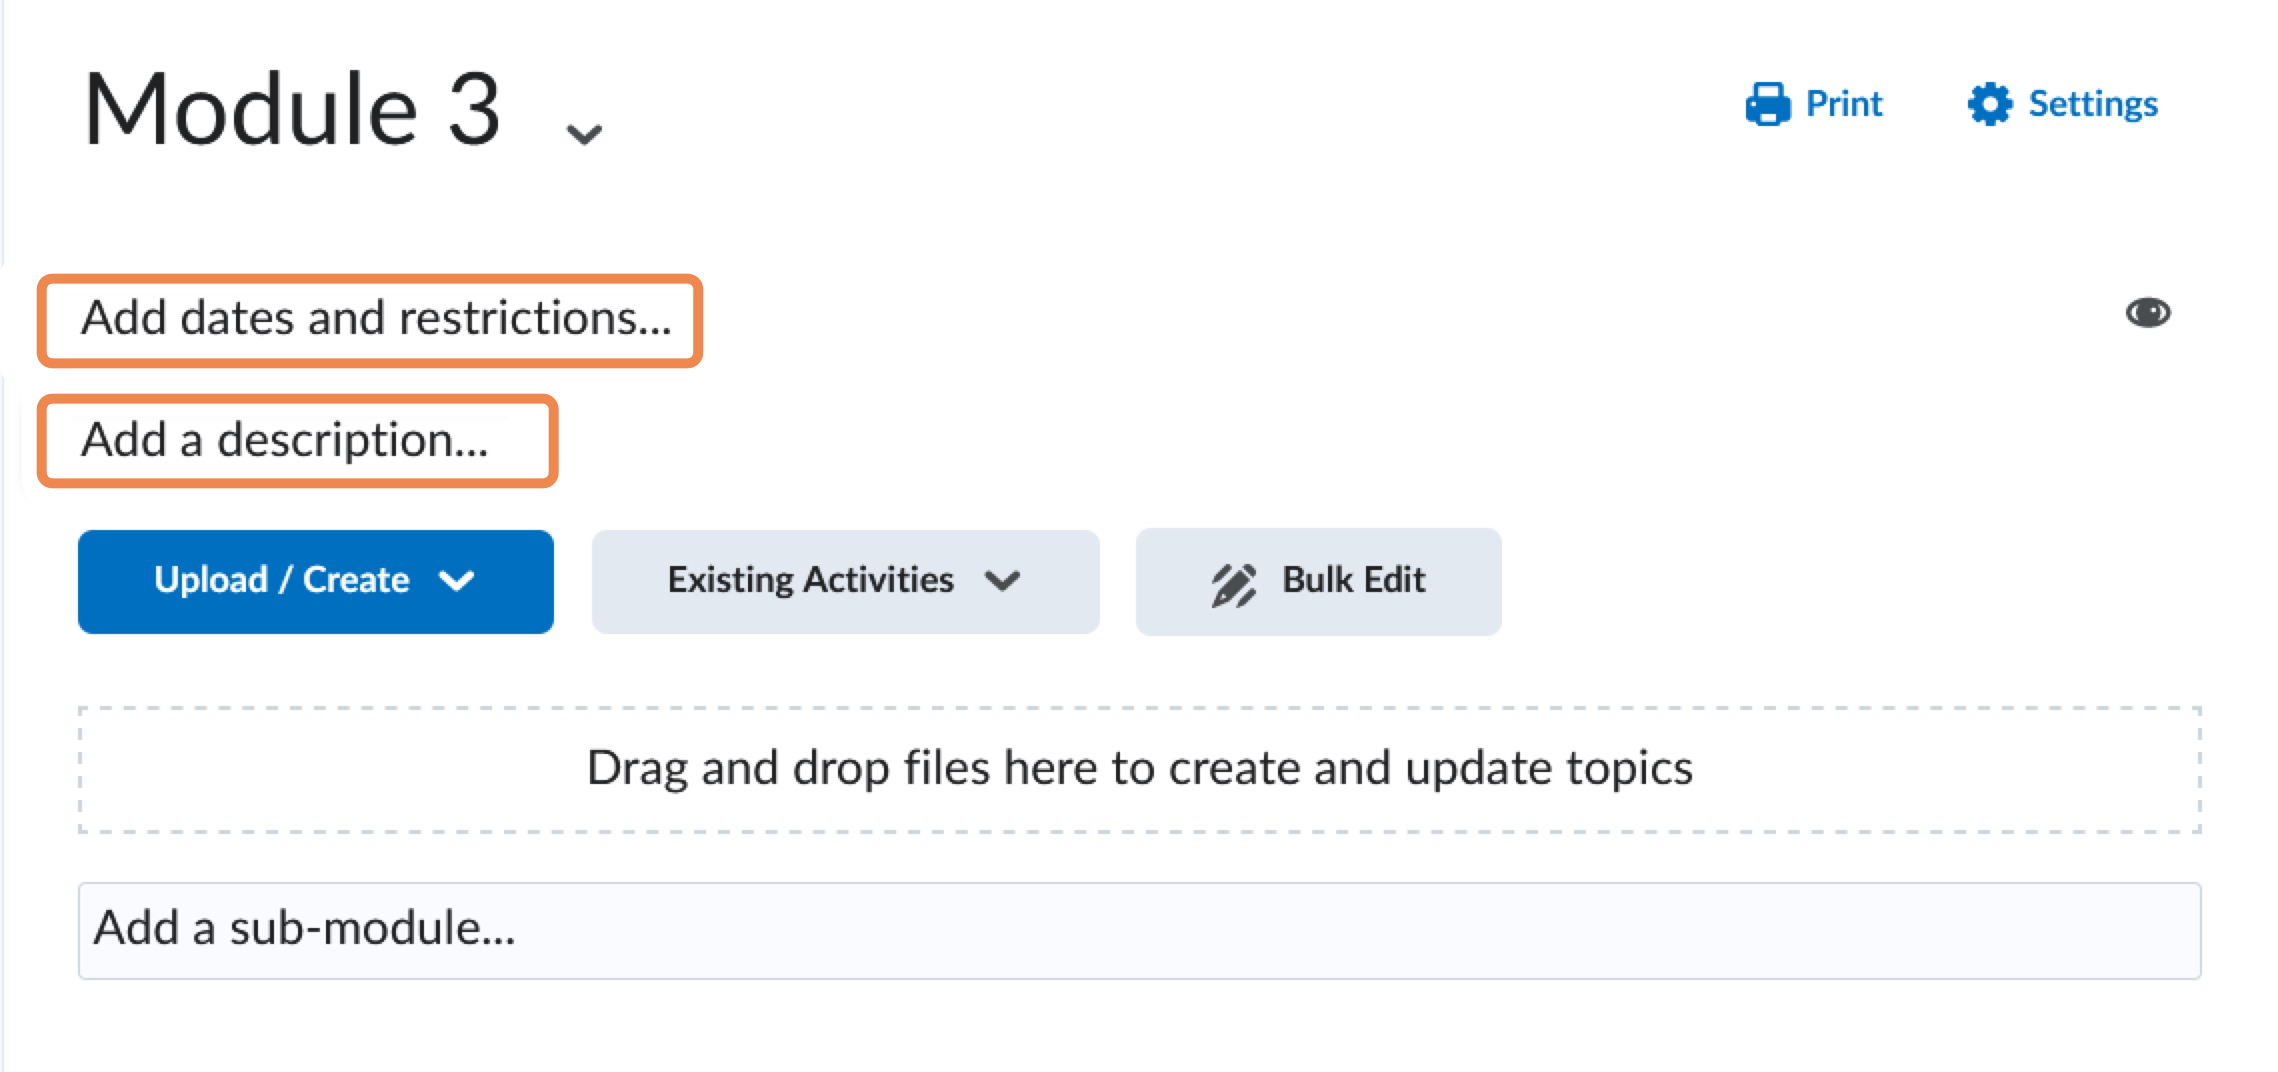
- You can then add availability restrictions or a description, if you wish, by clicking into those respective fields under the title of your new module.
Nest submodules within the modules
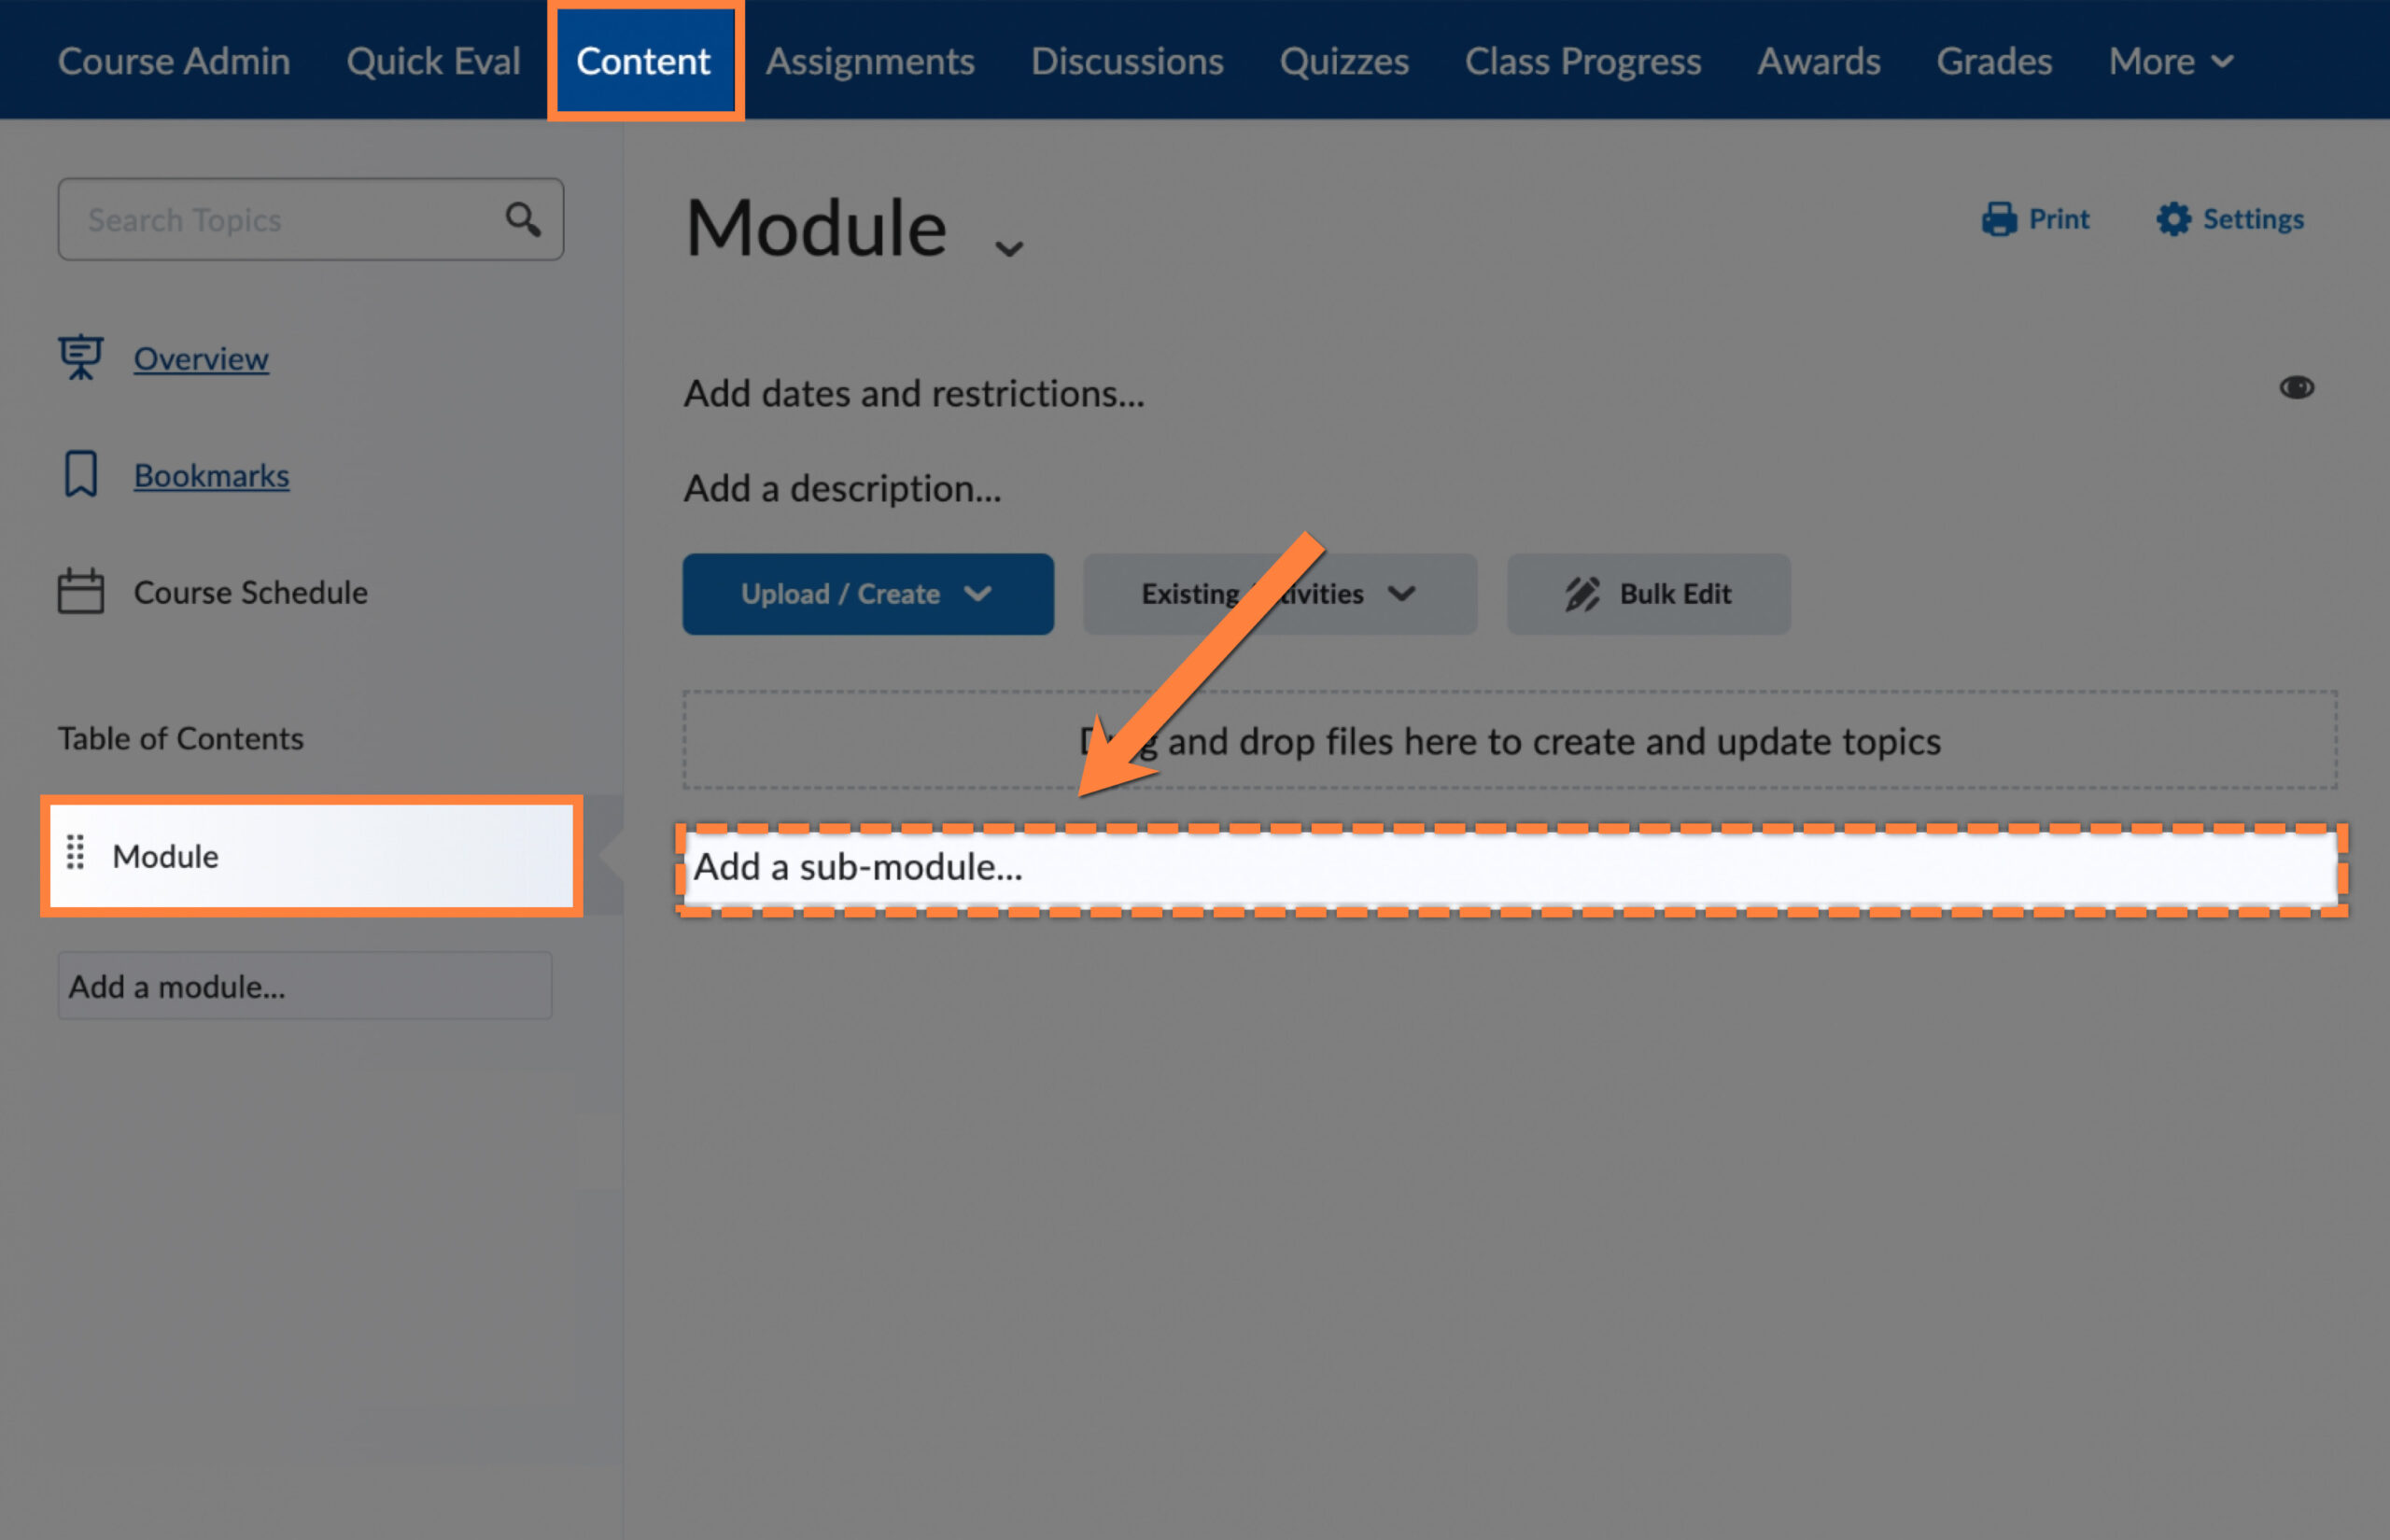
- Click on the module name in the Table of Contents to enter the module.
- Click into the field that says, ‘Add a sub-module…’. Type in the title of the sub-module and hit ‘Enter’ or click anywhere in the window. Brightspace automatically creates the new nested sub-module and opens it.
Add Content Topics in modules and sub-modules
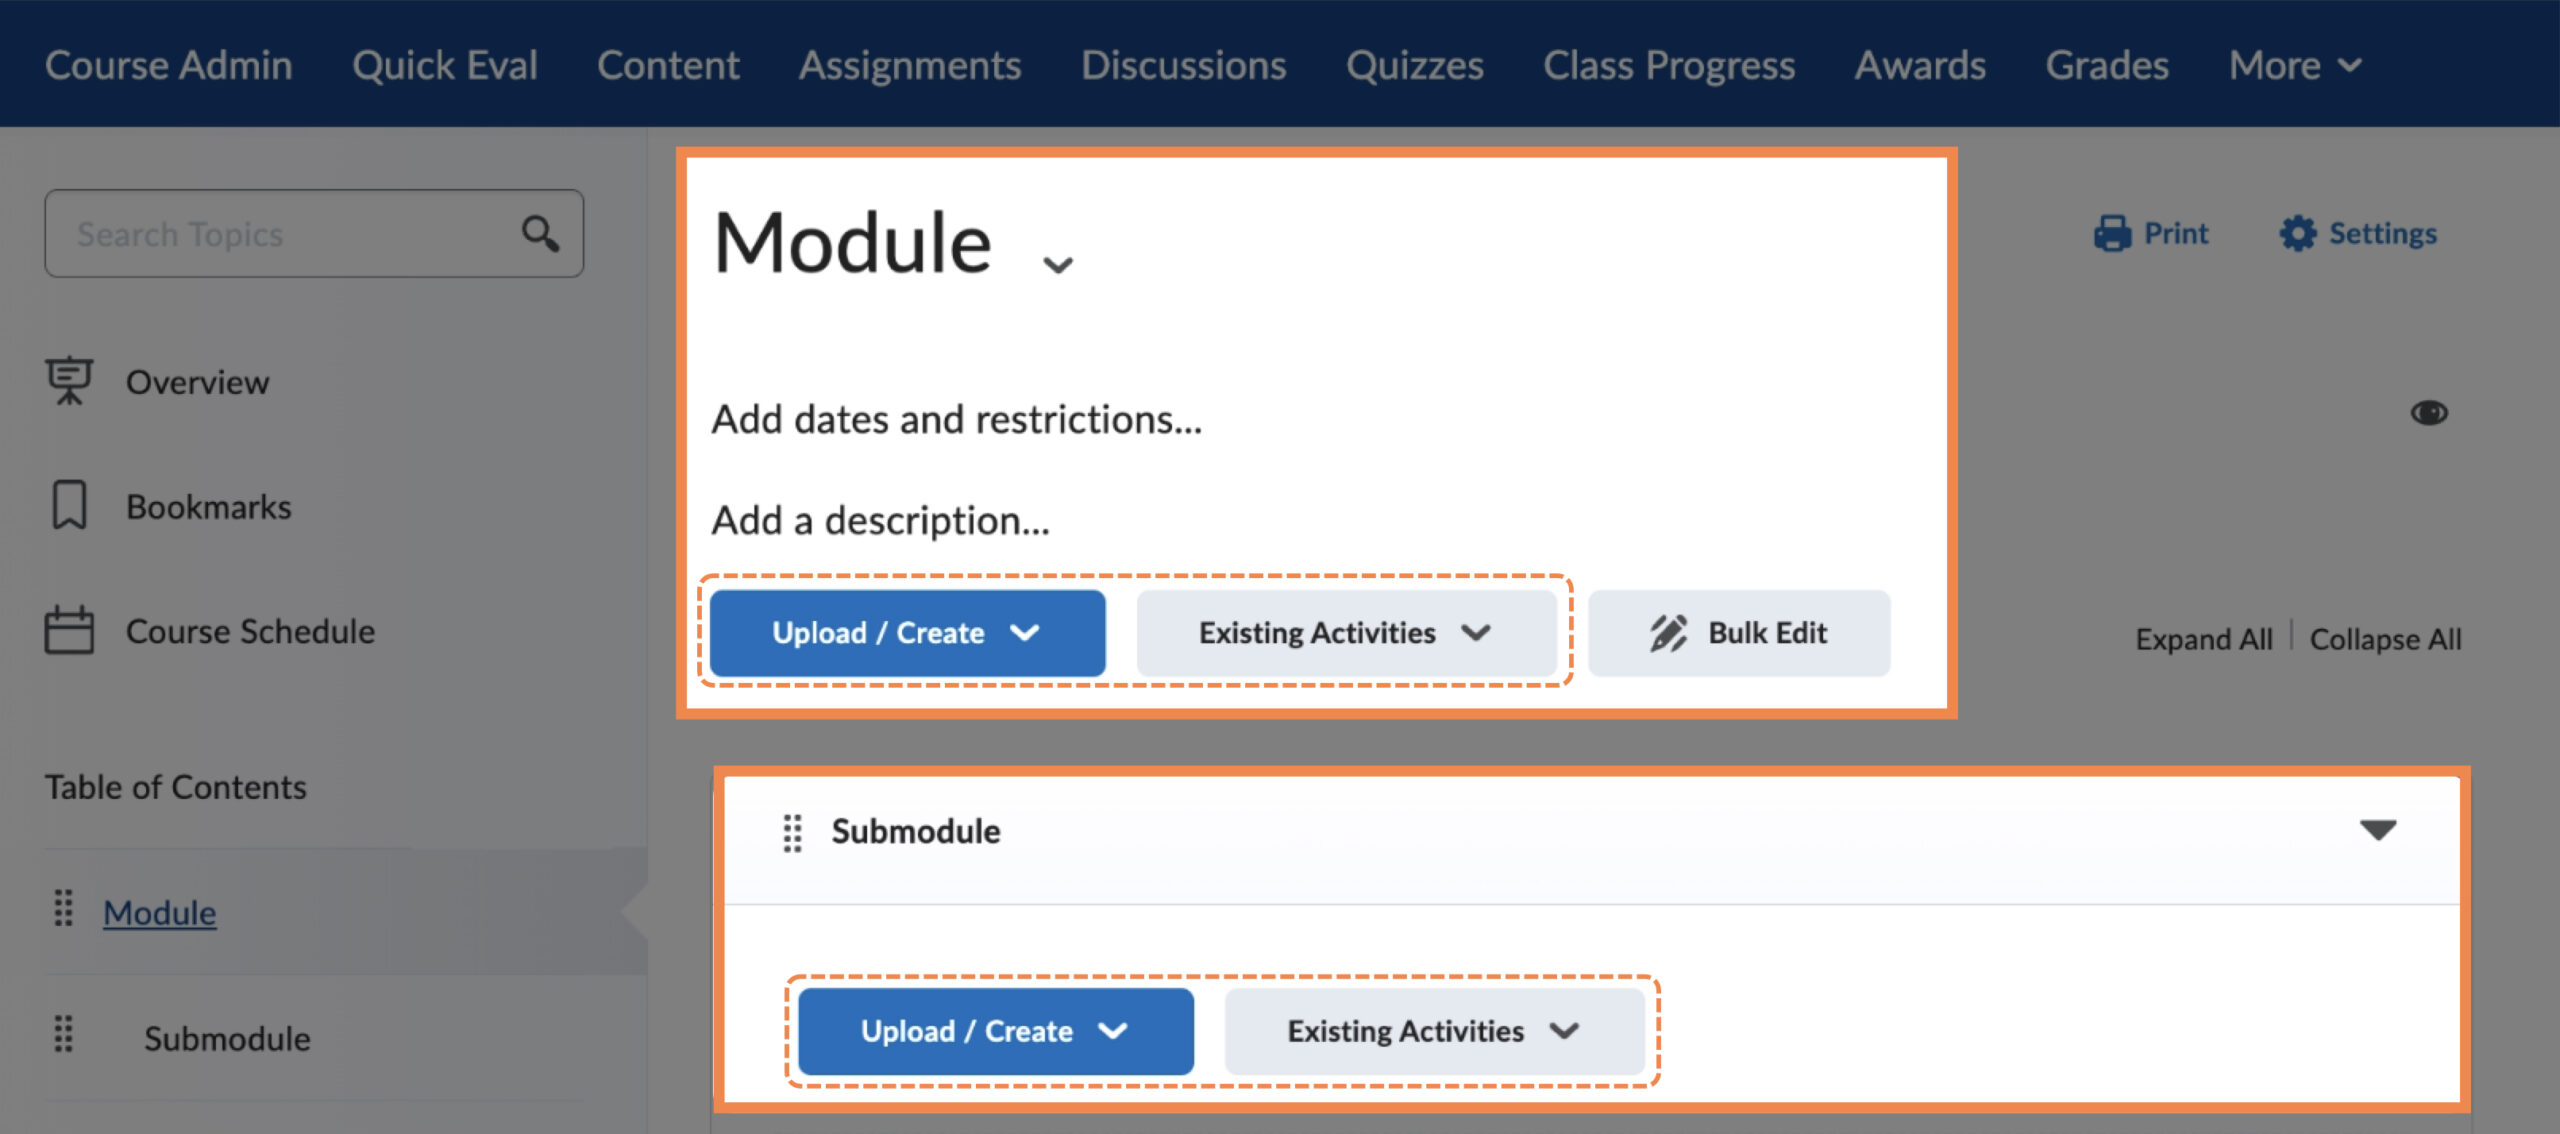
Click on the title of either the module or sub-module in the Table of Contents on the left or in the content window on the right.
Two menu buttons will appear: Upload/Create and Existing Activities.
Add Content Topics using “Upload/Create”
- Click on the Upload/Create button. A dropdown menu will open showing options for uploading content from a variety of sources or for creating new course content.
- Upload/Create is one of the main ways to add content to a course. Two commonly used options are uploading content from your computer and creating a new Brightspace item.
Upload Files from Your Computer
- Click on the Upload/Create button.
- Click on Upload Files.
- You have the option to upload files from your computer, from within your course, or from your OneDrive or Google Drive account.
Create a Content Topic Using the Brightspace Editor
- Click on the Upload/Create button
- Click on Create a File. The Brightspace Editor will open with ‘Save and Close’, ‘Save’, and ‘Cancel’ buttons beneath it.
- Create the new item and save it.
Add Existing Assessments
- Click on Existing Activities
- Select the appropriate assessment type to add to the module or submodule
Create and Add New Assessments
- Click on Upload/Create button below the module or sub-module’s title
- Select either the New Assignment, New Discussion, New Quiz, or any other option that suits your course (for more, see Unit 5 of this microlearning PD).
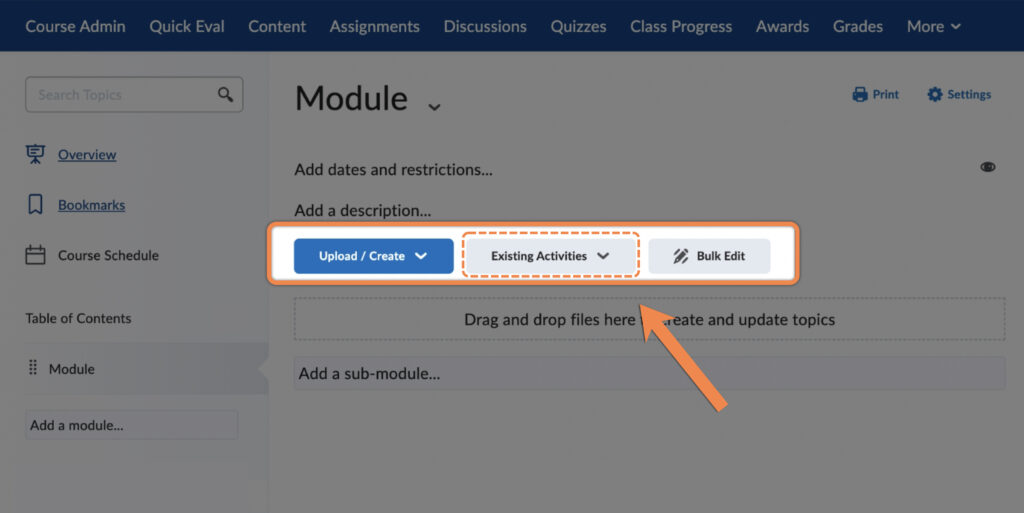
Add Content Topics using “Existing Activities”
- Click on Existing Activities.
- A dropdown menu will open showing all the options for adding existing Brightspace content, such as Discussions, Assignments, or Quizzes that you have previously created. The menu will also include links to any external applications that are integrated in your college’s Brightspace organization, such as publisher platforms, Turnitin, VoiceThread, or Panopto.
- Select the type of item you wish to add.
- If you select an existing Brightspace item, a window will open displaying all the existing content of that type. If you select an external application, a window will open in which you can select or create the item.
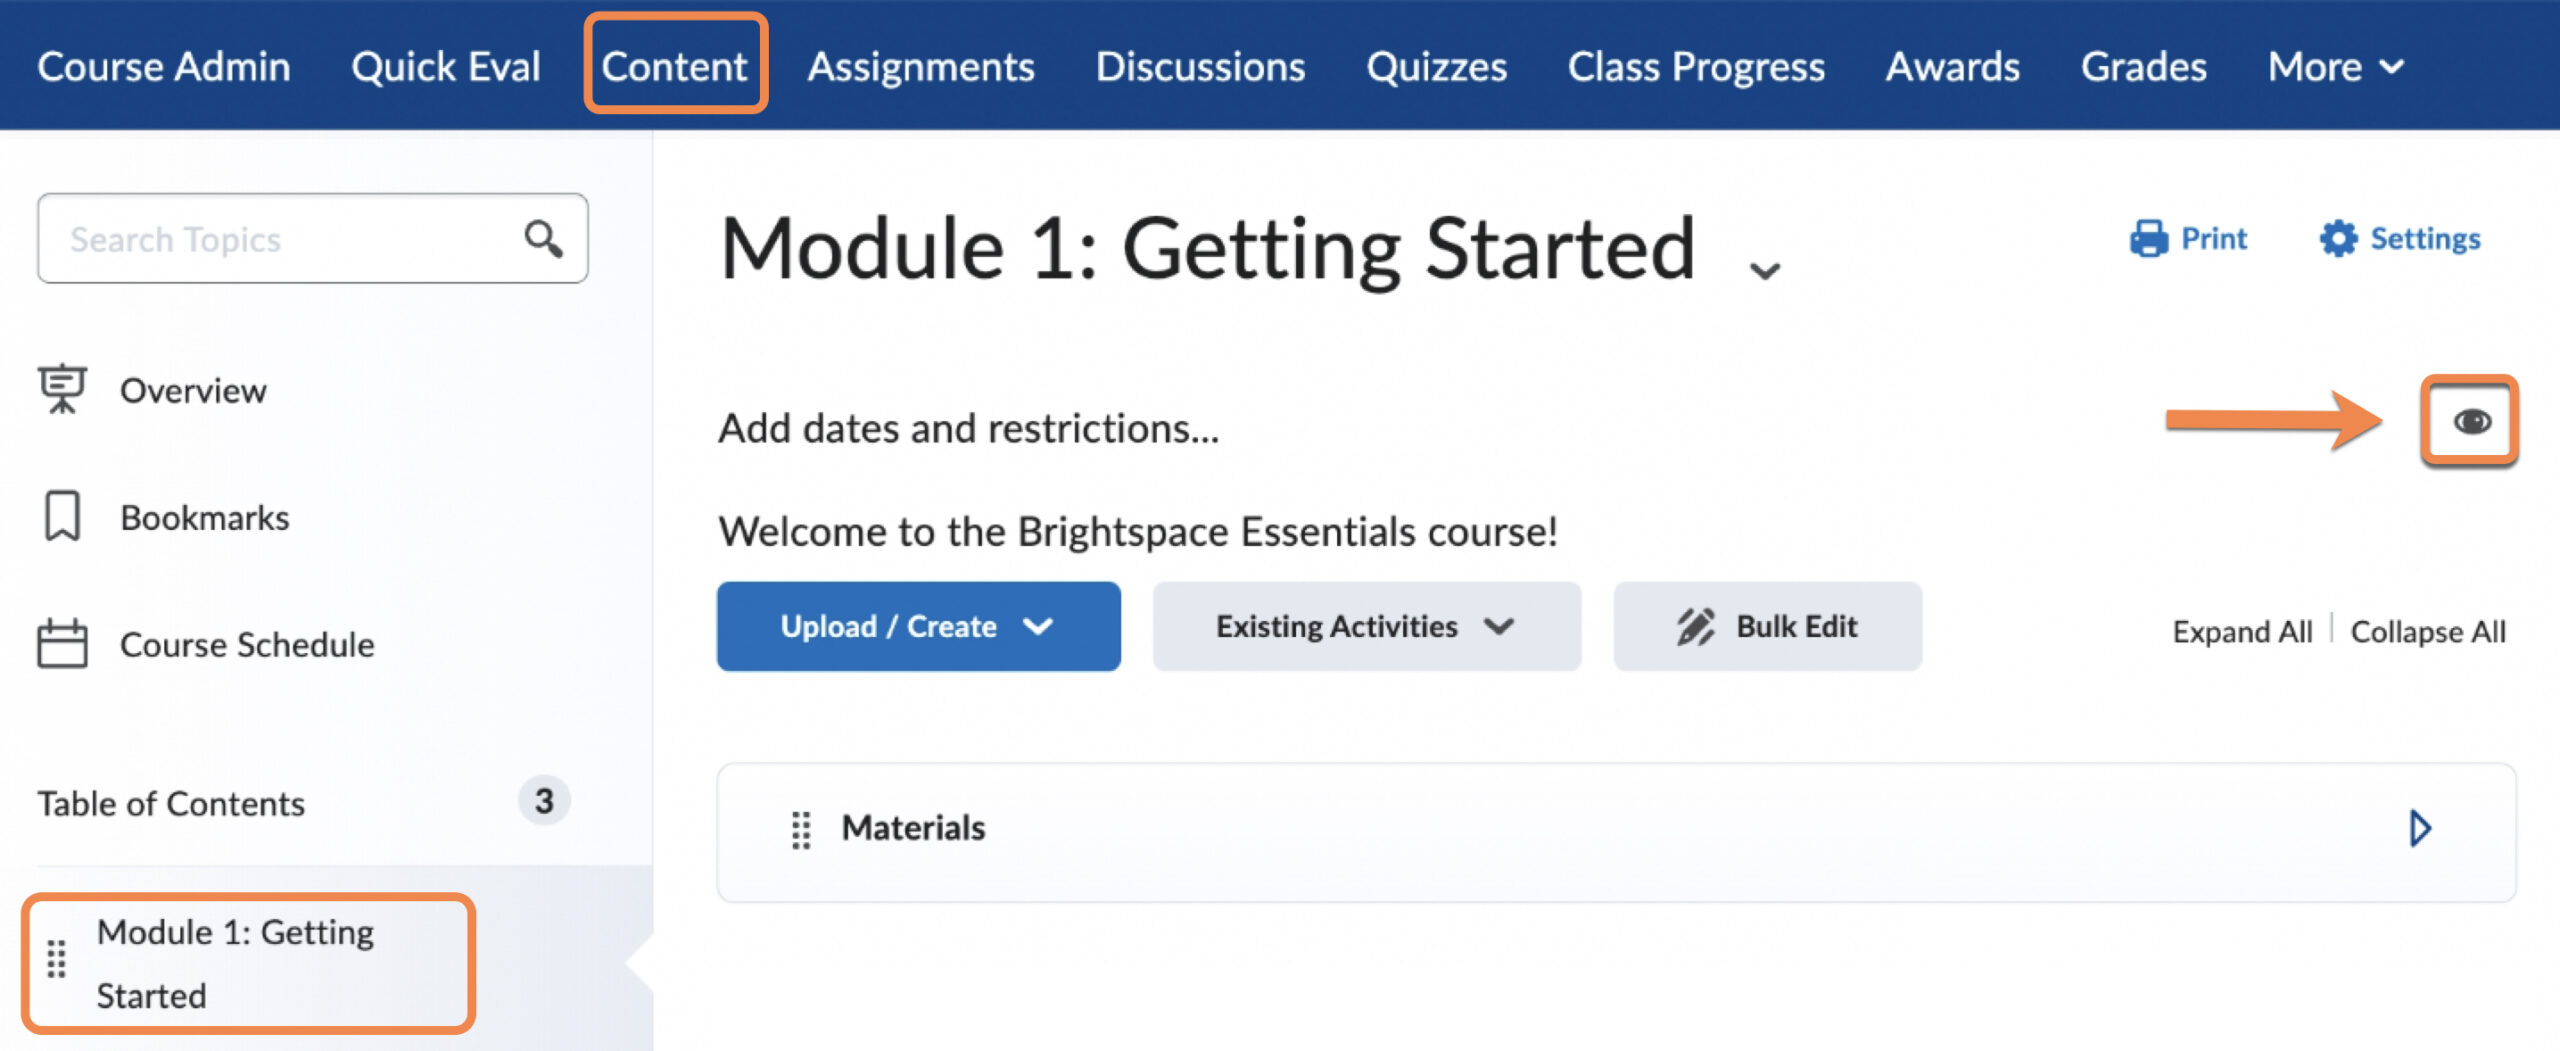
Make modules and submodules available to students
- Click on Content in your course Navbar.
- Click on the module or sub-module in the Table of Contents.
- Click on the visibility icon (eye) on the right side of the window, just under the module/sub-module title to toggle visibility on or off.
Make Content Topics available to students
- To hide Content Topics (module or sub-module content items), click on the arrow next to the Topic title.
- A dropdown menu will open, including the option to Hide from Users.
- Click on Hide from Users.
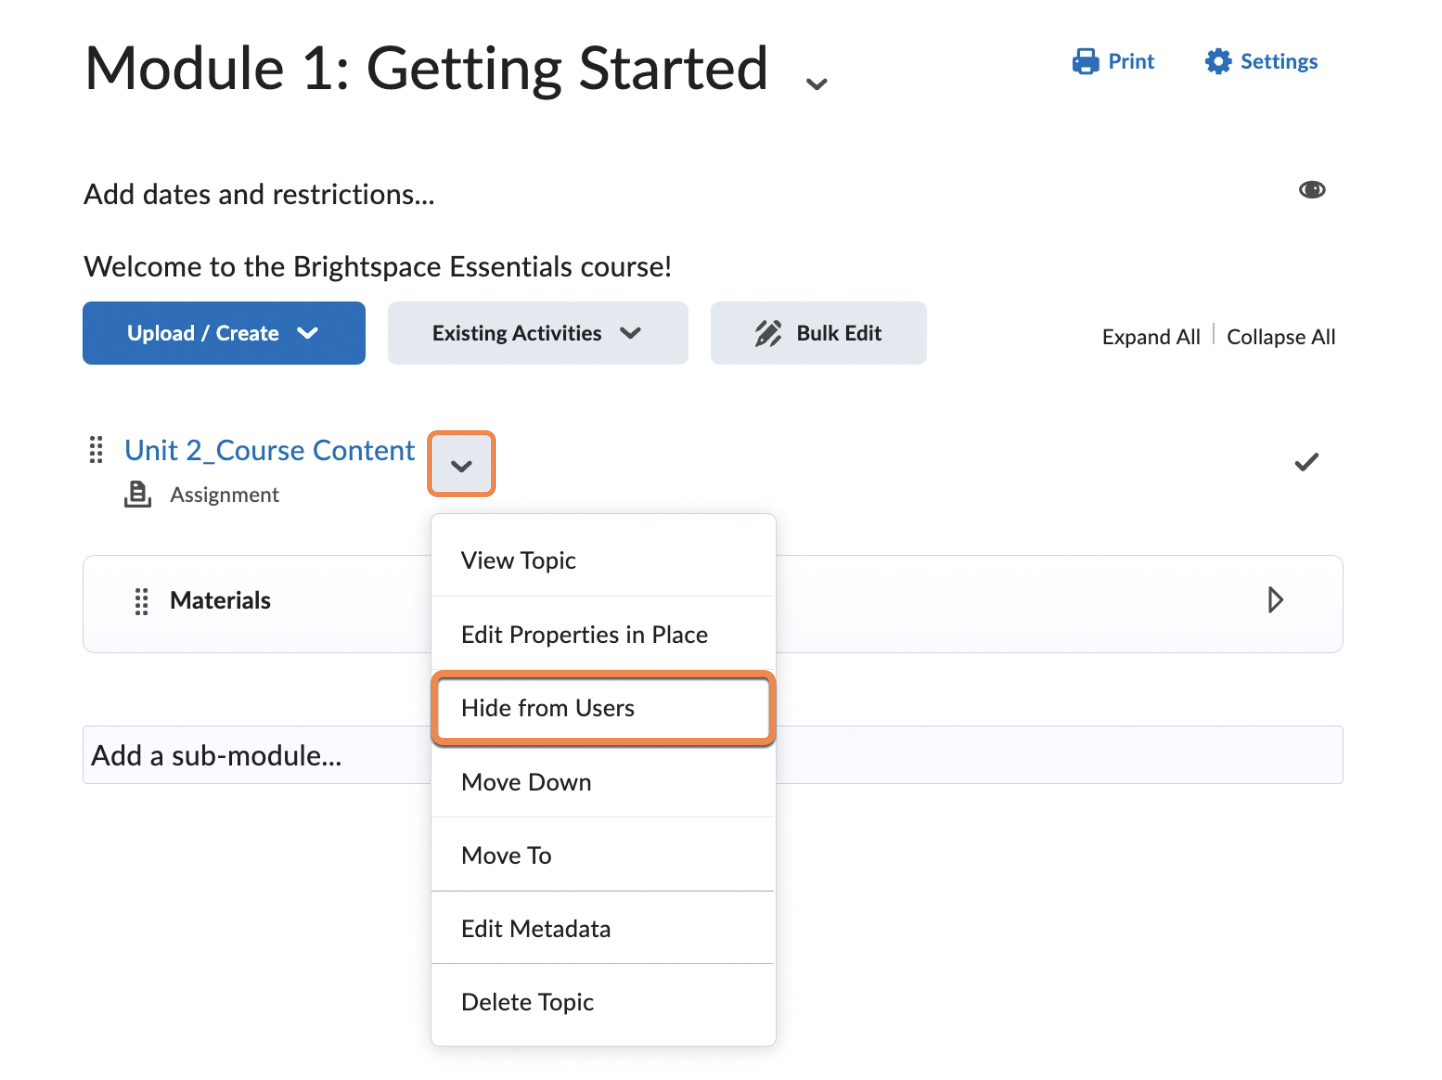
- A visibility settings toggle will appear, indicating the item is Hidden and showing an eye icon with a line through it.

- To make the material available, slide the bar to Visible.

Test Your Knowledge
Take Action
- In your practice site, create a module and a sub-module within it.
- Then create one Content Topic, or item.
- Add another Content Topic by selecting from the Existing Activities menu.
- Make one Topic hidden
- Use the View as Learner option (click on your username in the Minibar at the top right of the window).
Resources
Text
Brightspace Community: Add and organize learning materials in the Classic Content experience
CUNY Brightspace Transition: Training and Resources
CUNY SPS Accessibility Toolkit
Video
Brightspace Tutorials: Create Course Content | Instructor
Brightspace Tutorials: Content – Upload a Topic – Instructor