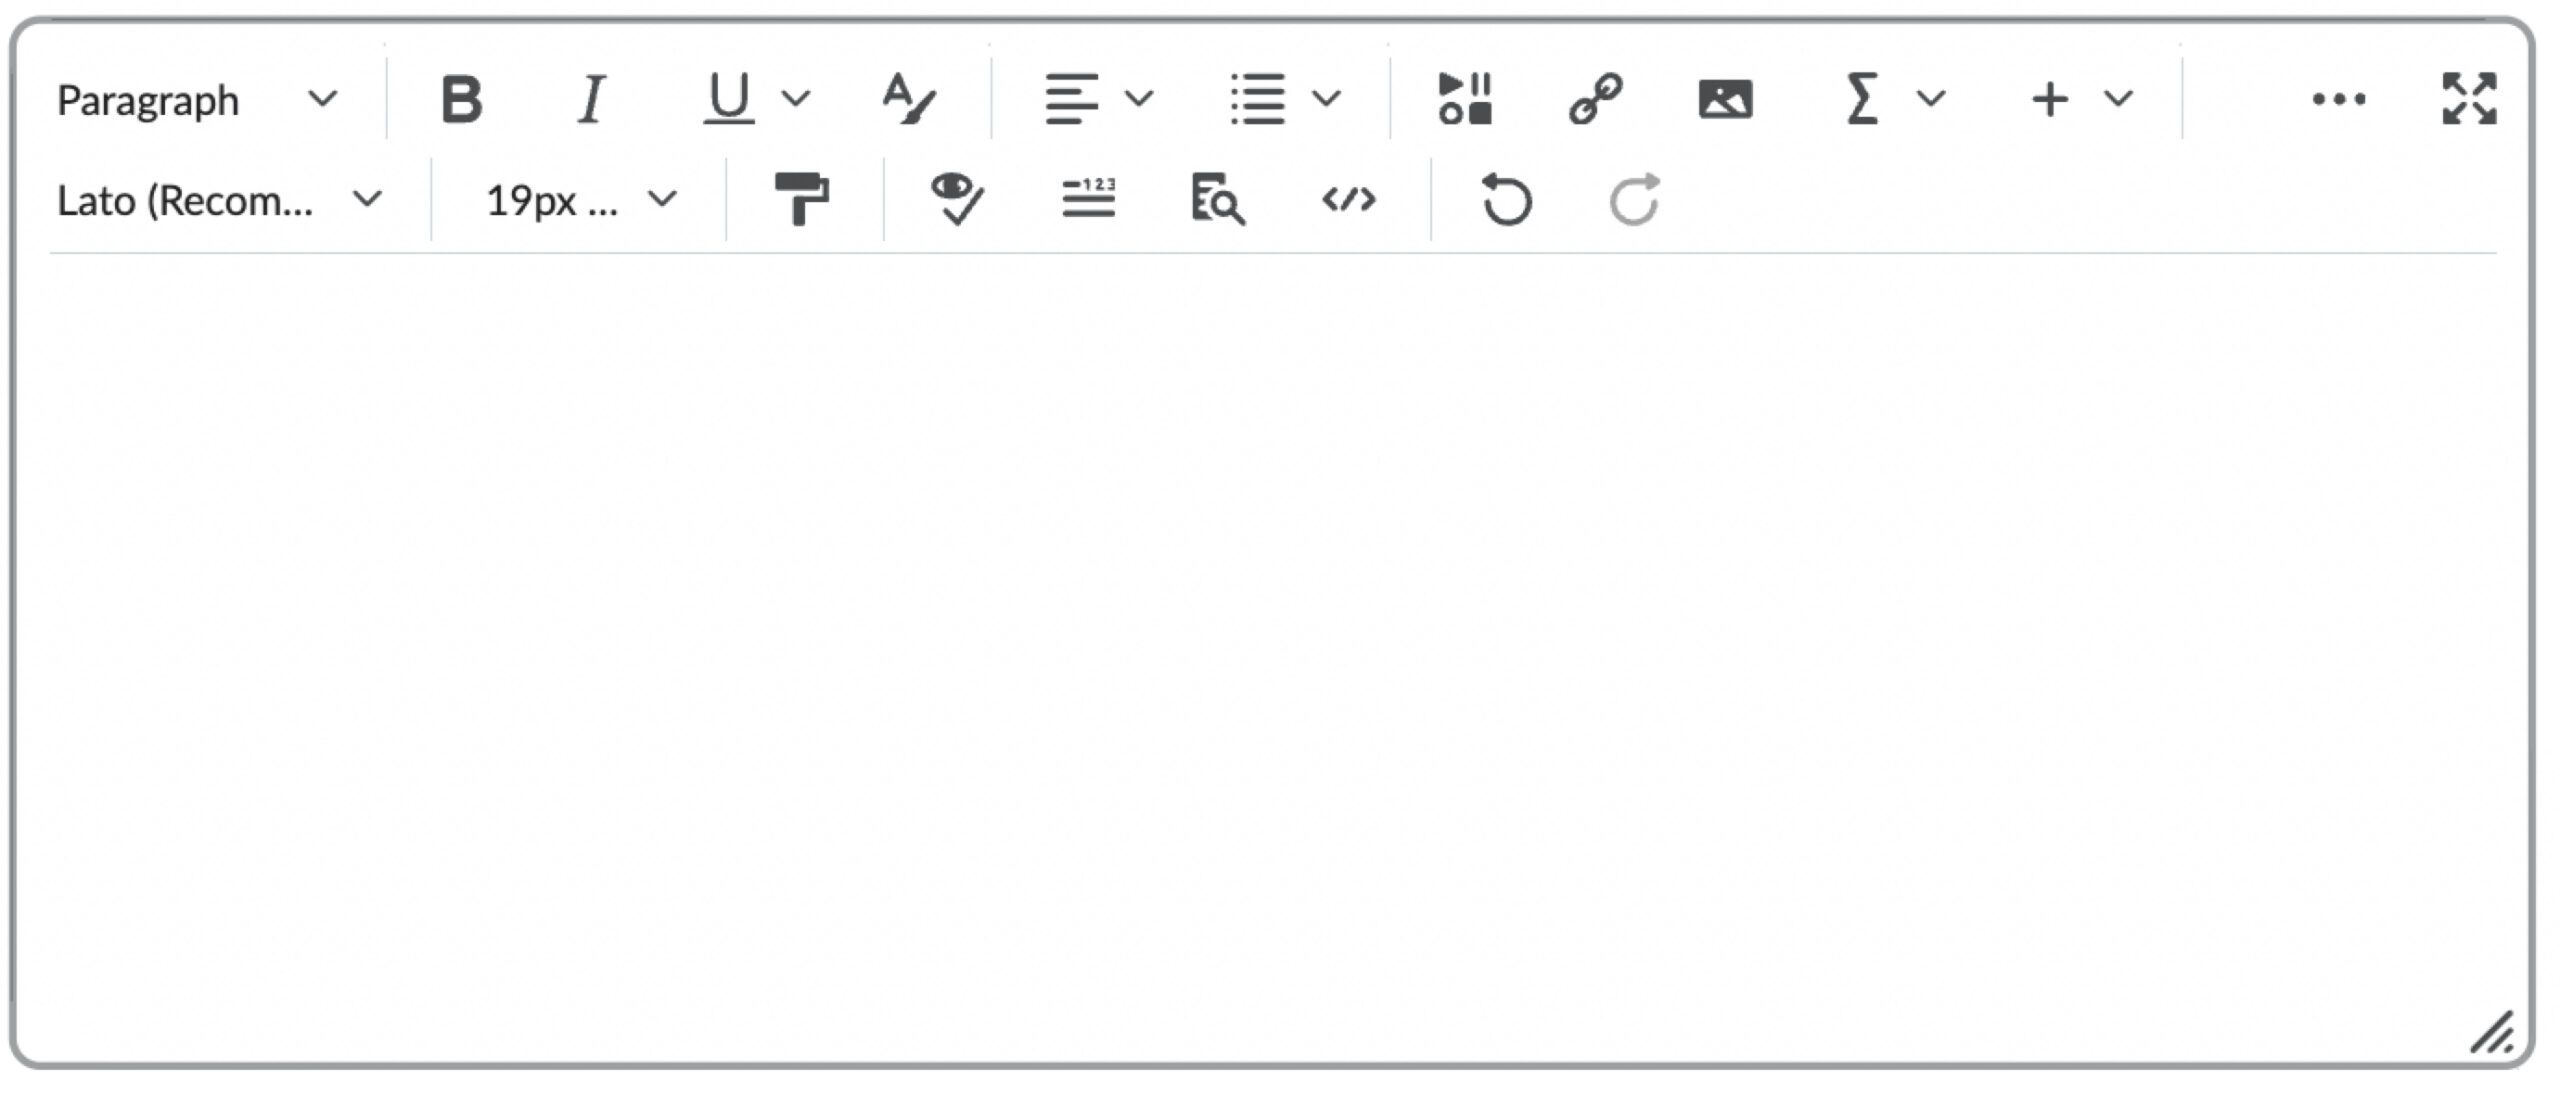
The Brightspace Editor is a text editing window that appears throughout Brightspace, in almost every tool that allows you to add text. It has several great tools that allow you to format text, check accessibility, insert images, equations, multimedia, or files available on integrated platforms (such as OneDrive or external multimedia platforms). You can even edit the source code for your content if you wish. This unit will ensure you know how to find the tools you need in the Brightspace Editor.
Quick Tips
Full screen editor
Expand the Editor to full screen when you are drafting or formatting a longer item, or when you are working on a smaller screen.
Accessibility
Whenever you use the Brightspace Editor, whether to create an announcement or a discussion post, or any other task that involves the editor, clicking the Accessibility Checker before saving or posting is an easy way to ensure content is accessible to all students.
Preview your work
Just like it’s a good practice to use spelling and grammar checkers, and the Brightspace Accessibility Checker, whenever you are posting a new item to your course, it’s a great idea to preview items before you post them, especially longer items or items that include images, tables, or graphs.
How to
Expand the toolbar

To expand or reduce the toolbar, click on the ellipsis (…) on the top right of the toolbar. If you don’t see all the tools, try expanding the toolbar.
Expand the editor to full screen

Expanding the editor to full screen is very helpful when you are drafting or formatting a long item, or when you are working on a smaller screen.
Format text
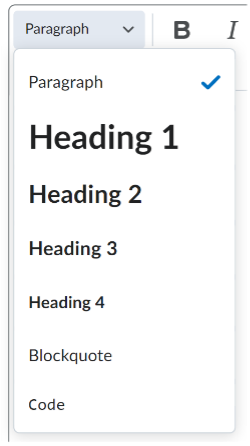
The editor includes all the basic text formatting tools, including structural formatting styles like headers and blockquotes, font options, text justification, lists, and a format painter. Using the format styles systematically, particularly the Paragraph style for plain text and the Headers for headings (rather than simply bold or higher font sizes) is the best practice for Accessibility. Simply select the text you wish to format, click the Format dropdown, and apply the appropriate formatting style.
Insert stuff

Insert Stuff allows you to embed files from your computer, from the course, or from external drives, multimedia, including recording a video note, and content from external platforms such as OER platforms.
Insert quicklinks
The quicklink menu allows you to insert a link to anything in your course, any third-party tools installed in your Brightspace platform, and to an external website (“Url”, at the bottom of the course materials list in the menu).
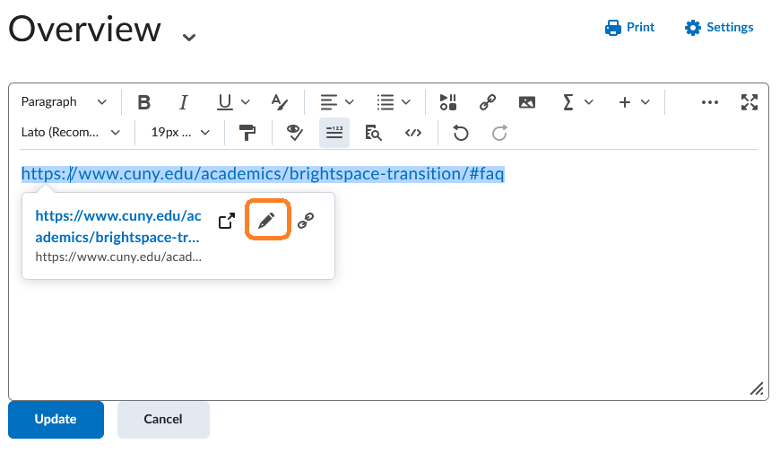
Note that when you paste or type a URL into the editor, it will automatically turn into a hyperlink. You’ll want to edit the hyperlink so that the text displayed is meaningful and not the URL. To edit a link simply click on it and then click on the pencil icon to edit the title of the link.
Insert images

You can insert image files from your computer, from within your course, or via a link.
Insert equations

The Brightspace Editor includes a graphical math equation editor, a graphical chemistry equation editor, and MathML and LaTex editors. All equations created with these editors will render in a format that is accessible to most screen readers. For more on accessibility of equations, please see Accessibility in STEM in the CUNY SPS Accessibility Toolkit.
Insert tables

Using the Brightspace Editor’s Insert Table function ensures that your tables are formatted accessibly.
Insert more stuff / See all tools

Clicking on the plus sign icon opens a menu of all the other things that can be inserted, including emojis, code, symbols, dividers, and attributes (both for individual elements and the entire page). Also, when you are working on a small screen, some of the editor tools may be hidden. Clicking on the plus sign shows you any tools that are not displayed in the toolbar.
Edit source code

If you are comfortable with HTML, you can view the source code for the item you are editing and fine-tune your formatting.
Preview

It’s a great idea to preview items, especially longer ones, or ones with embedded objects, before you save it or post it.
Check accessibility

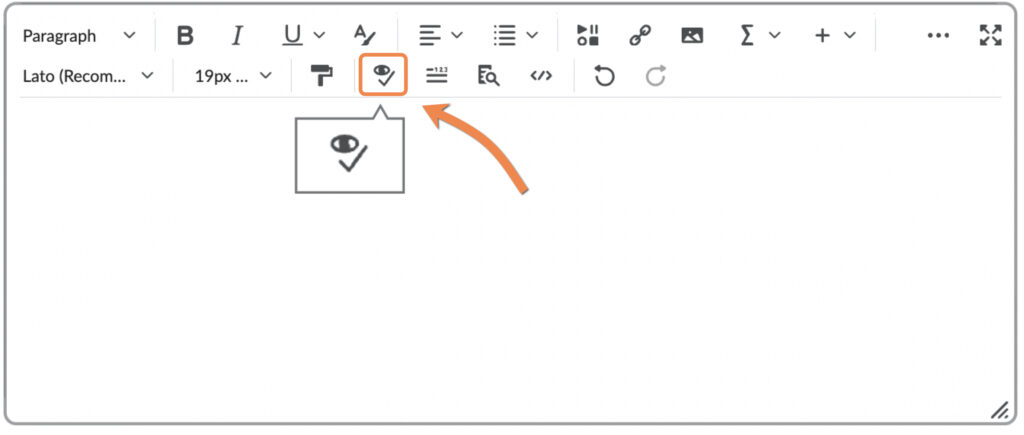
The Brightspace Editor includes an Accessibility checker tool, represented by an icon that looks like an eye above a checkmark. Use this tool to ensure the contents you’ve created will be accessible to all your students
- Once you’ve drafted your item in the editor, click on the Accessibility Checker button.
- You will see the accessibility report in a pop-up window including a list of potential issues and suggestions for how to resolve them.
Test Your Knowledge
Take Action
- In your practice site, navigate to Content and click on one of the modules you’ve created.
- At the top of the module, click on the prompt for you to “Add a description.”
- This will open the Brightspace Editor.
- Experiment with the tools:
- Minimize and expand the toolbar
- Make the editor full screen.
- Type in a web address, like “www.cuny.edu,” and see what happens.
- Try pasting content into the editor and then click on the Accessibility Checker.
Resources
Text
Brightspace Community: About Brightspace Editor
Brightspace Community: Use the Accessibility Checker on HTML-authored content
CUNY Brightspace Transition: Training and Resources
CUNY SPS Accessibility Toolkit
Video
Brightspace Tutorials: Using the Brightspace (HTML) Editor | Instructor