Video in an online course can potentially fulfill several aims. Instructor recordings provide a vital sense of presence and help personalize the learning experience, setting a strong foundation for future interactions with students. Besides being on camera, online courses often use video content from sources like YouTube, TED talks, or any number of resource sites.
In this unit you’ll find steps for working with video in Brightspace, specifically:
- Creating and managing video with Panopto (the SPS video platform)
- Uploading video created with Screenpal, Zoom, or another app to Panopto
- Adding video content from 3rd party sources like YouTube or Vimeo
- Using “Video Notes,” a Brightspace feature
- Captioning all video content in SPS courses
Glossary
Panopto Video
Panopto is CUNY SPS’s video hosting platform with great tools for creating and hosting video, plus fast video streaming on any device. Think of Panopto as YouTube for educators but without the distractions of advertisements and social media. Find more information at Panopto for SPS Faculty.
Embed Code
A block of HTML code that can be pasted into Brightspace to render a visual element, commonly sourced from a third-party site, like YouTube or Vimeo.
Video Notes
A tool on the Brightspace content editor that provides a quick way to record short, temporary video messages. Ideally used for ephemeral video messages.
Quick Tips
Create a video to welcome students on day one.
Add a personal welcome message or faculty introduction via video. Research has shown that cultivating a sense of instructor presence in the virtual classroom is associated with students participating more actively in the course.
Video production is a skill.
Like most skills, you get better with practice. Don’t let the perfect get in the way of the good. A video with mistakes still resonates, forming deeper connections.
Sound quality is more important than you think.
Your audience won’t watch a video with bad audio. Always record in a quiet space and use a USB microphone, if possible.
Video Support
Faculty teaching a class at SPS may request production support from the OFDIT Media Studio, a professional recording space ready to produce instructional content. The Studio is staffed with a small team ready to provide full-service audio and video support. Visit the OFDIT Media Studio page for details.
How to
Create a Panopto Portal on Brightspace
Panopto is integrated directly into Brightspace, making it easy to access and create video content for your courses. Faculty can record videos, create playlists, and measure viewer engagement via user analytics and in-video quizzing. For more information on creating, accessing, or uploading videos to Panopto visit the Panopto for SPS Faculty page.
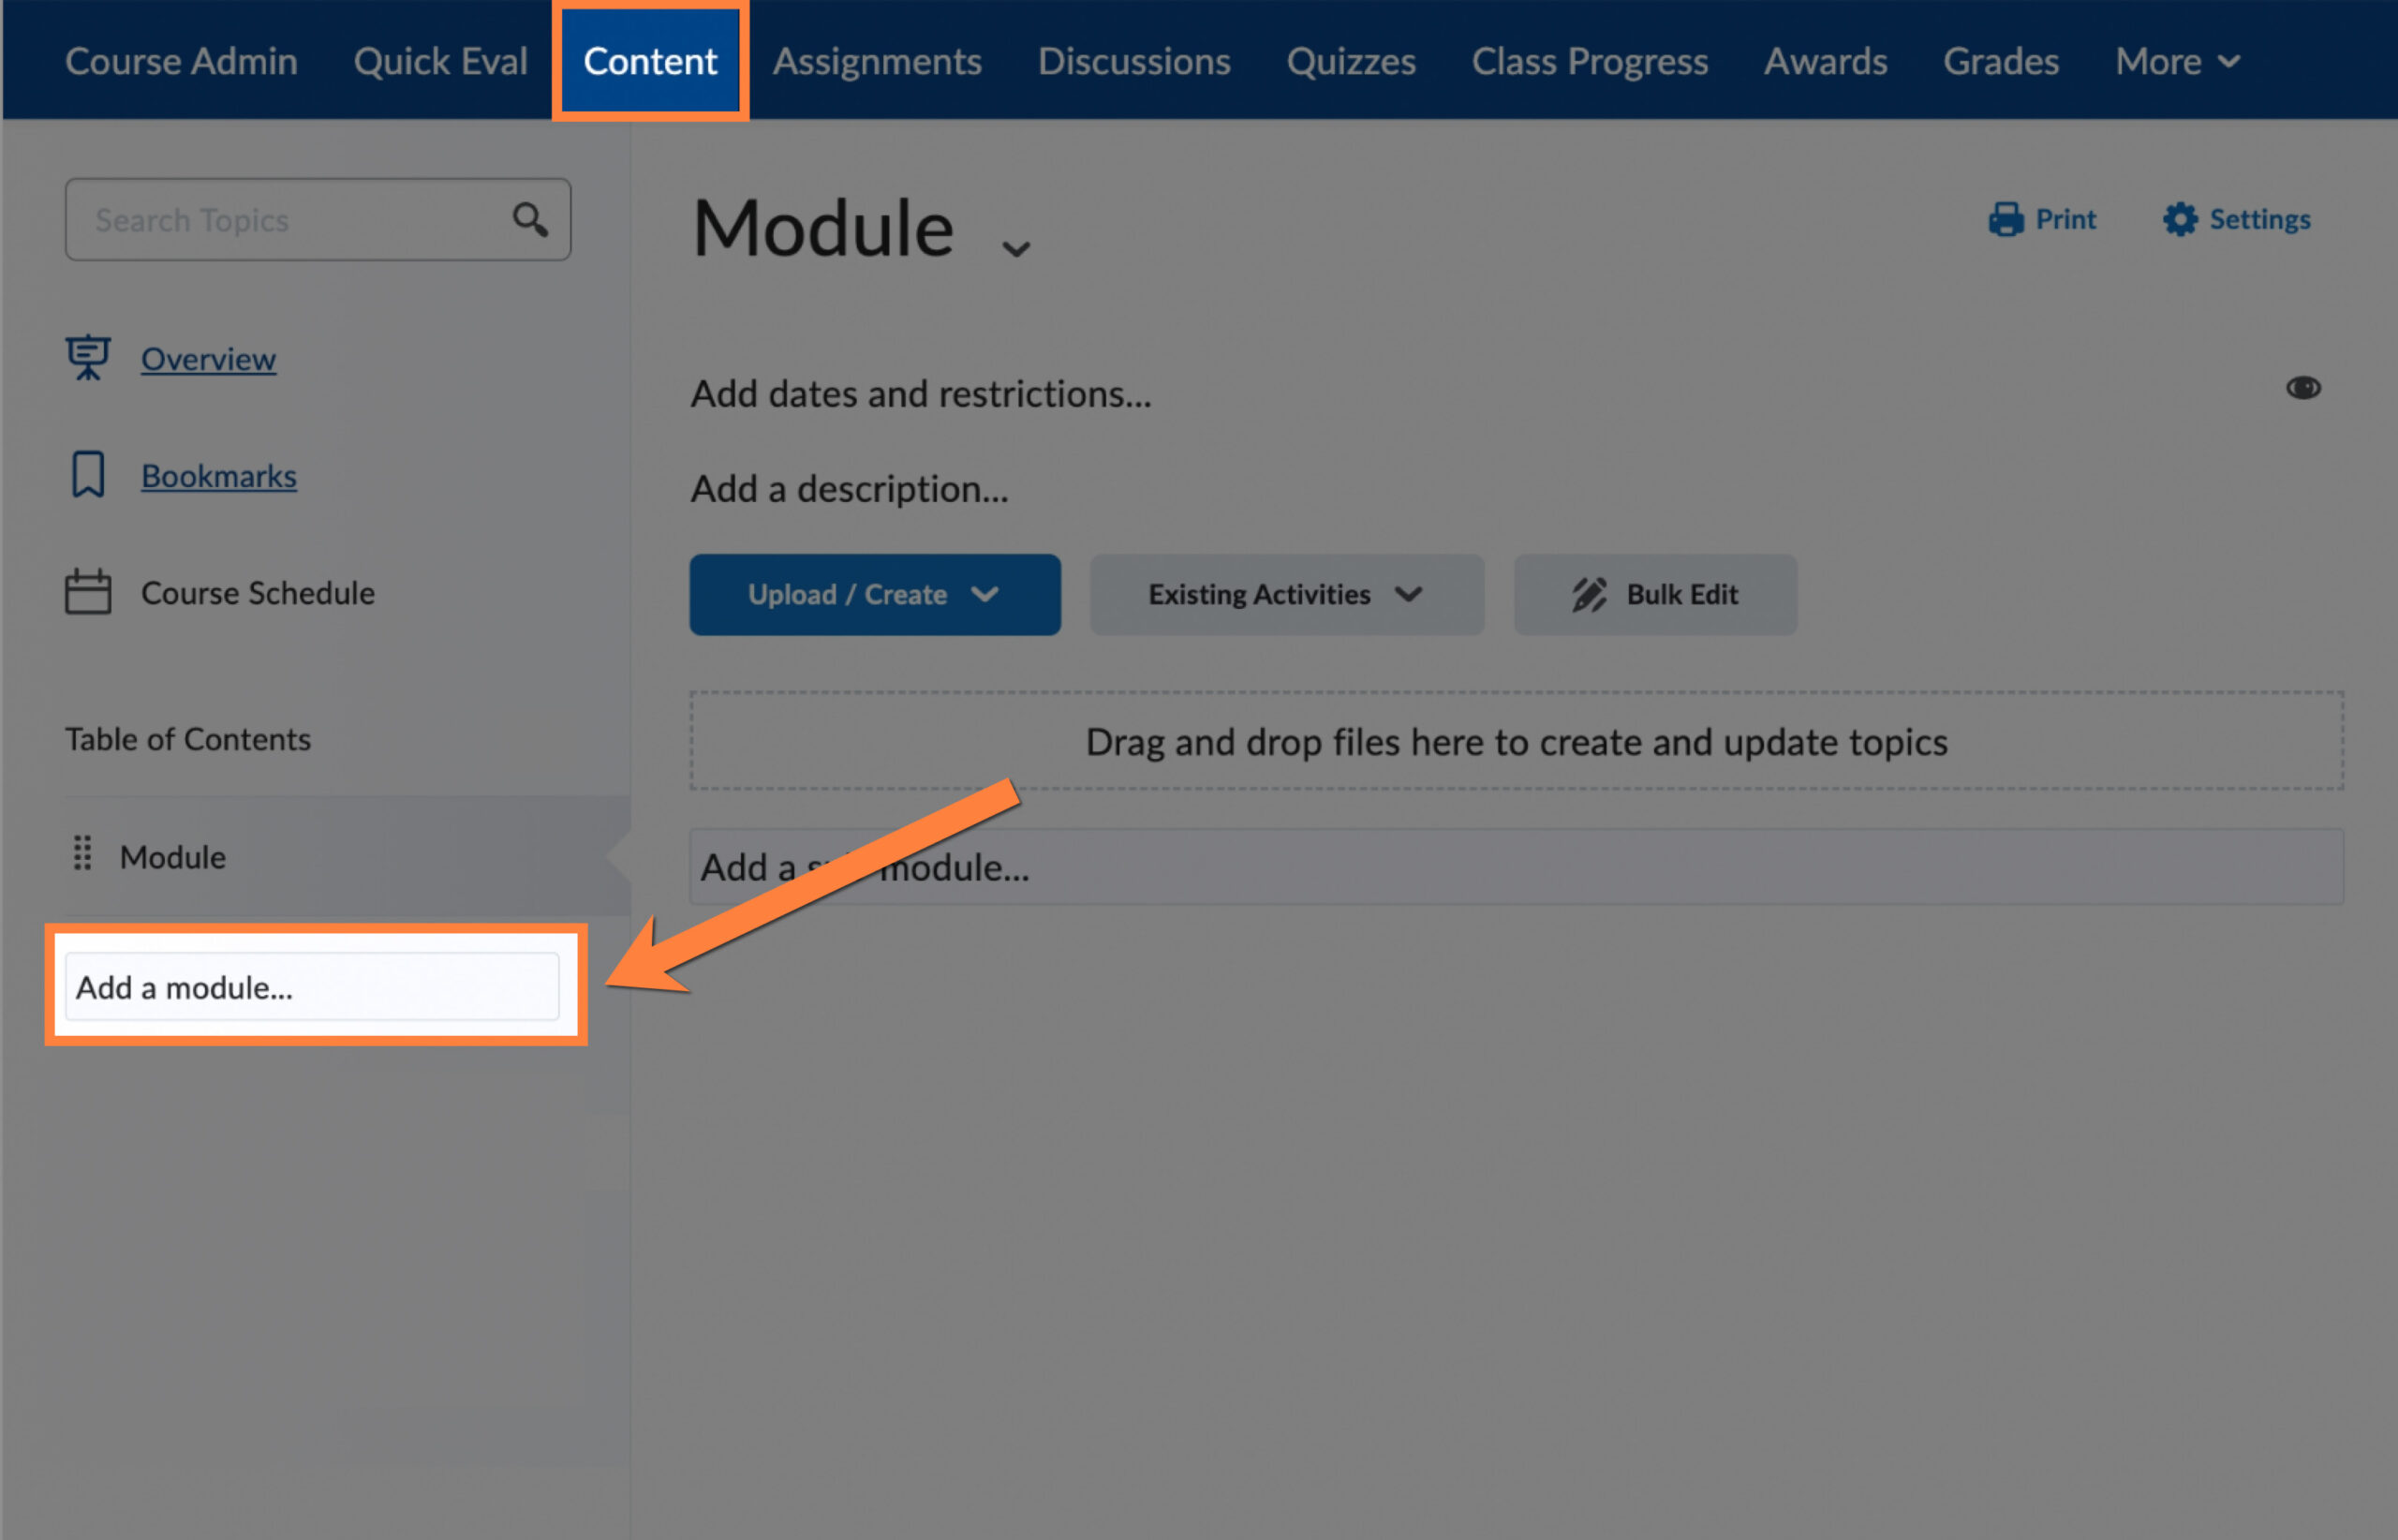
- Add a new module and name it Panopto (or another name, as you see fit)
- Click on Existing Activities.
- Click on External Learning Tools.
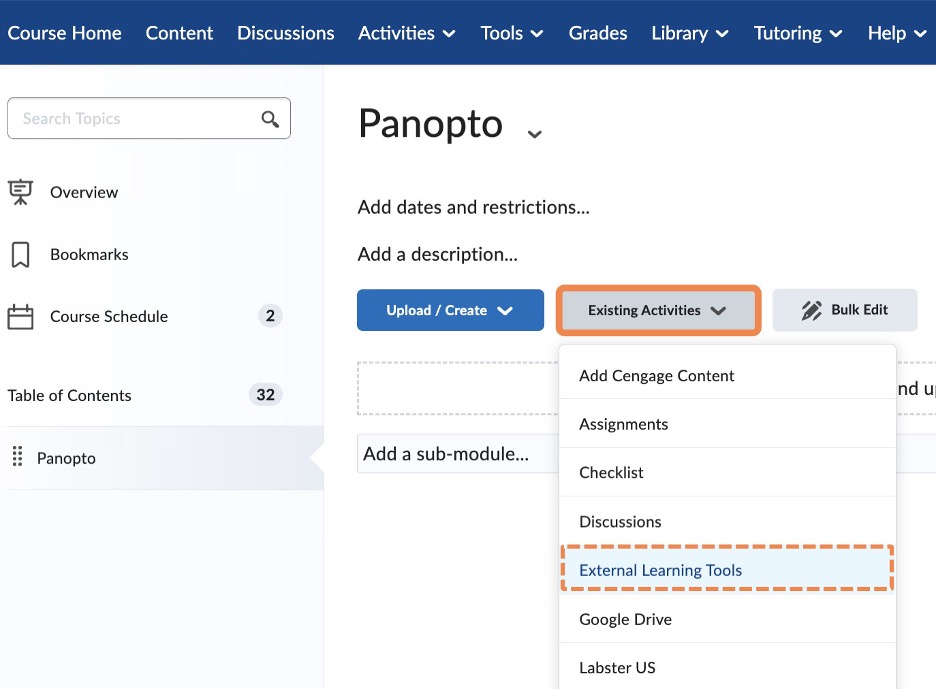
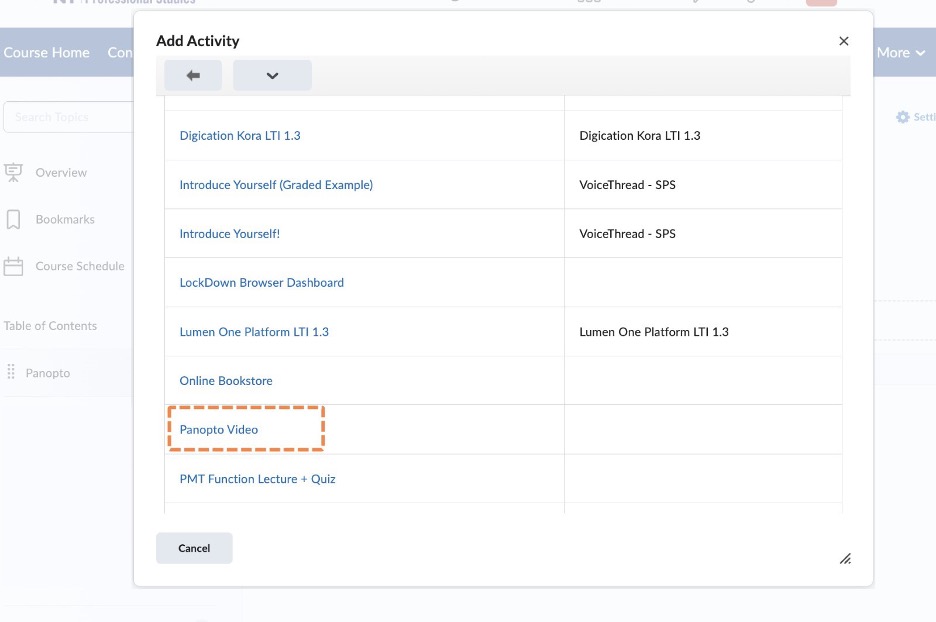
- Select Panopto Video. This will add a new Content Topic to the bottom of the module.
- Optional: You can adjust the visibility of the module so that it is hidden from students.
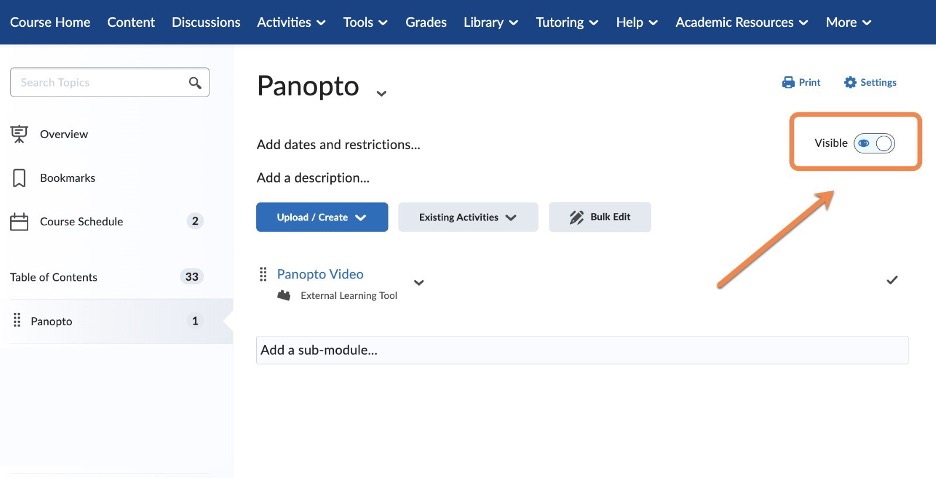
Clicking on the newly added topic will launch Panopto, where you’ll find the following:
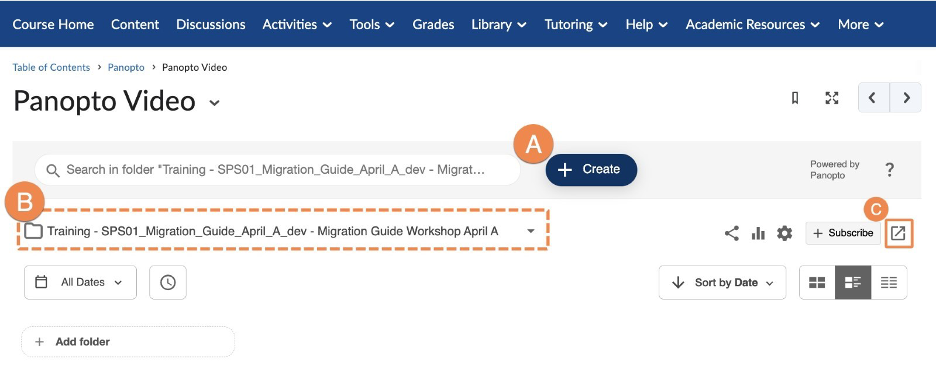
- Create button: Use this to make a new recording or upload a video.
- Course Folder: Videos in this folder are viewable by your students.
- Launch Panopto: This opens the full Panopto site in a new window.
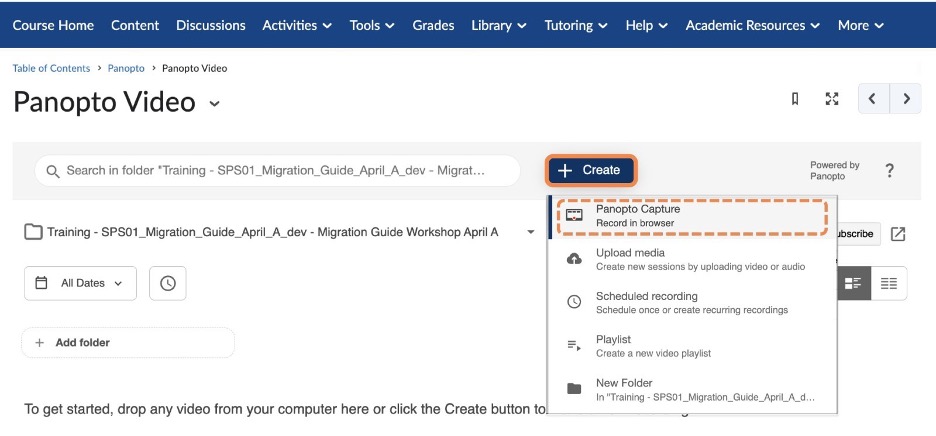
Create Video with Panopto
When ready to create a video, click the Create button and select Panopto Capture. Here is an article on using Panopto Capture (a screen and webcam video recording tool).
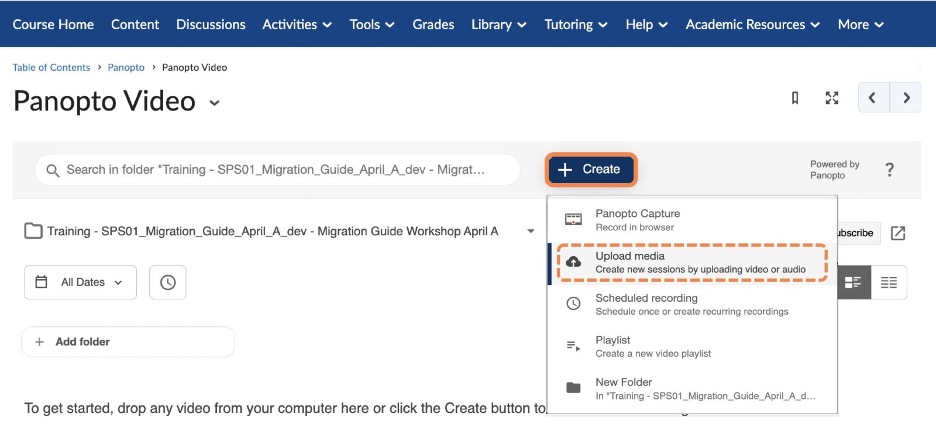
Upload Video with Panopto
If you created a video outside of Panopto (ex. by using ScreenPal, Zoom, etc.), you can upload the video file to Panopto. Click the Create button and select Upload Media. Here are detailed steps for uploading video.
Add Panopto Video to Brightspace using the Content Editor
The Brightspace content editor is the toolbar you see when creating content topics, module descriptions, announcements, discussion threads, etc. Anywhere you see the content editor you have the option of adding a Panopto video.
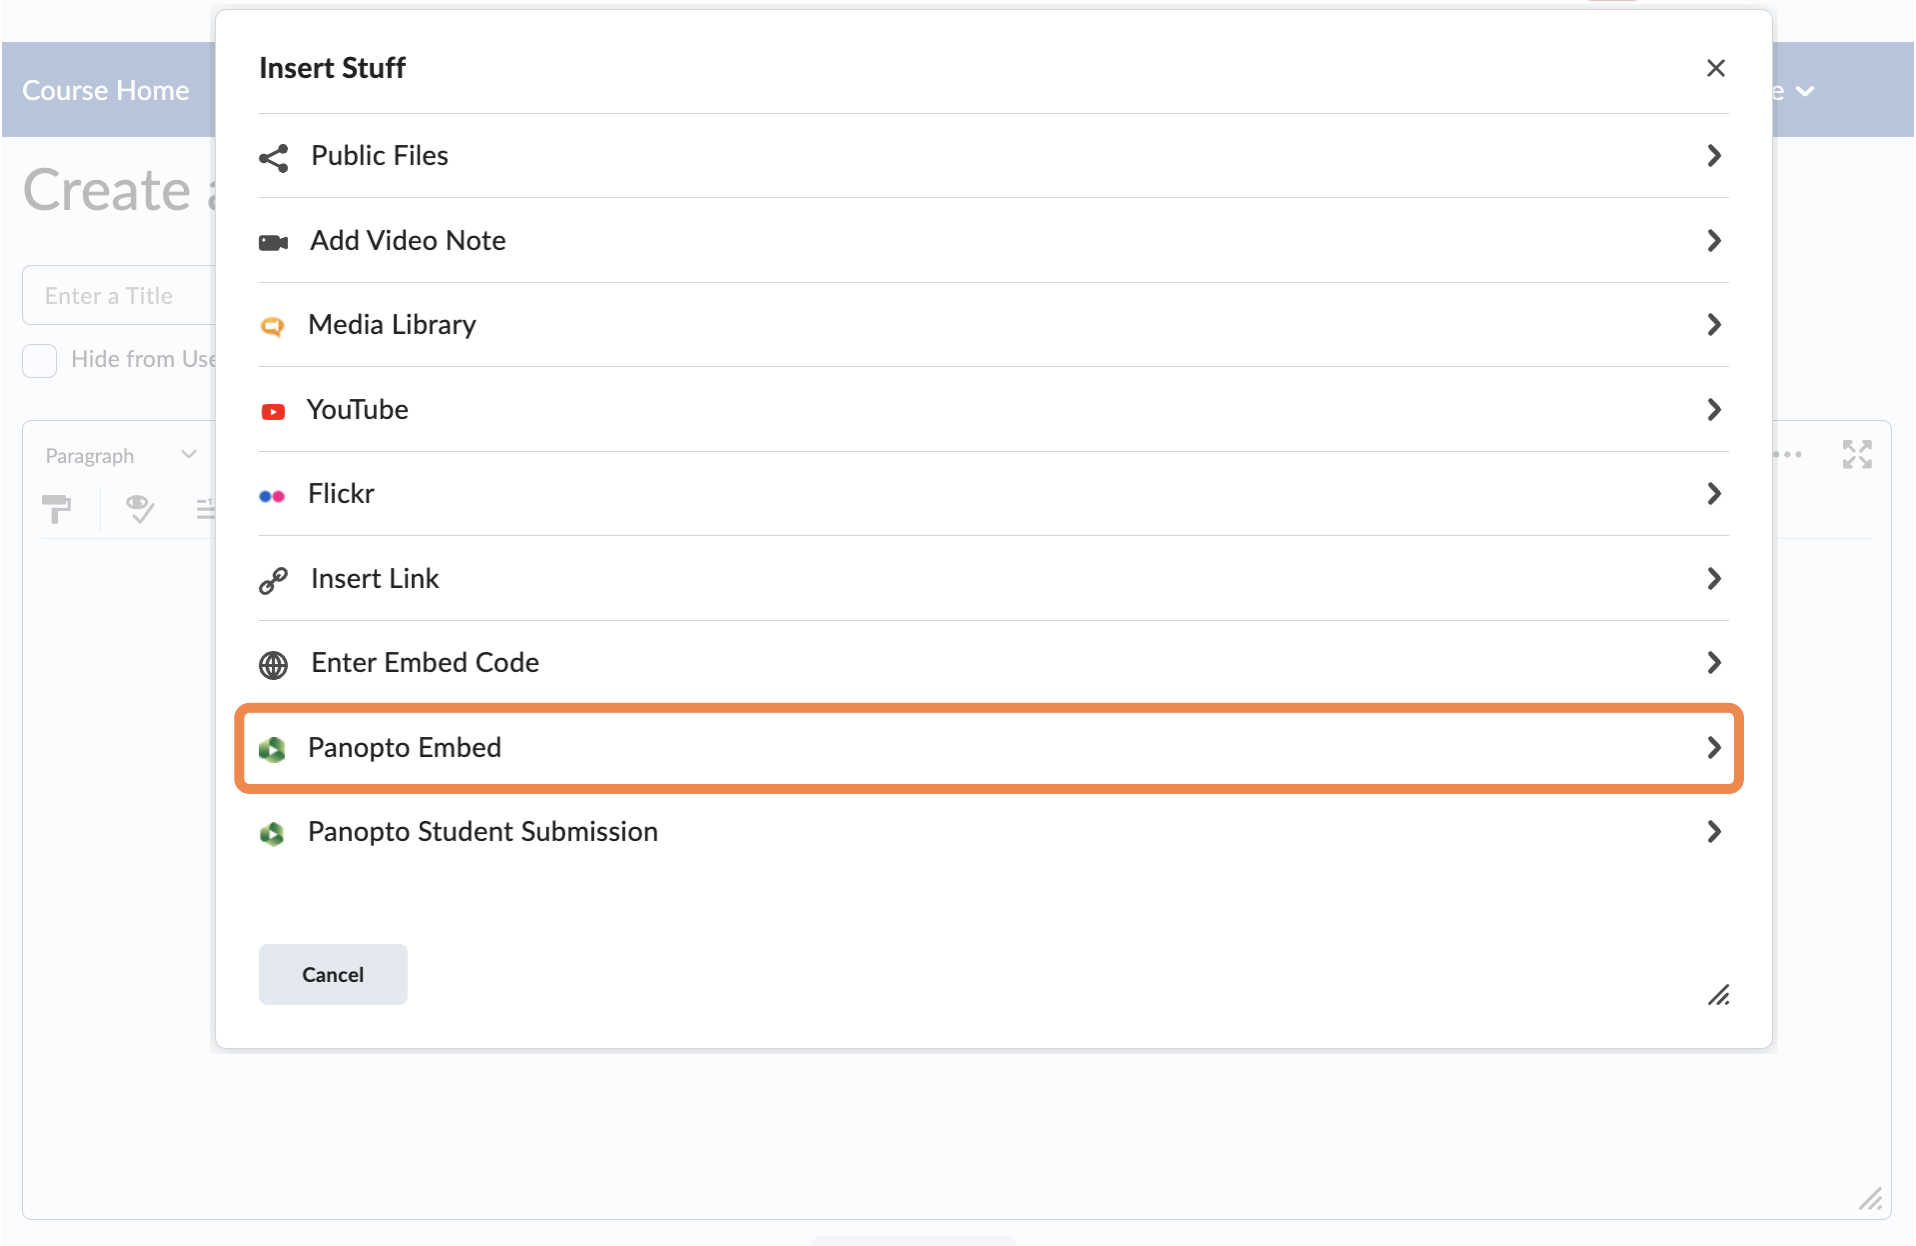
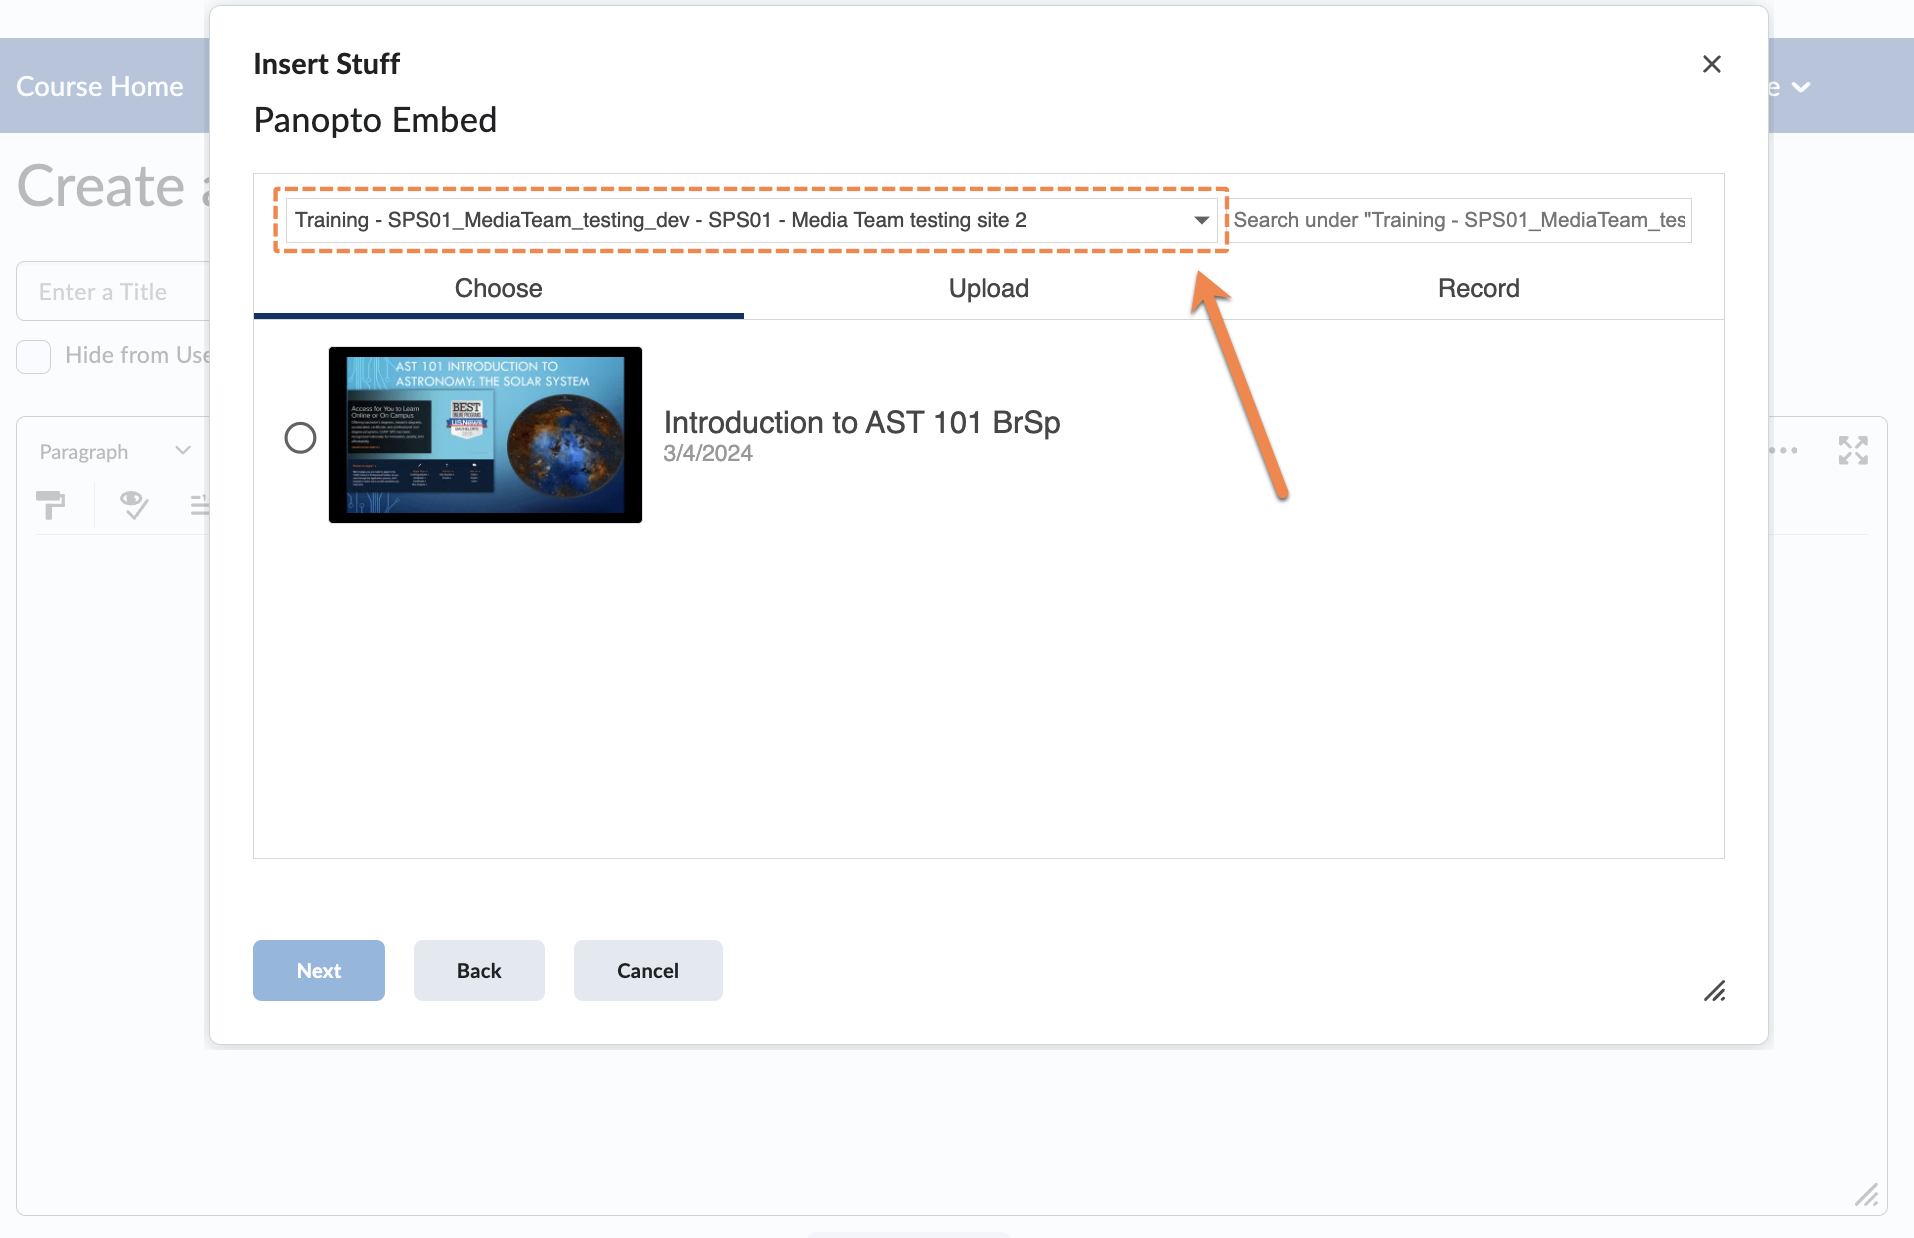
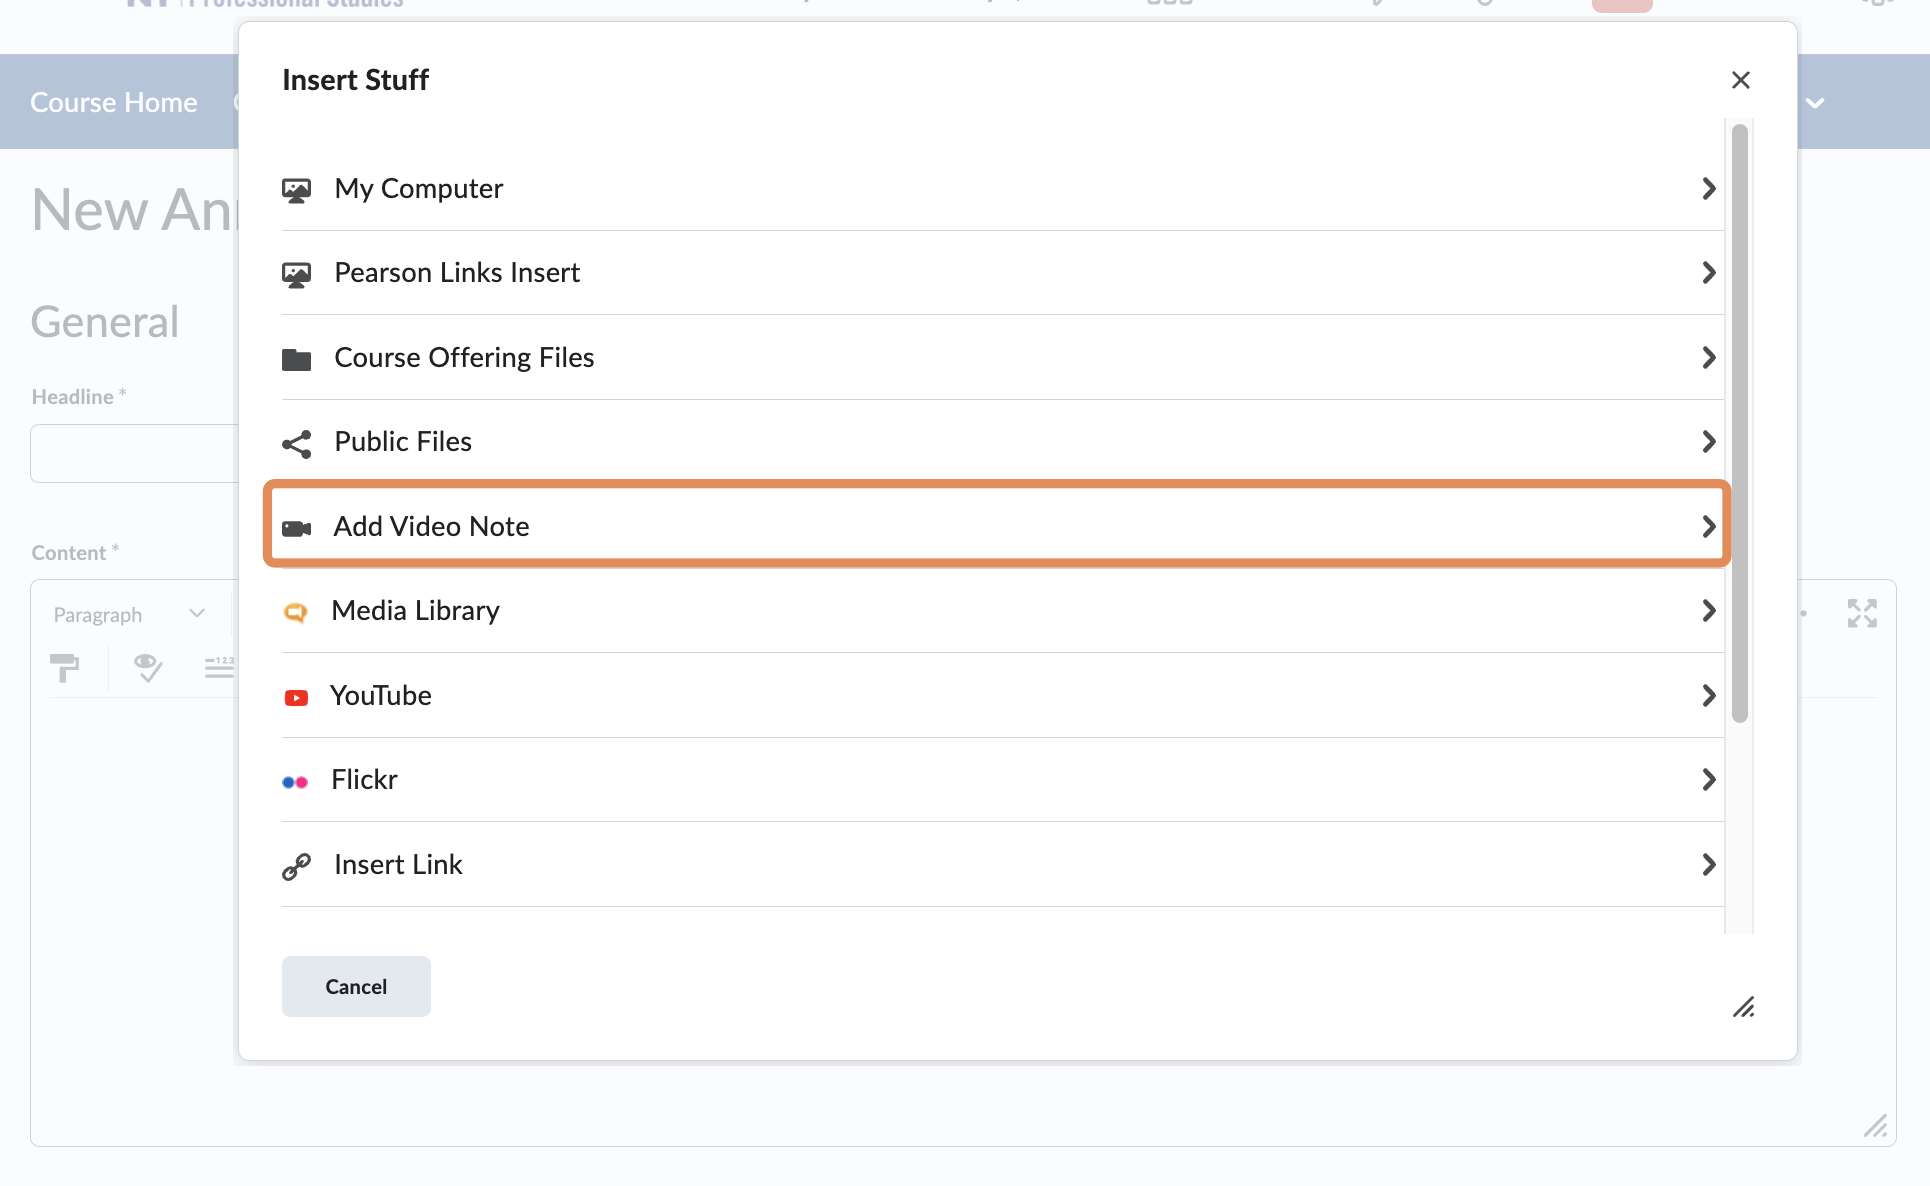
- To start, navigate to where you want to add the video. From the content editor select the Insert Stuff icon.

- From the Insert Stuff menu, select Panopto Embed.
- On the following screen, you’ll see videos saved to your course folder in Panopto. If you don’t see the video you’d like to add, try navigating to another Panopto folder by selecting the drop-down menu to switch folders.
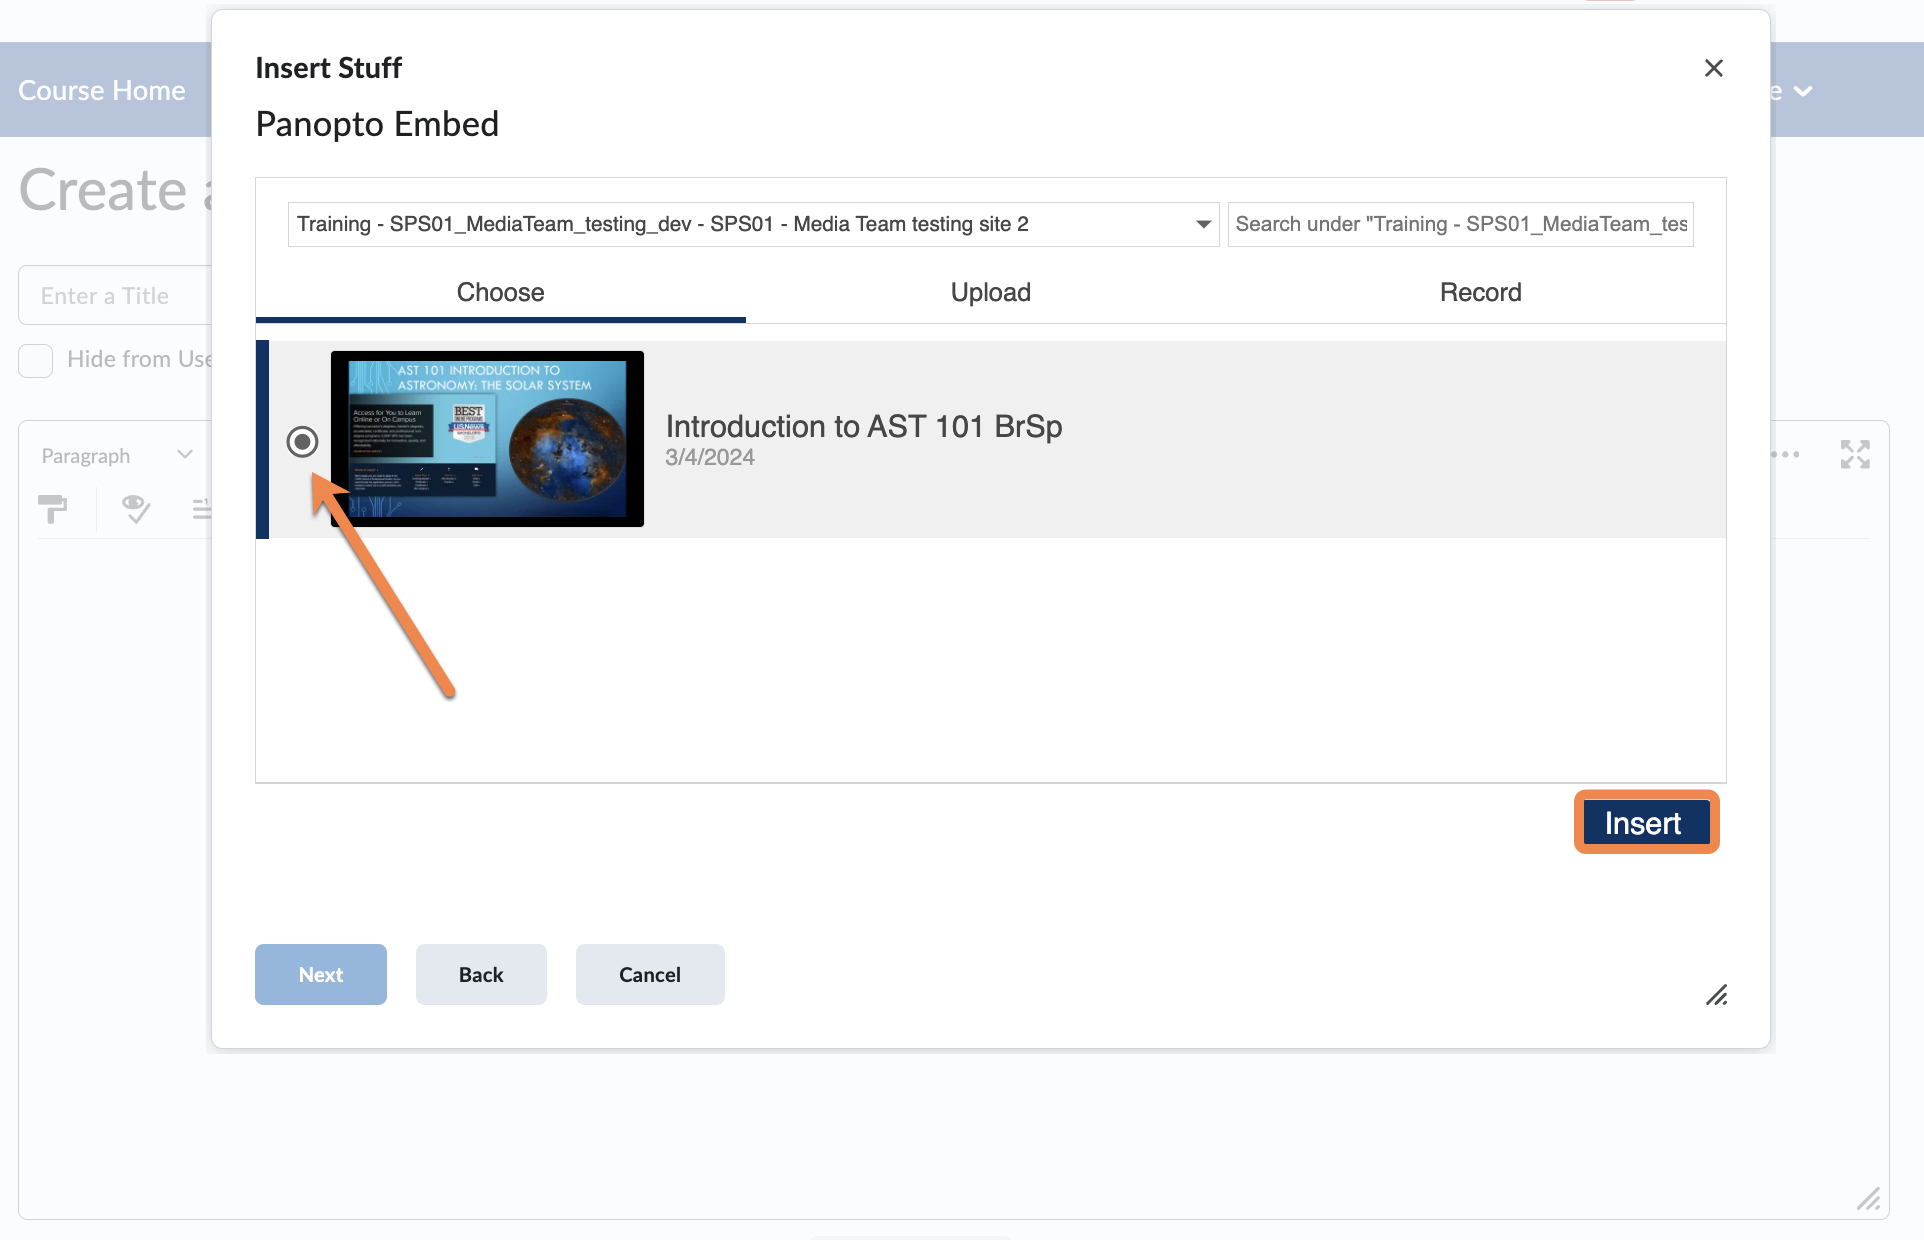
- When you’ve located the video you’d like to add, click on the video and then click Insert.
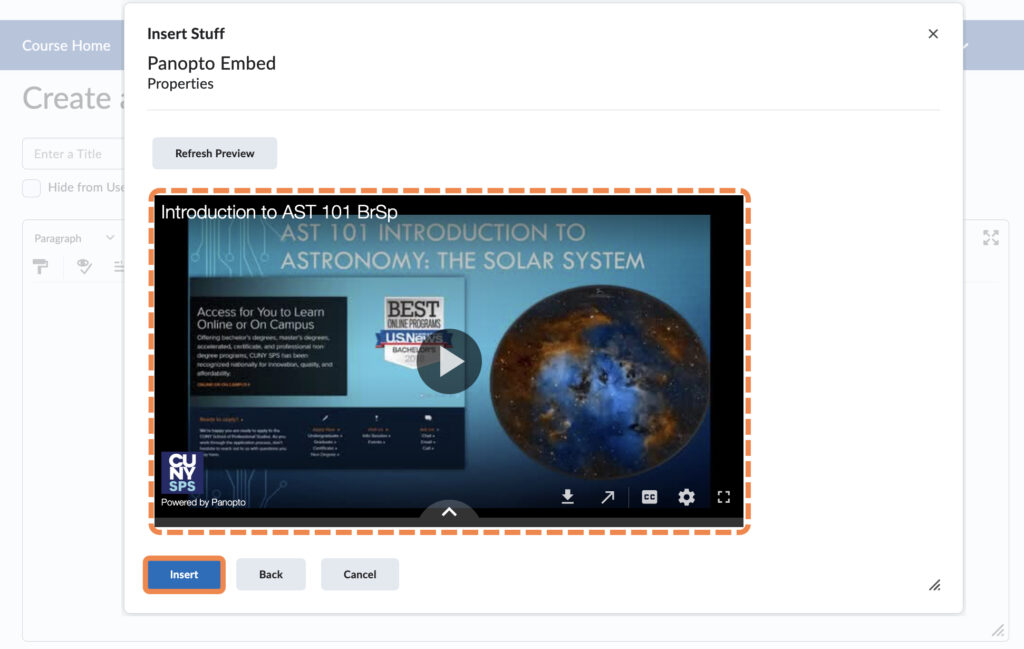
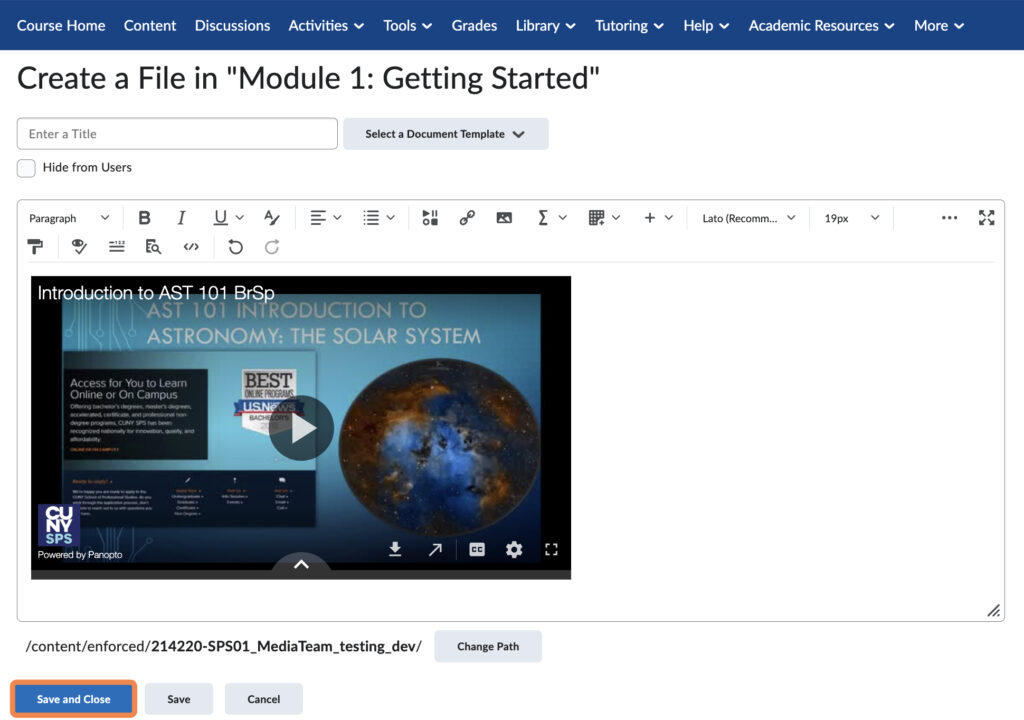
- You’ll see a screen with a preview window of the video; click Insert again. When ready, be sure to click Save and Close to finish adding the video.
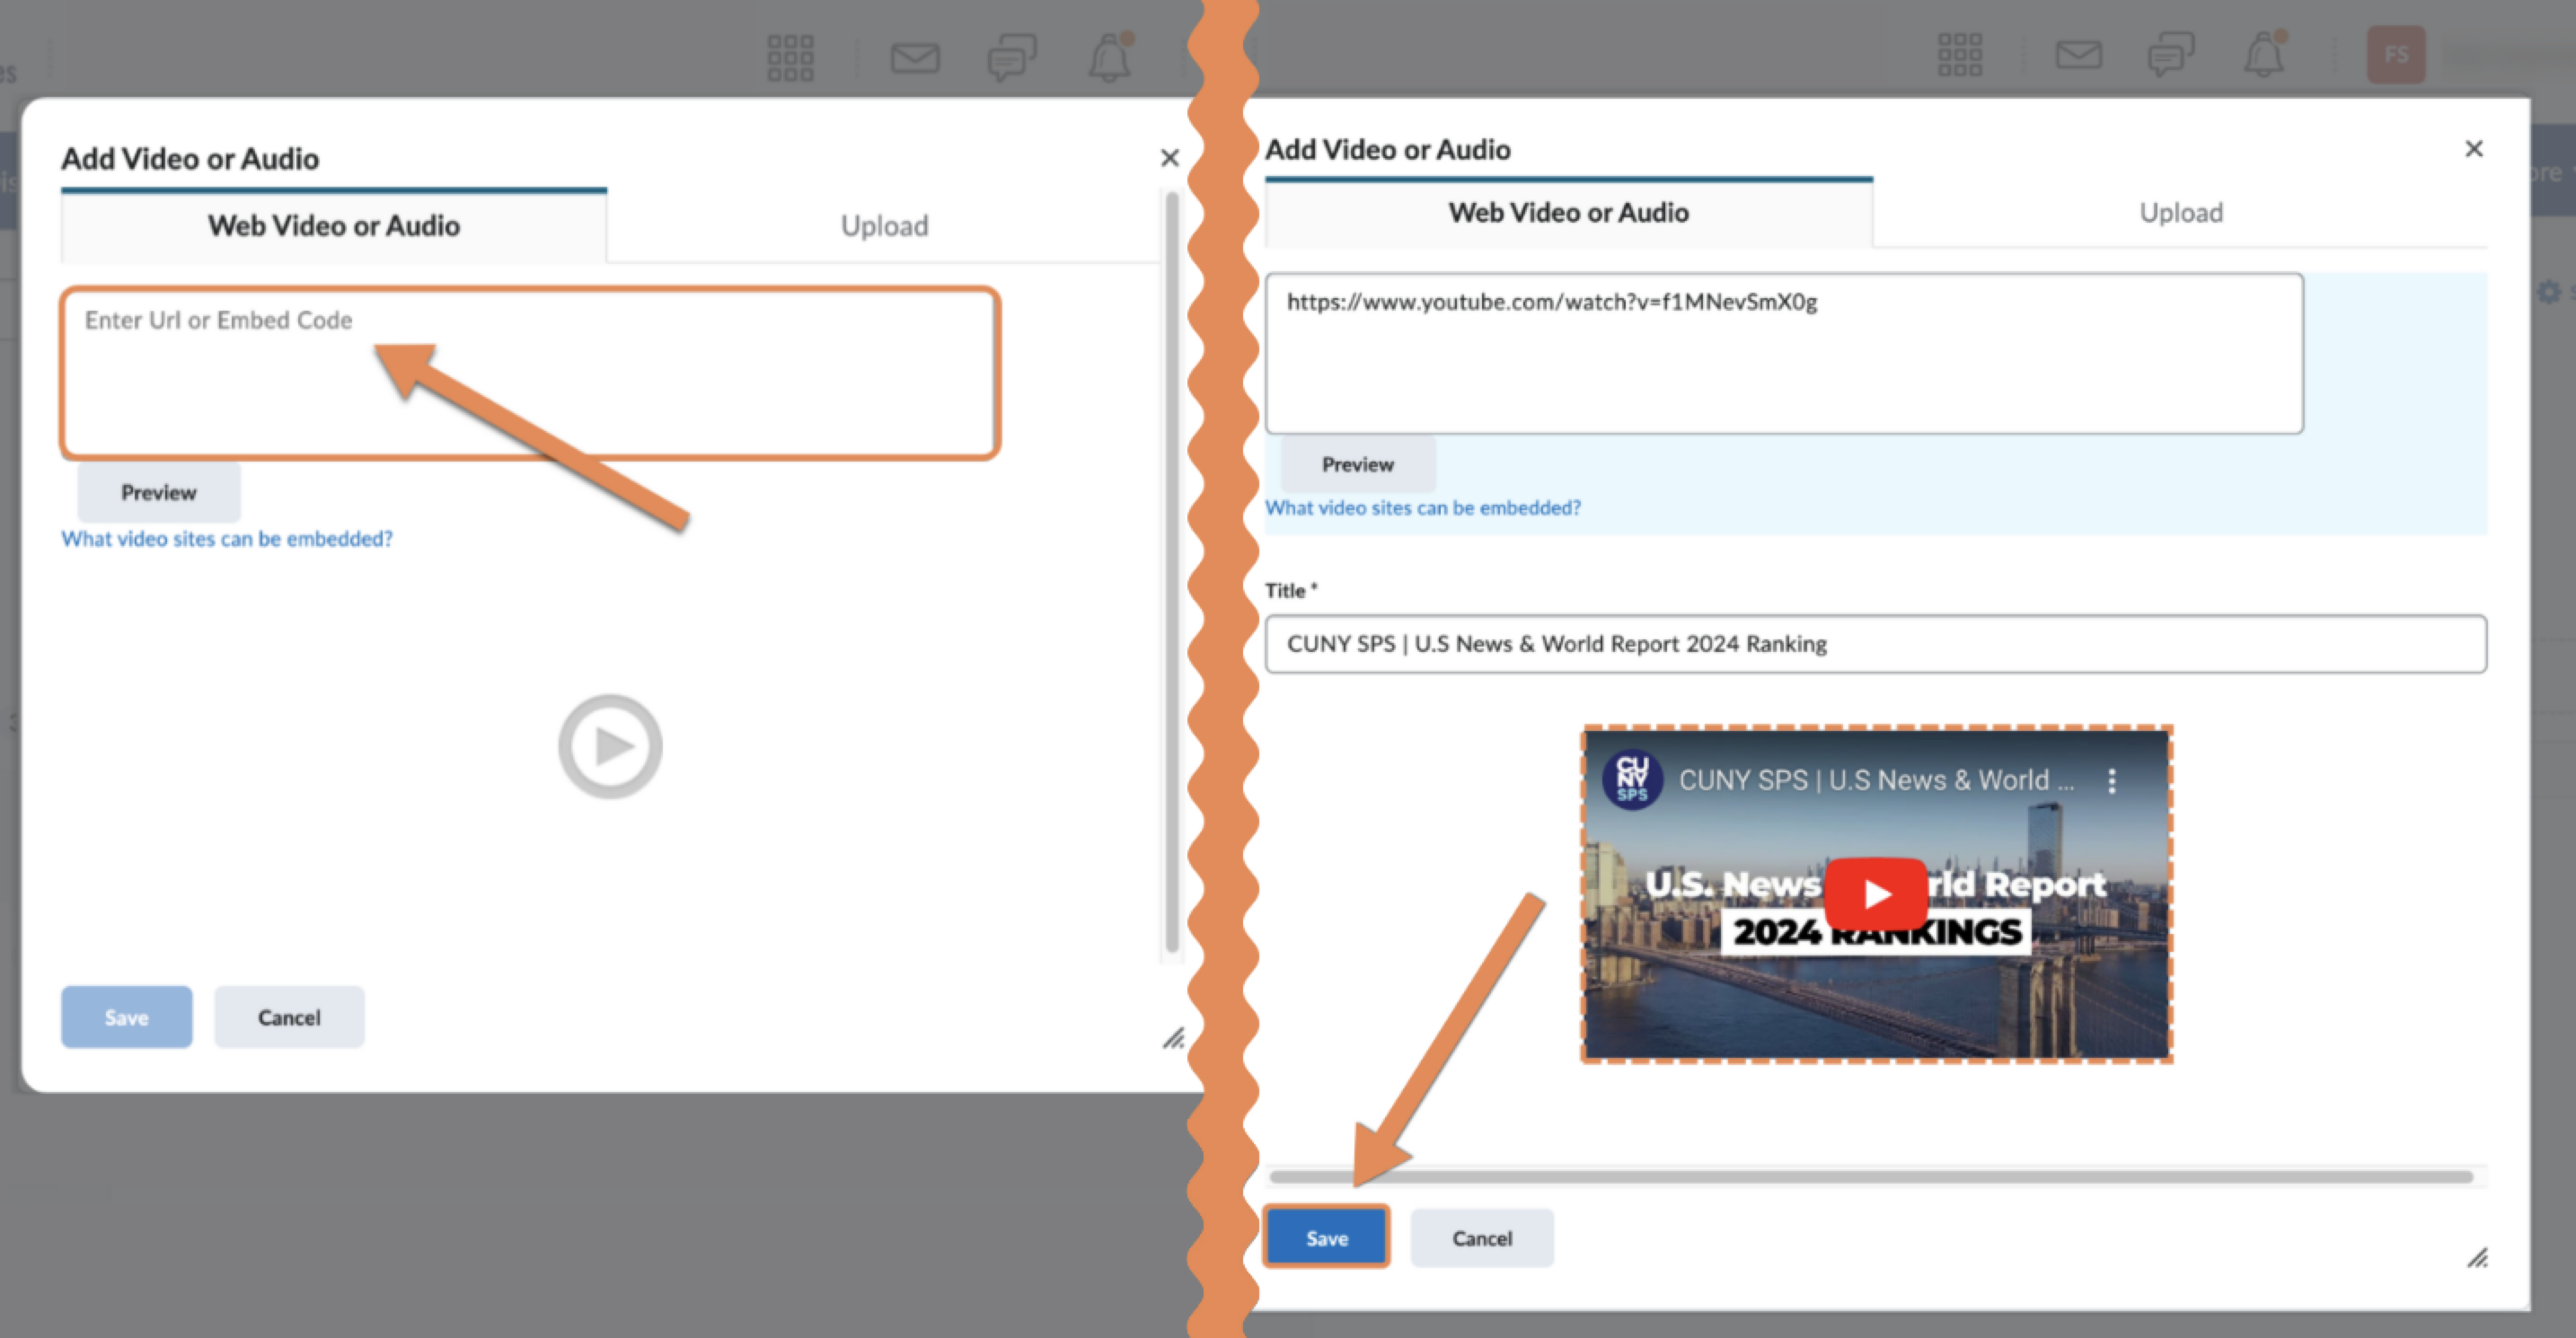
Add Video only from YouTube/Vimeo using “Video or Audio”
This is the quickest way to add an external video to a module. However, this method of adding content only displays video. Additional items (text headings, attachments, etc.) will not accompany the video when using this method.
- From a content module, click the Upload/Create button and select Video or Audio
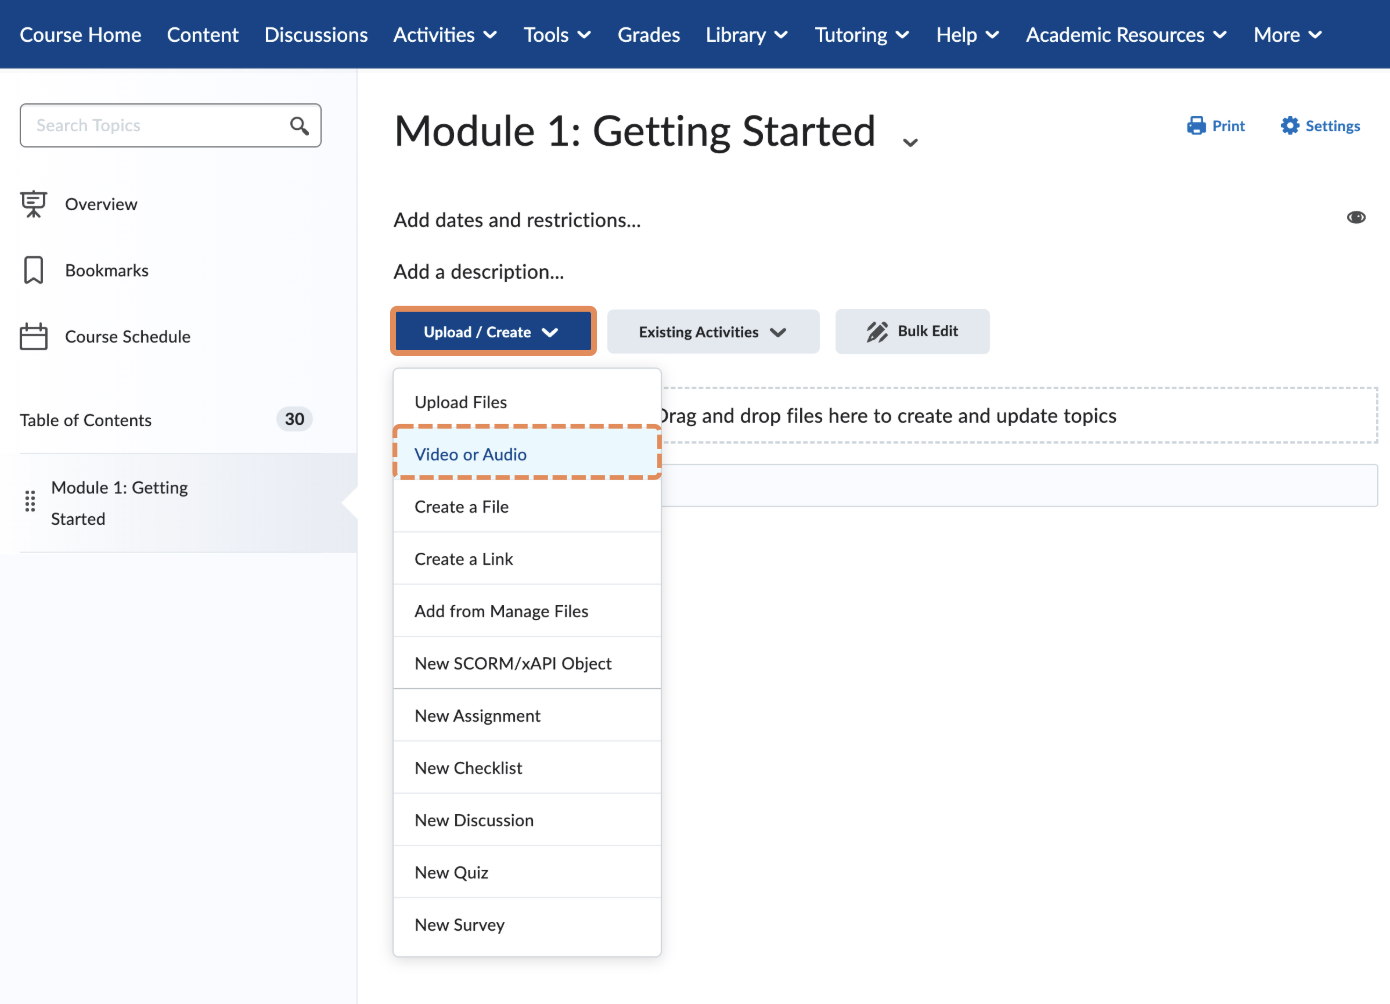
- Paste the video’s URL (or embed code). You will see a preview of the video appear. Click Save to add the video.
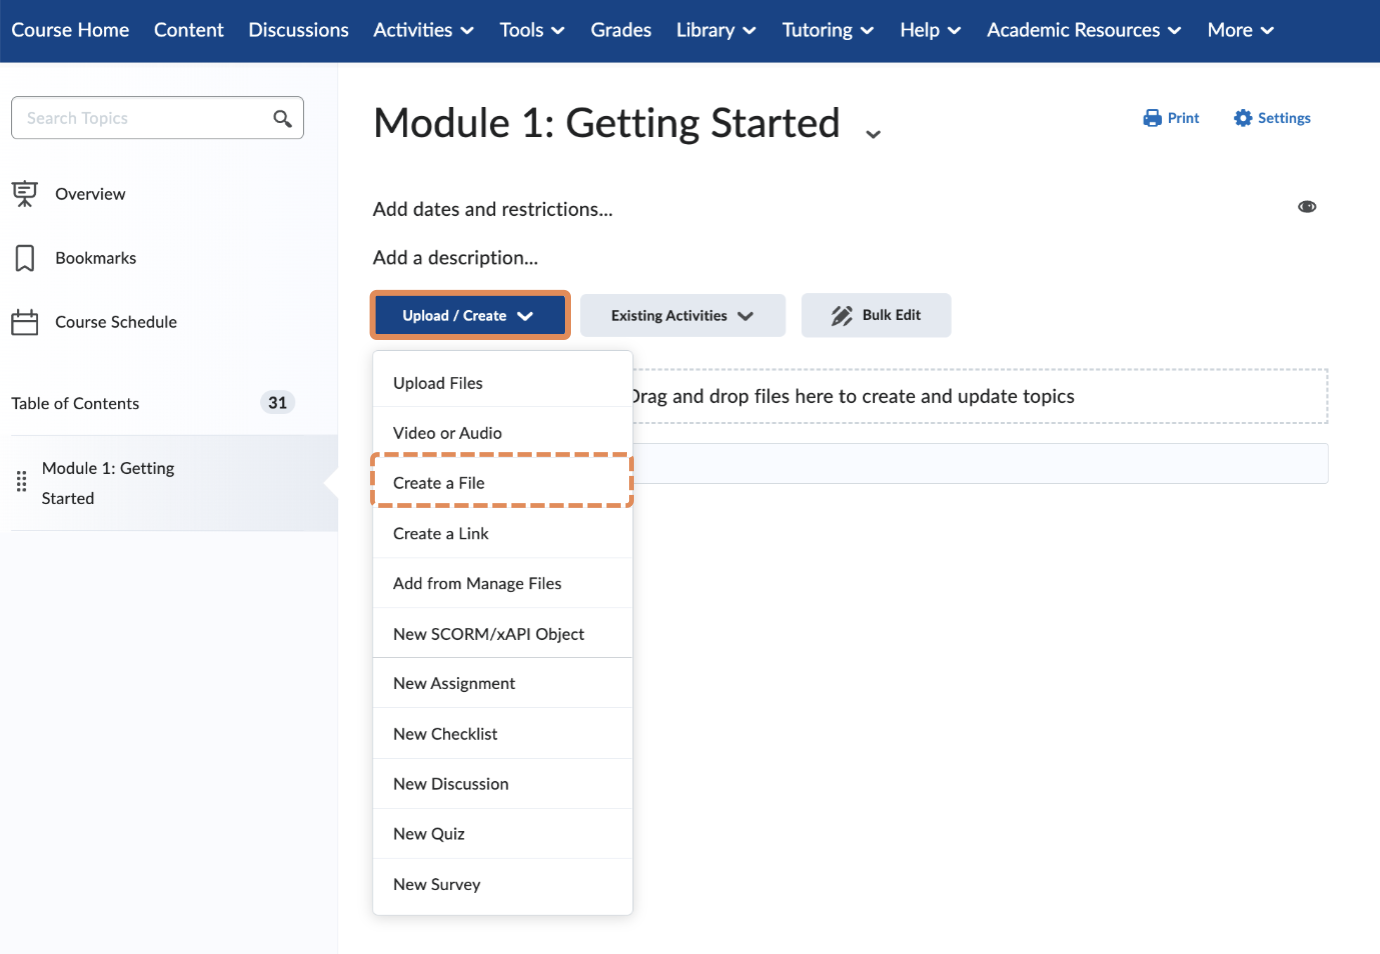
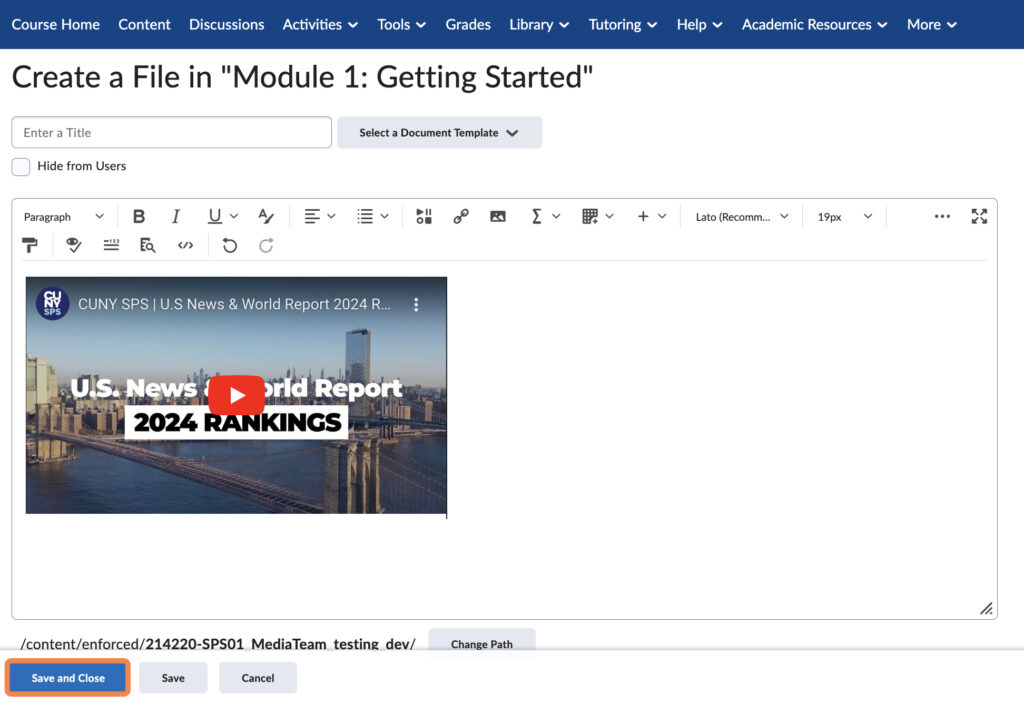
Embed YouTube/Vimeo with Code using “Create a File”
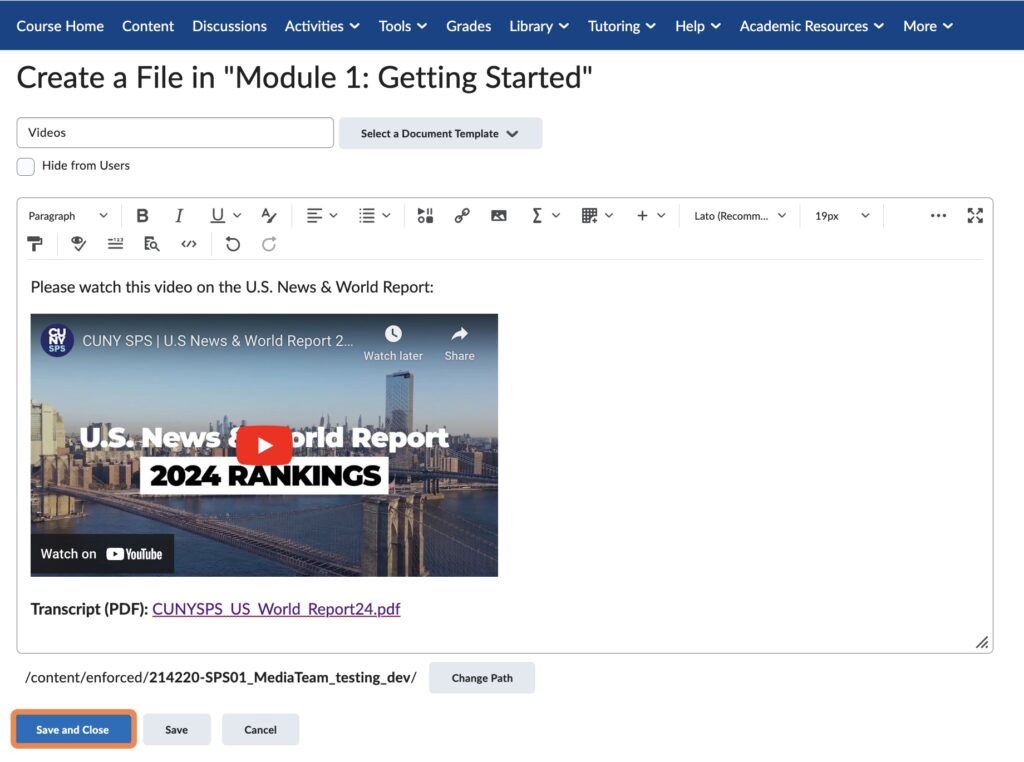
Embedding a YouTube, Vimeo, or external video with the Create a File feature allows you to accompany the video with additional text and attachments within the topic.
- From a content module, click the Upload/Create button and select Create a File.
- Click the Insert Stuff icon on the content editor, followed by the Enter Embed Code option.
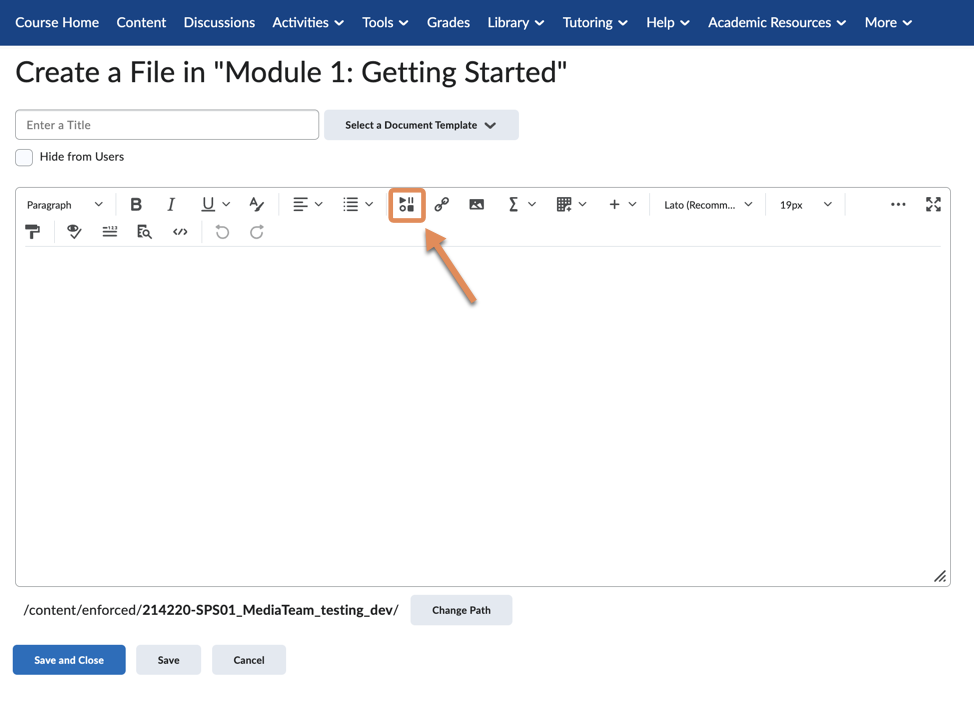
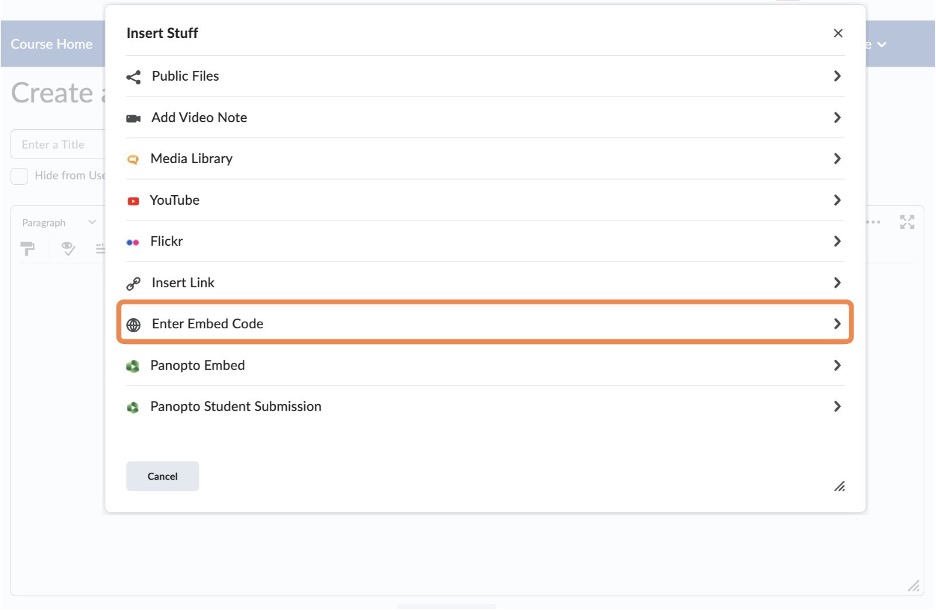
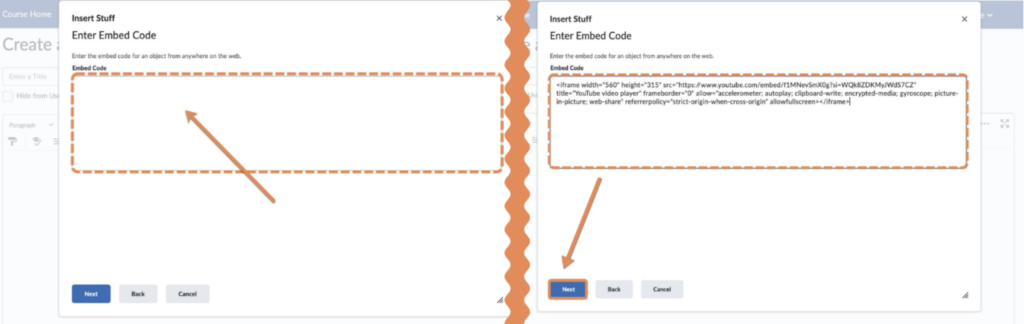
- Copy the embed code from the video’s hosting site (ex. YouTube/Vimeo).
- Paste the video’s embed code and click Next.
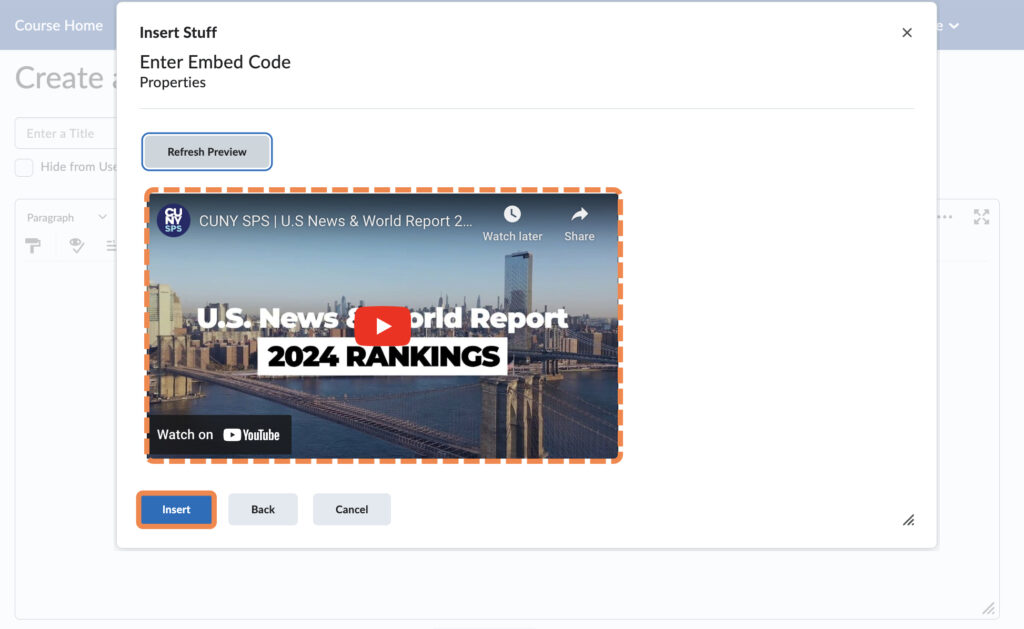
- You’ll see a screen with a preview window of the video; click Insert again. When ready, be sure to click Save and Close to finish adding the video.
Embed YouTube Videos with the “YouTube” Search Feature
You can search for a YouTube video on Brightspace. Please note, if you have the direct URL to the video, you must use the “Video or Audio” feature described above to add the YouTube video to your course.
- From a content module, click the Upload/Create button and select Create a File.
- Click the Insert Stuff icon on the content editor, followed by the YouTube option.
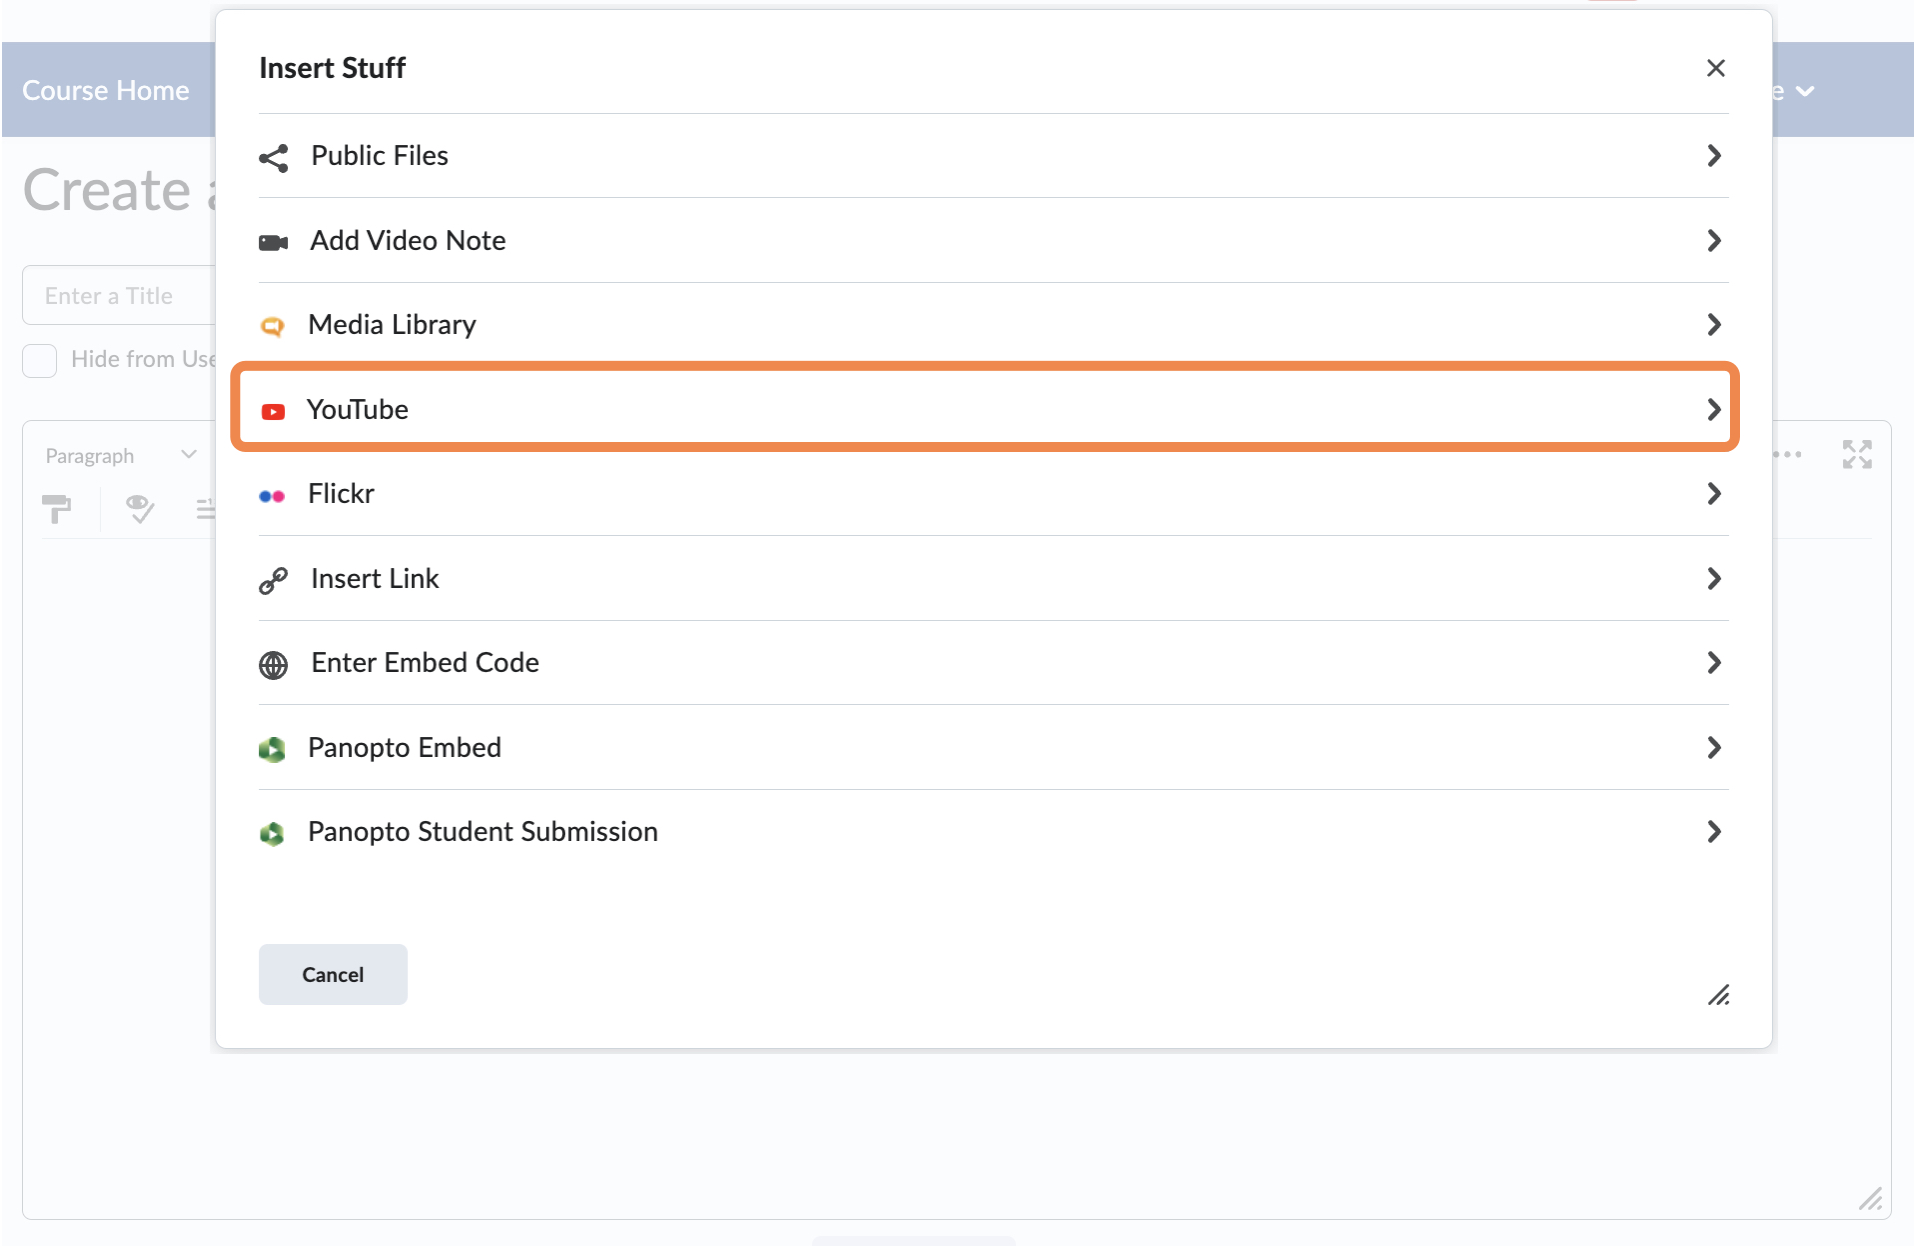
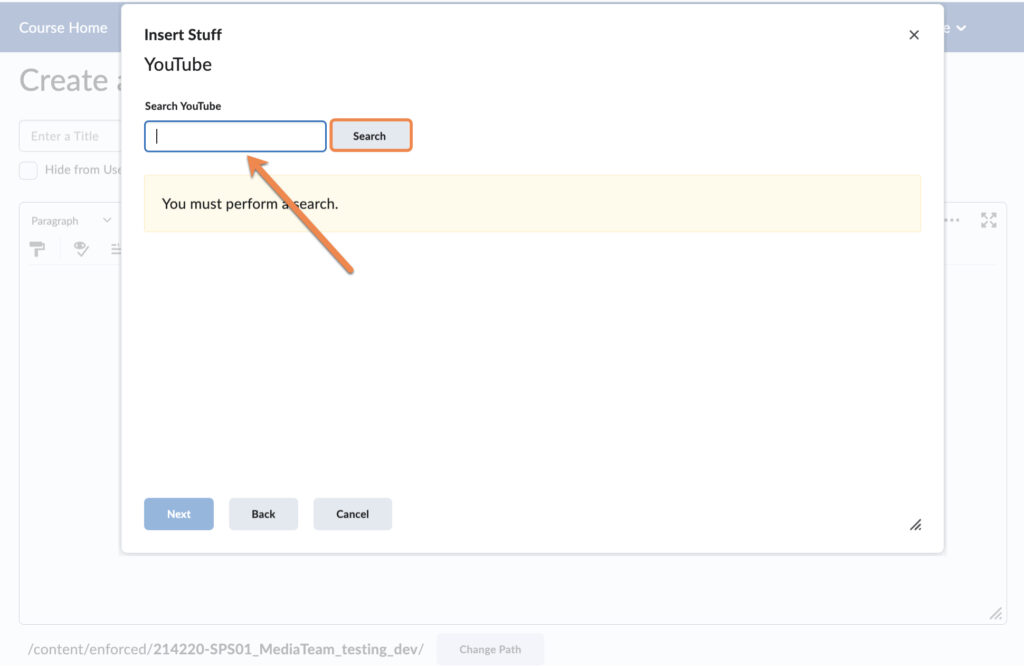
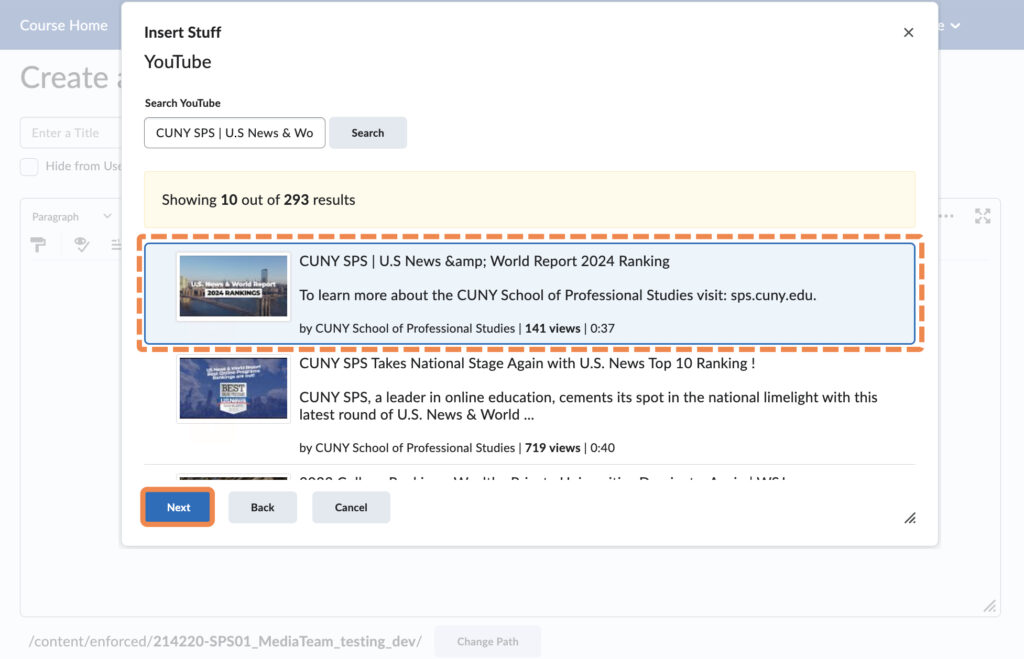
- Enter the keywords for your desired YouTube video in the Search YouTube bar and select Search. Once you have found the desired video from the results, select the video and click Next.
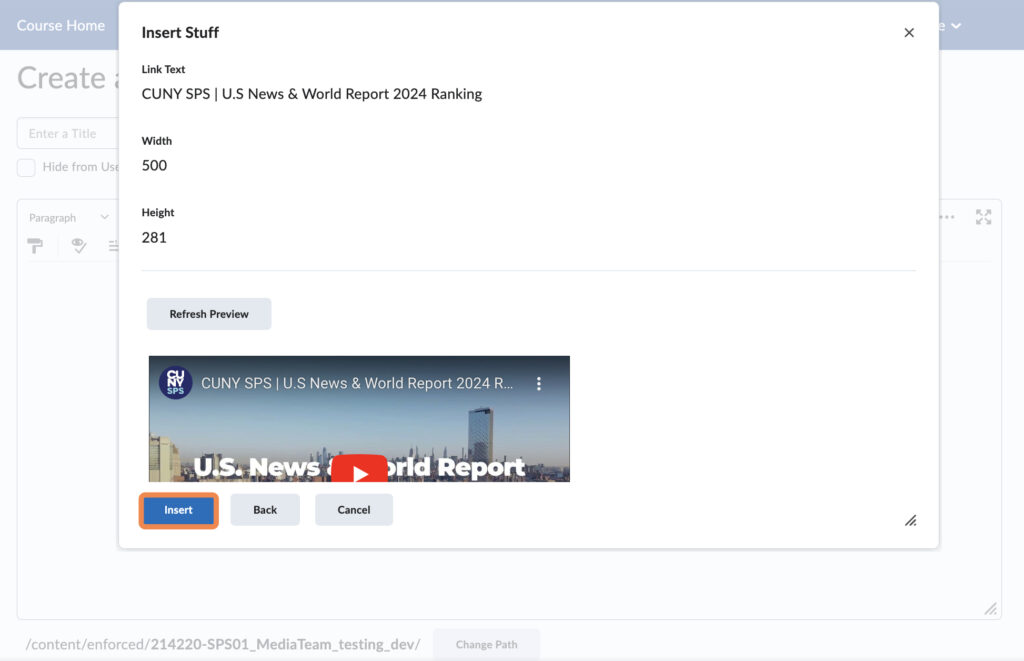
- You will see a preview of the video. Click Insert to add it. When ready, be sure to click Save and Close to finish.
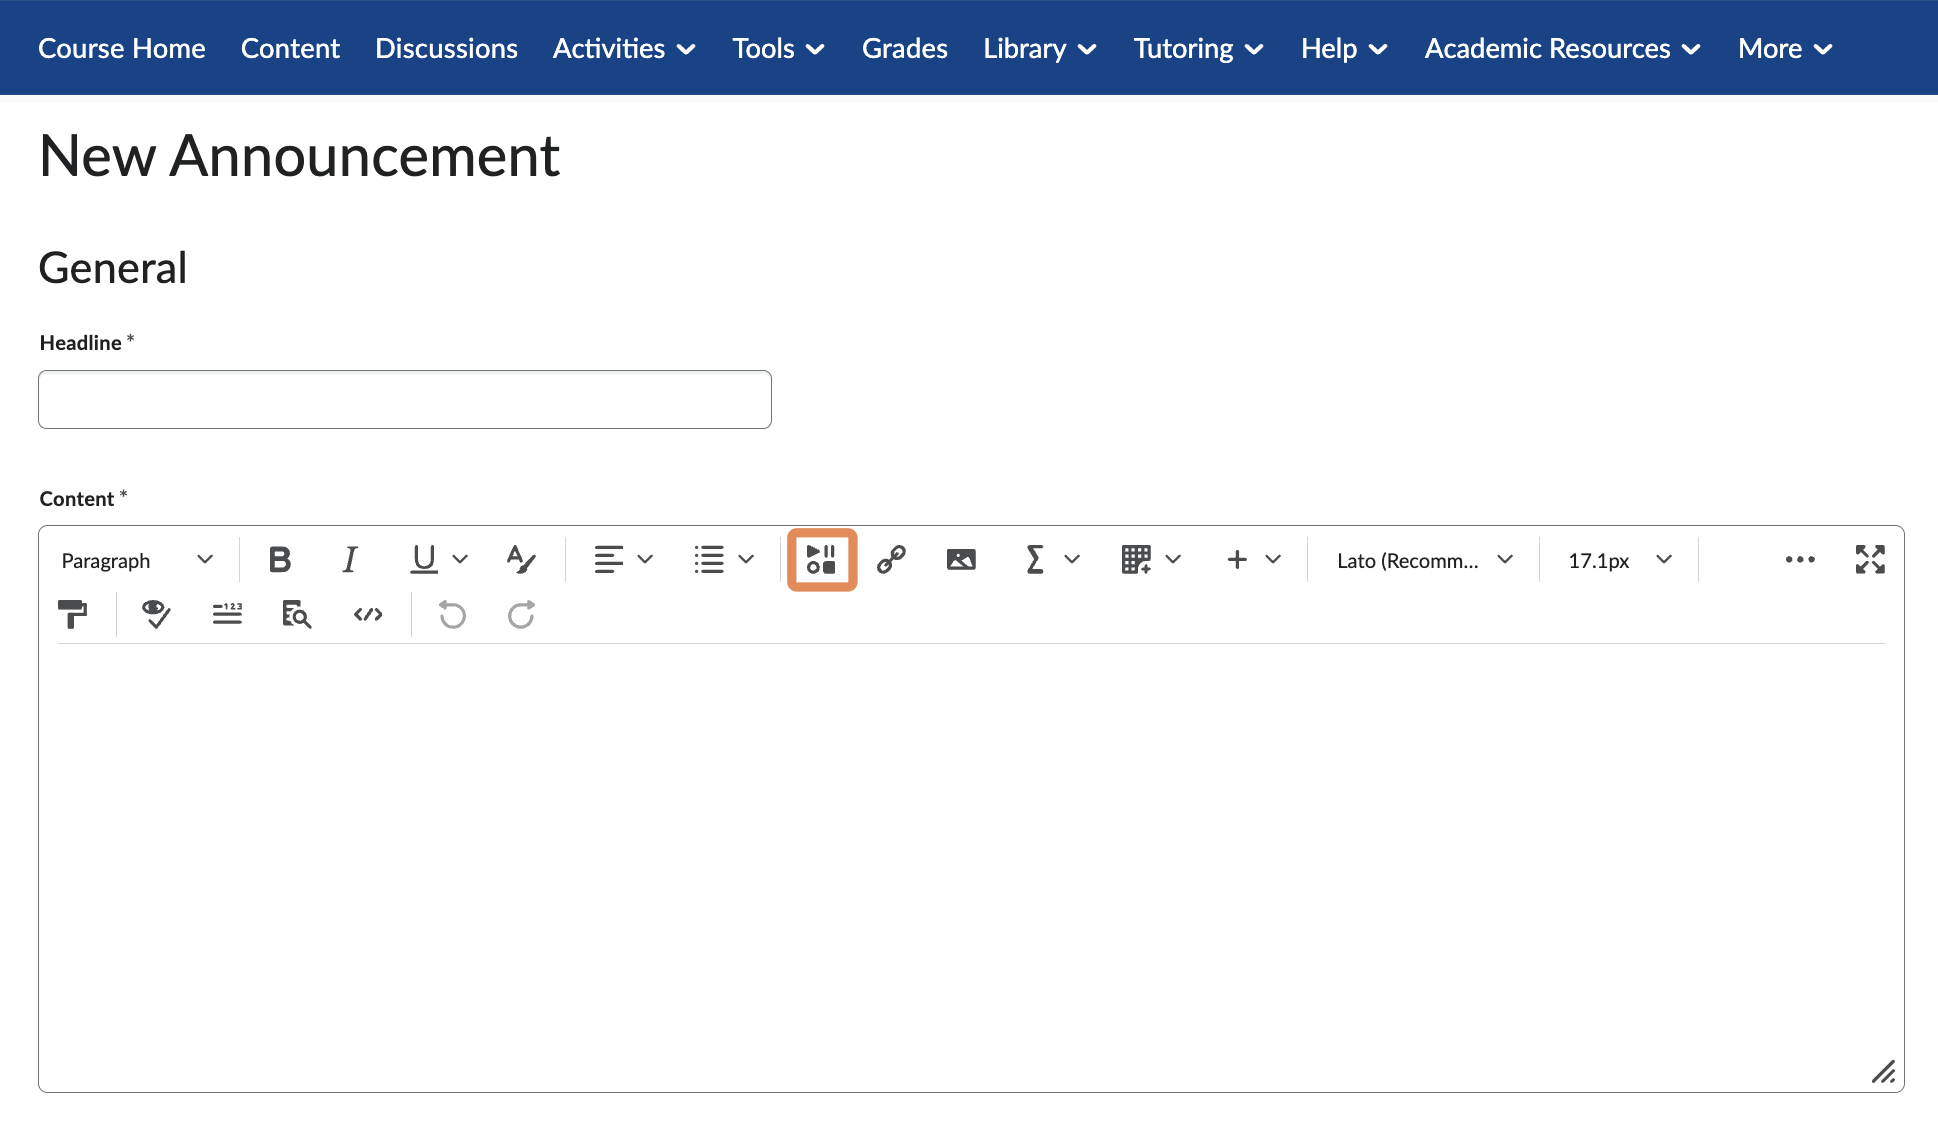
Use Video Notes in Brightspace
The Video Notes tool is intended for quick, timely messages. It’s not ideal for video content that is meant to be a permanent part of the course. Video notes can be reused, but are best suited for faculty who desire to offer feedback, weekly updates, or other one-off ephemeral messages via video.
Note: Students may also add video notes to discussions, assignments, and quizzes.
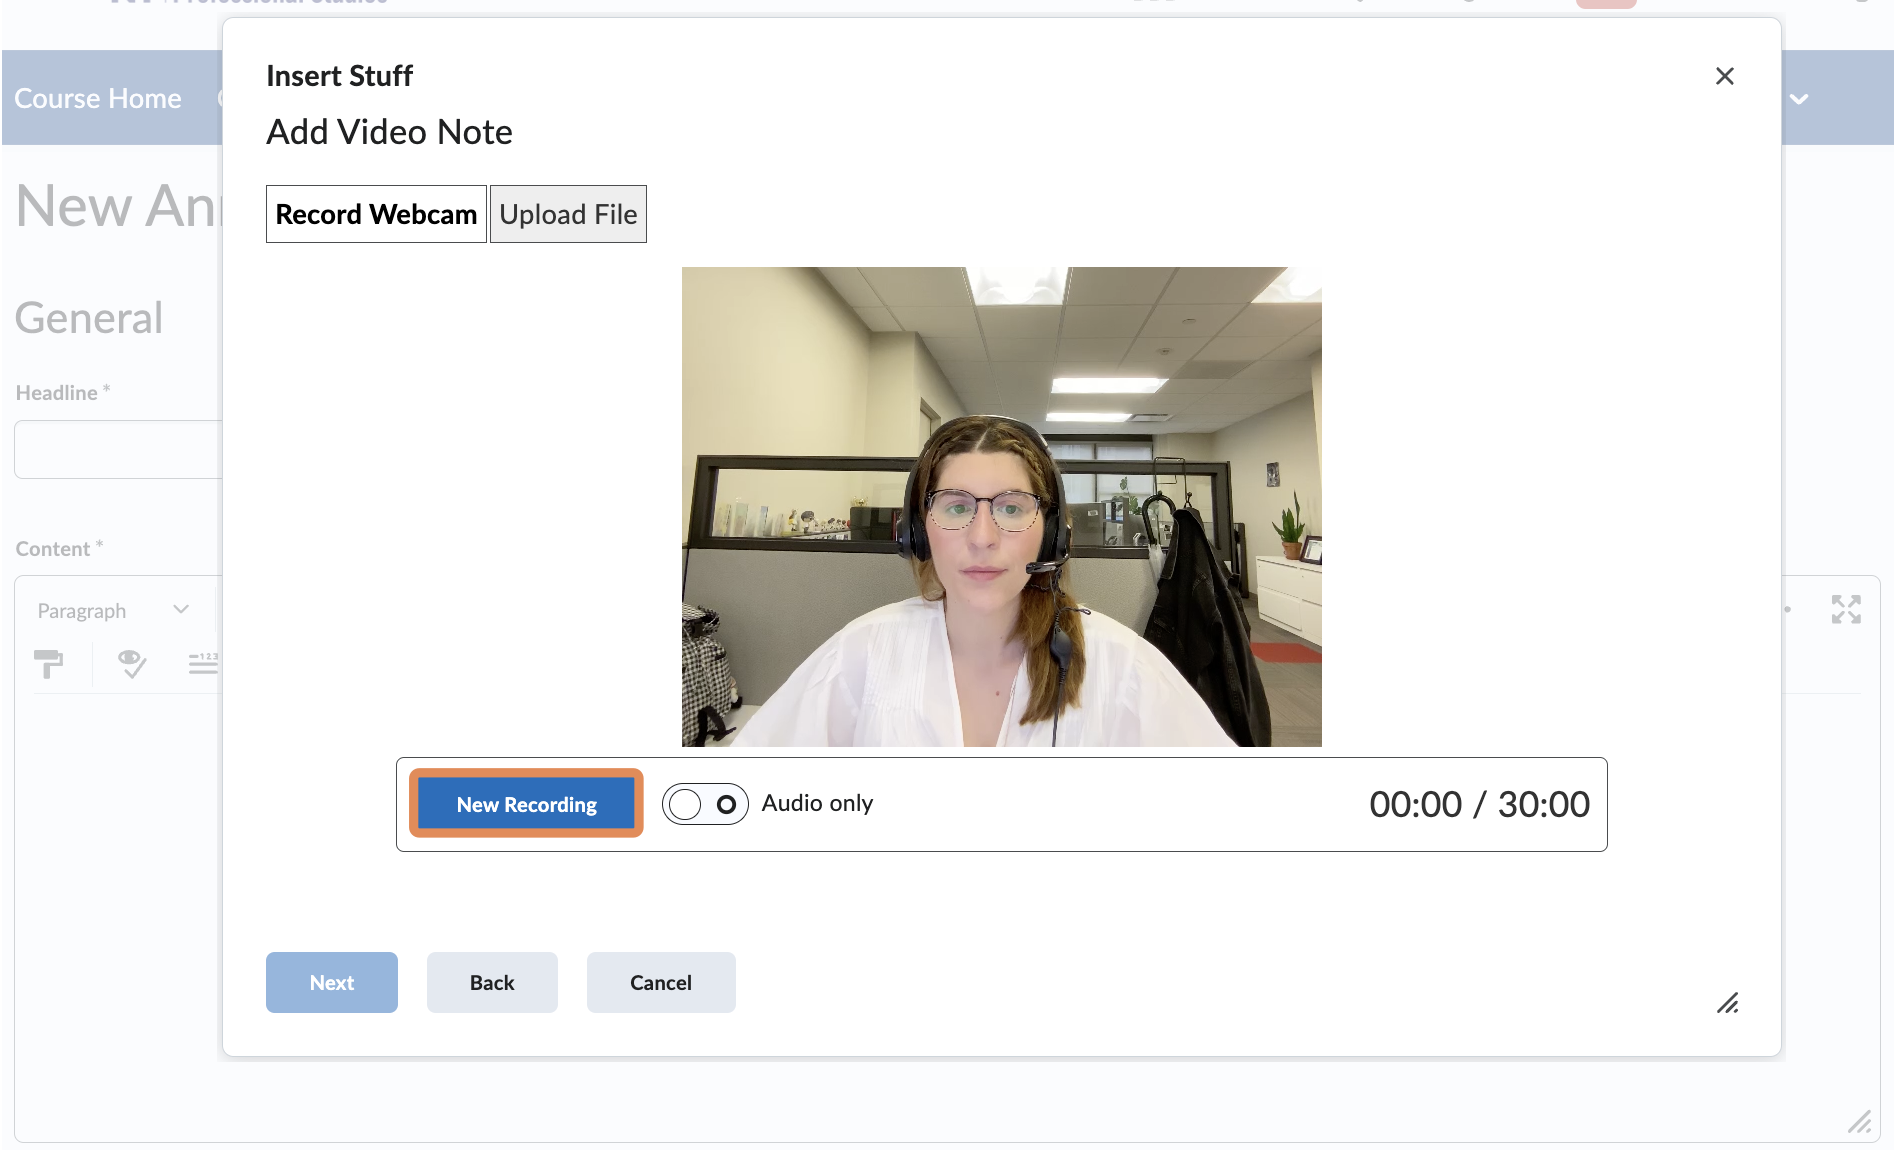
- Prepare your script or outline for the content of your video note. Navigate to the area of Brightspace where the Video Note should appear. From within the content editor, select the Insert Stuff button followed by the Add Video Note.
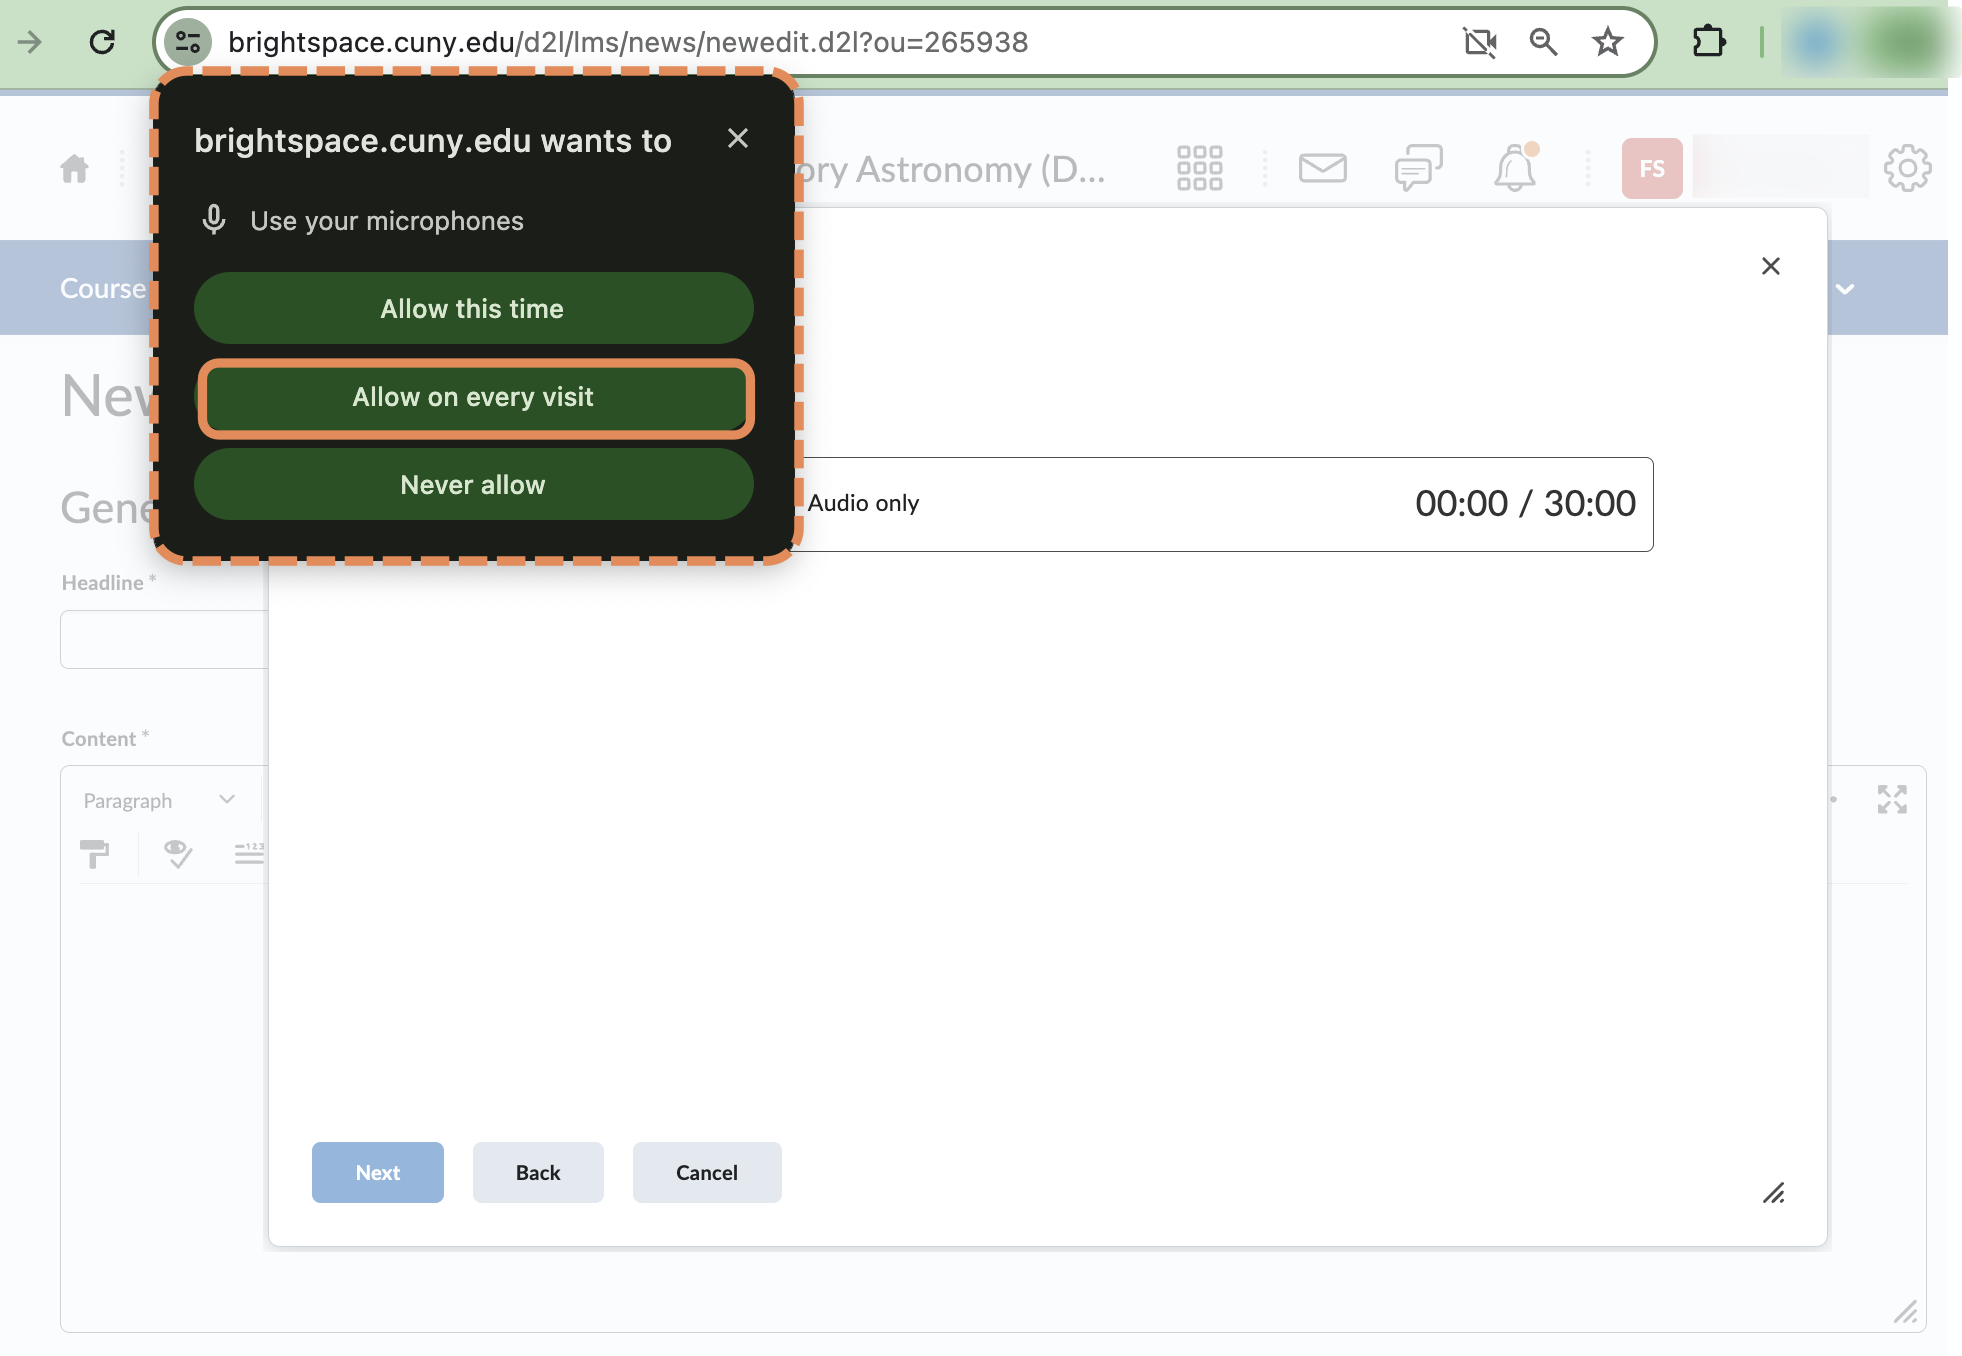
- Recording from your webcam, check the preview of your shot and adjust as necessary. When ready, click on New Recording to begin.
- The first time you use the Video Note, look for a pop-up from your browser asking to grant permission for Brightspace to use your camera and microphone. Be sure to allow those permissions.
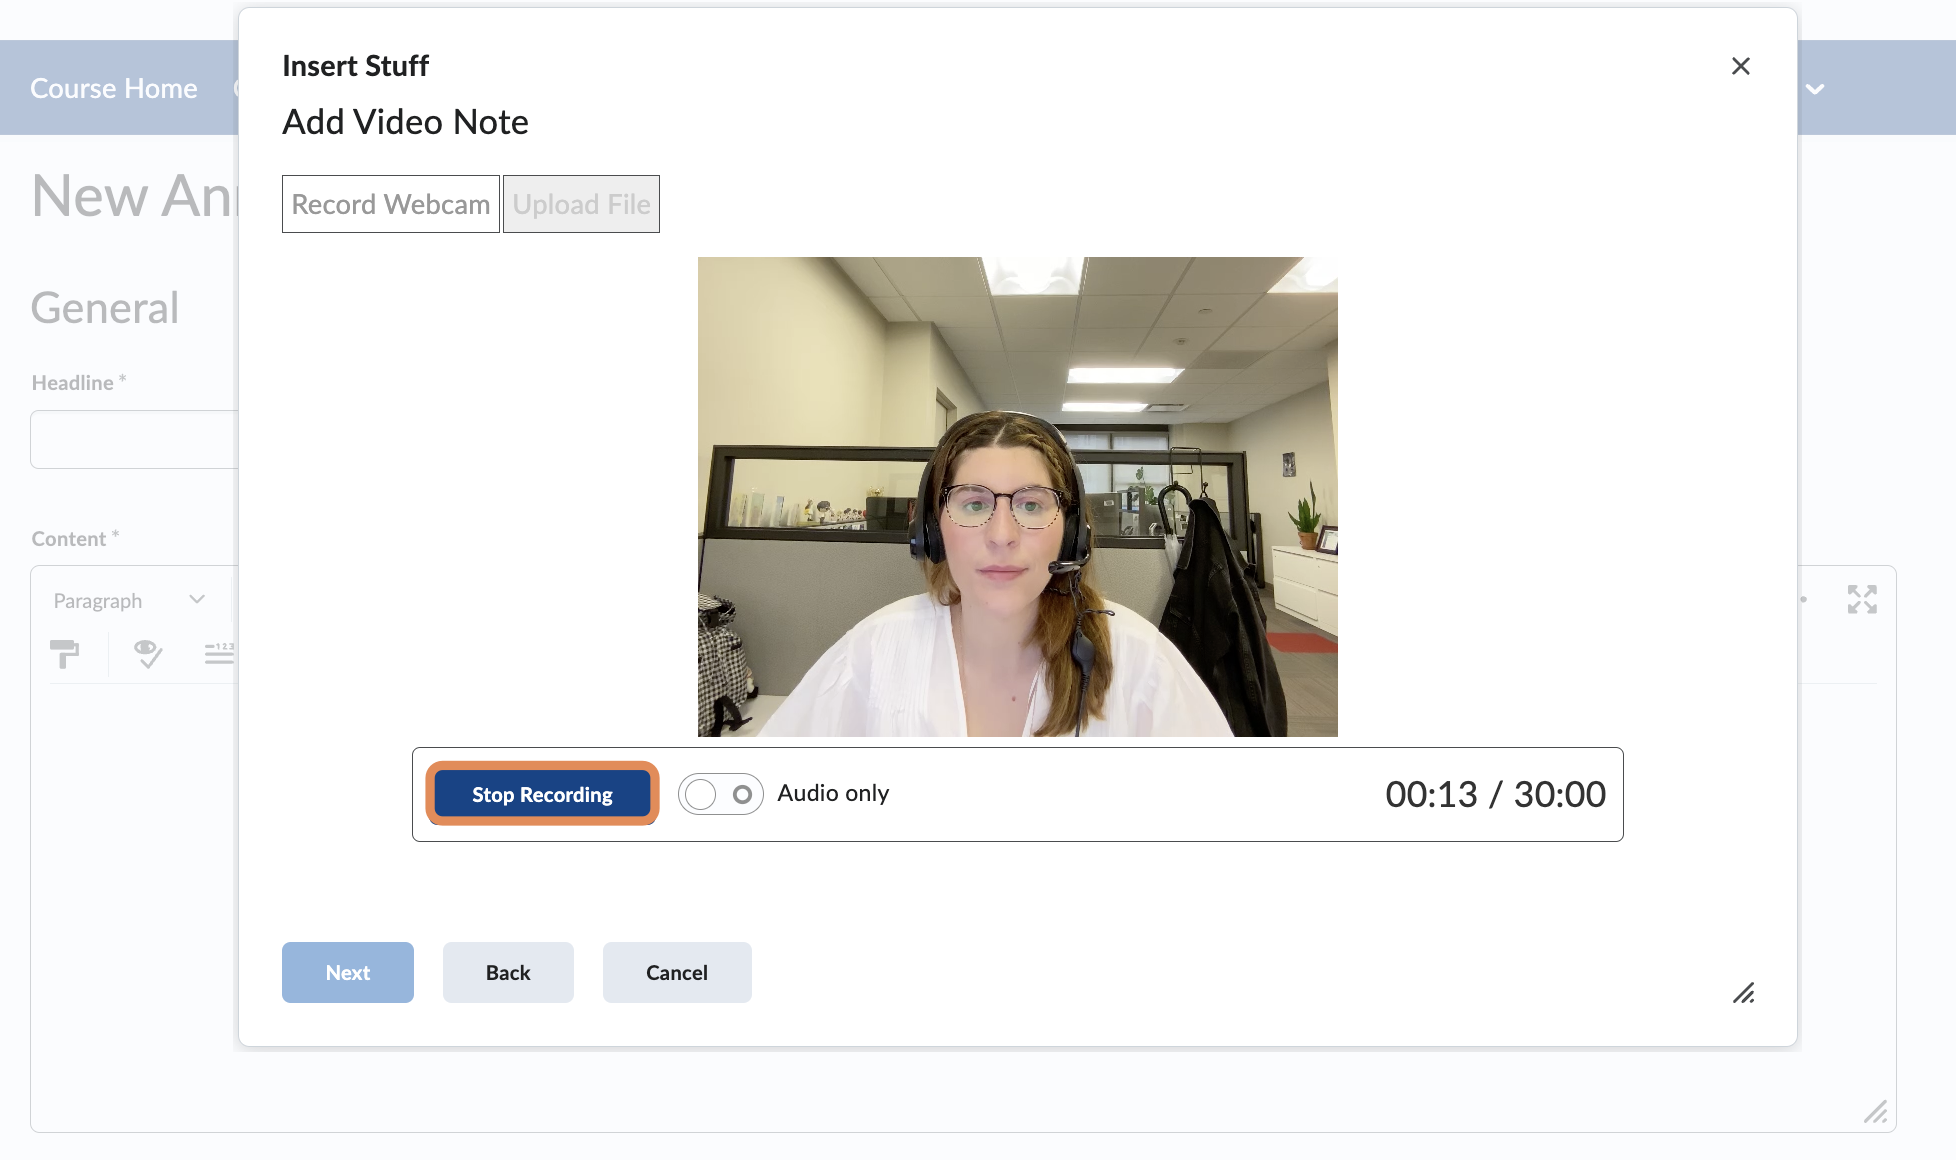
- Once you have completed the video note, click Stop Recording, followed by Next.
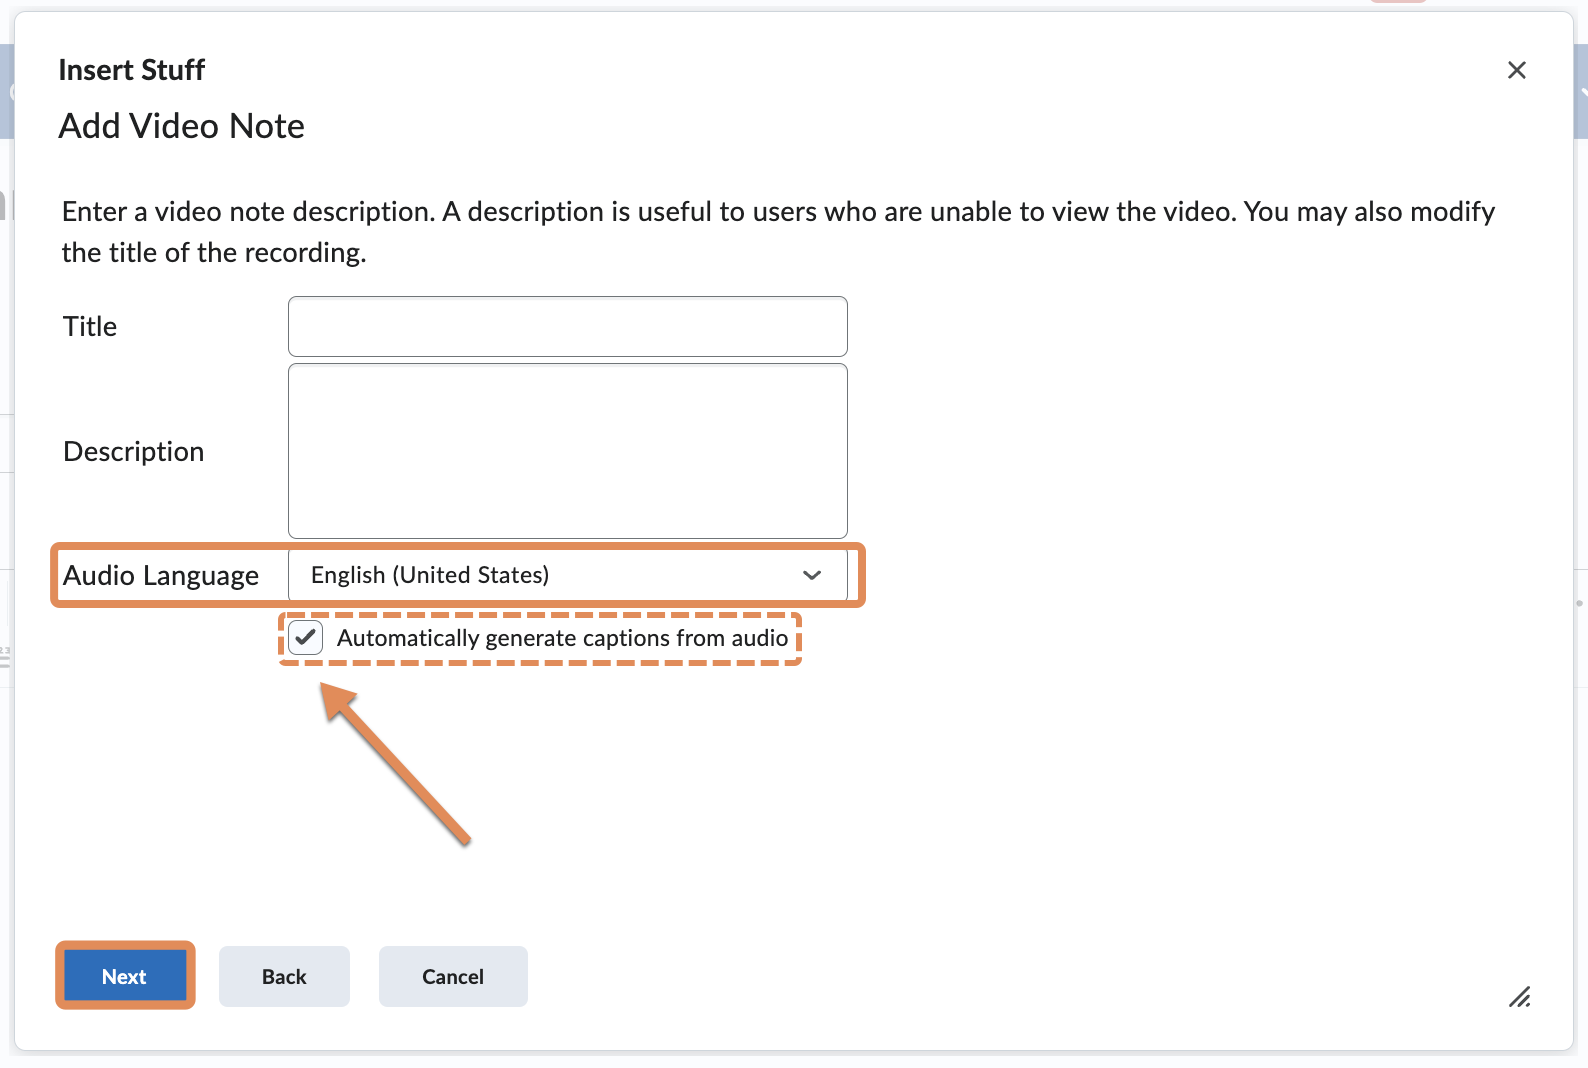
- Give your video note a title and add a description (if desired). Select English (United States) as the Audio Language from the pull-down menu and tick the checkbox to Automatically generate captions from audio, followed by Next.
- Be sure to include the auto-generated captions as this is the only way a Brightspace video note can be made accessible. Alternatively, videos hosted in the Panopto platform can be professionally captioned and transcribed by filling out the Caption Request form (see topic below).
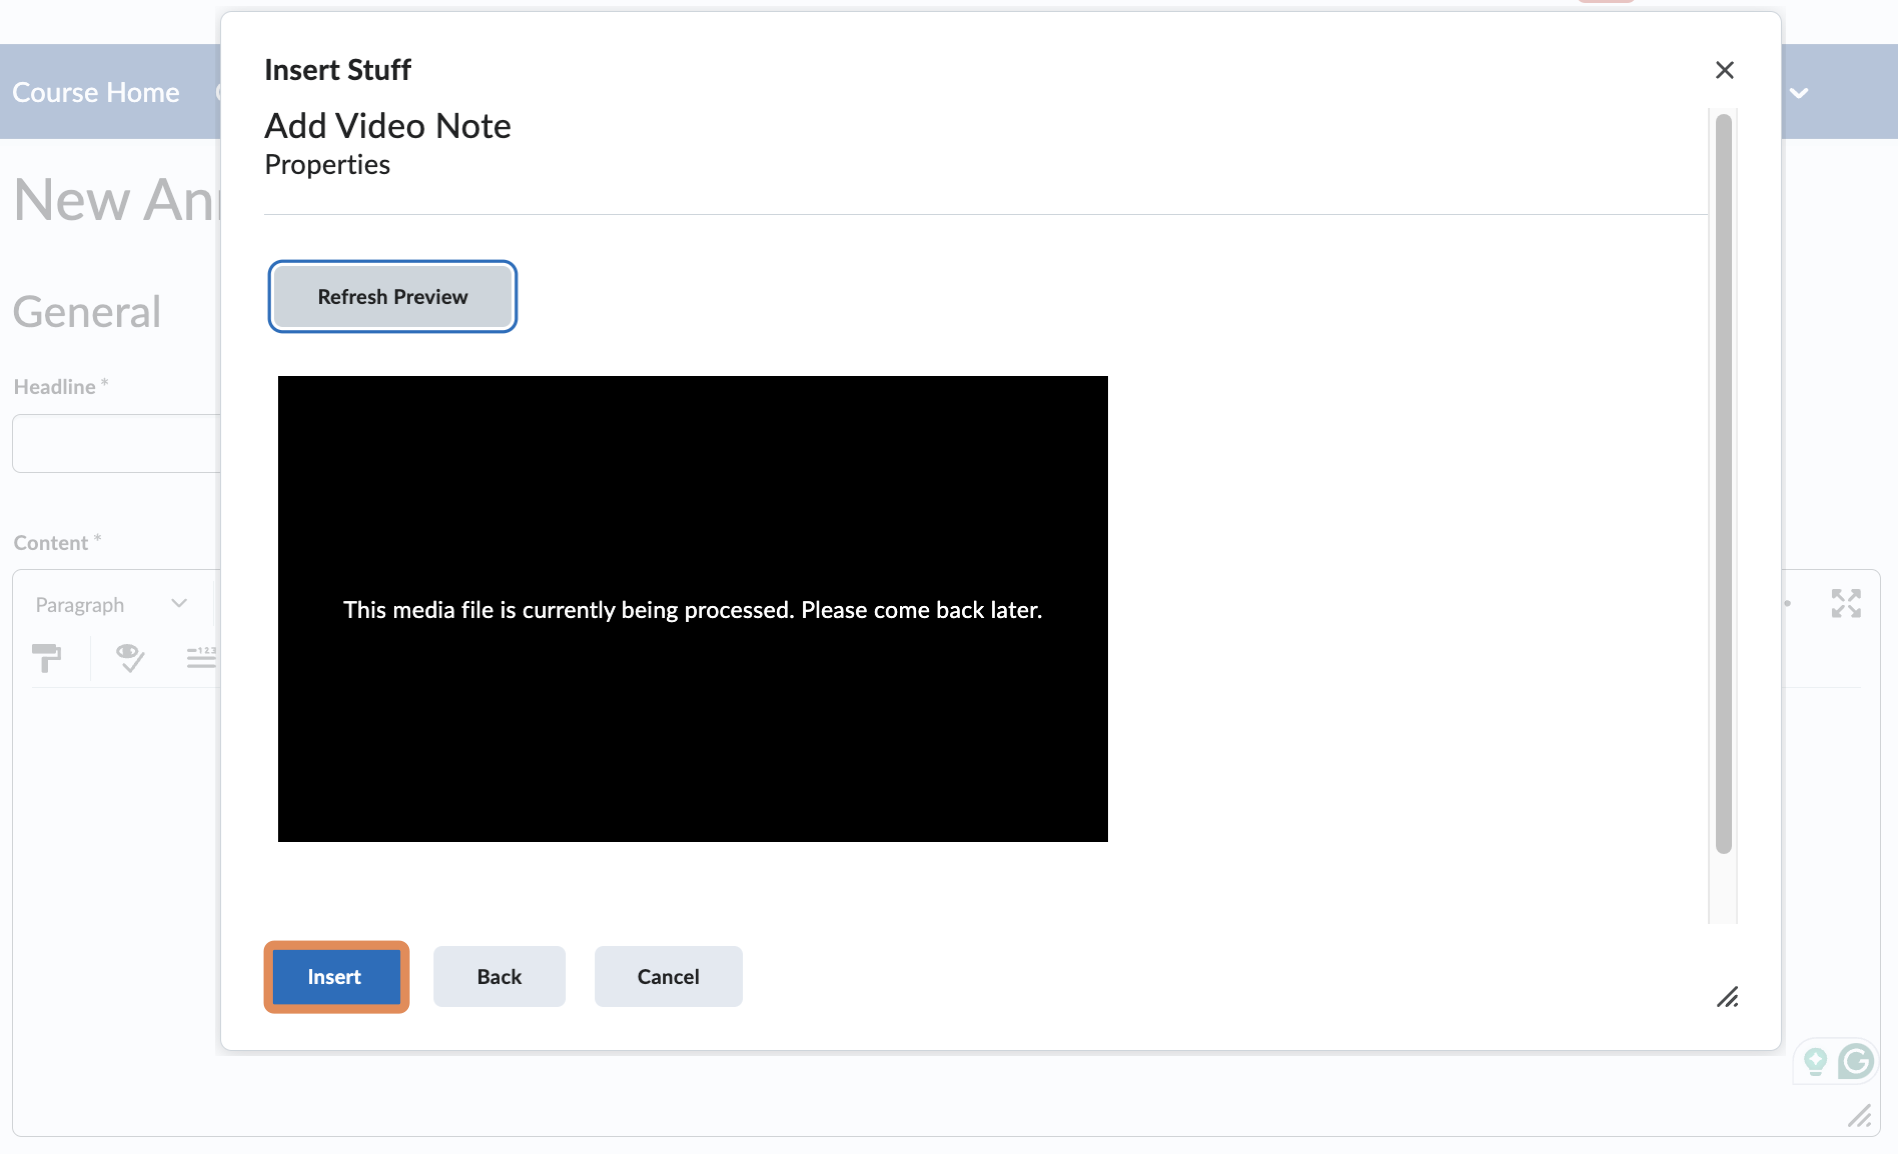
- You will now see that the media file you just made is being processed. It’s safe to click the Insert button to finish adding the Video Note.
Caption Video Content
Captioning video is better for everyone! At SPS we work to make our courses accessible to all. To that end we have secured a professional captioning service, 3Play Media, to caption all video content used in academic courses. If your video is hosted on 3rd party sites (ex. YouTube/Vimeo), even if owned by a 3rd party, may be submitted for captions. Any video hosted in Panopto may be submitted for captions.
Note: Uploading video directly to Brightspace, for example, in a Video Note, cannot be submitted directly to 3Play, be sure to use the automatic captions feature for these types of videos. Please use Panopto for full-service video needs.
Please complete the Caption Request form once for each video submitted; if you have 5 or more videos to caption, please email Sharon Jorrin: Sharon.Jorrin@cuny.edu
Test Your Knowledge
Take Action
- Add a YouTube video by either using the “Video or Audio”, “Embed Code”, or “YouTube search” method.
- Add the Panopto Portal to your course site following the steps above.
- Try either uploading a video or creating a new one using Panopto
- Review your course for videos that do not have captions and submit them to the Caption Request form.
Resources
For more on Panopto visit the Panopto for SPS page on the Faculty Hub site.
Create and insert a video note in Brightspace (Faculty)
Create and insert a video note in Brightspace (Students)
OFDIT Media Studio