

Overview
Creating an accessible Word document ensures that your content is readable by everyone, including individuals using screen readers or other assistive technologies. In this guide, you’ll learn the steps to use the Accessibility Checker in Word as well as tips on saving Word as a PDF.
Video Coming Soon
1. Run the Accessibility Checker
Microsoft Word has a built-in “auditor” that finds accessibility issues for you. Here’s how to run the checker:
- Go to the Review tab.
- Click Check Accessibility.
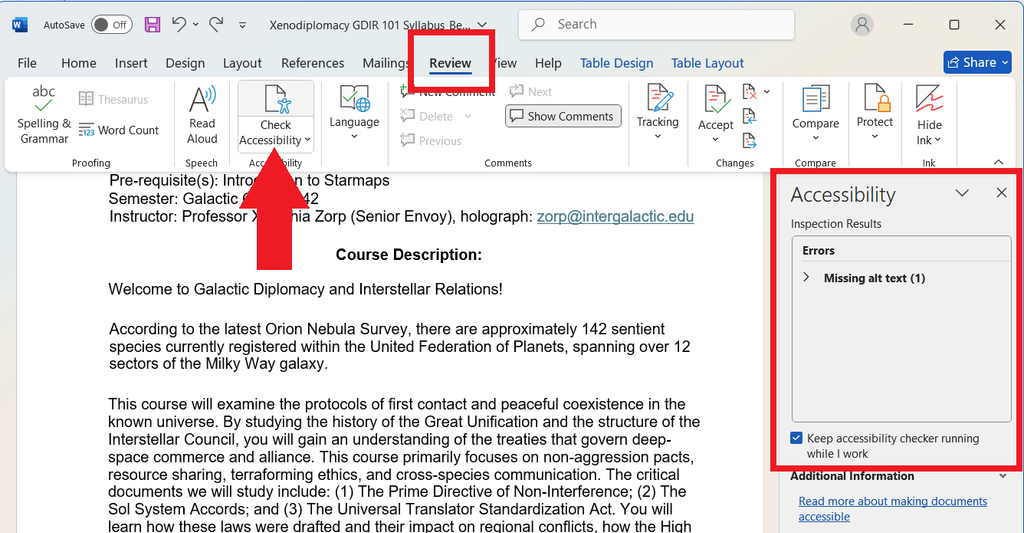
- Review the Errors (must fix) and Warnings (recommended fixes) in the side pane.
- Check navigation structure ‘manually.’ See our guide Accessible Word Document: Structure and Heading
- Check color contrast ‘manually.’ See our guide on Accessible Word Document: Best Practices for more on color and contrast.
2. Saving as a Word or PDF
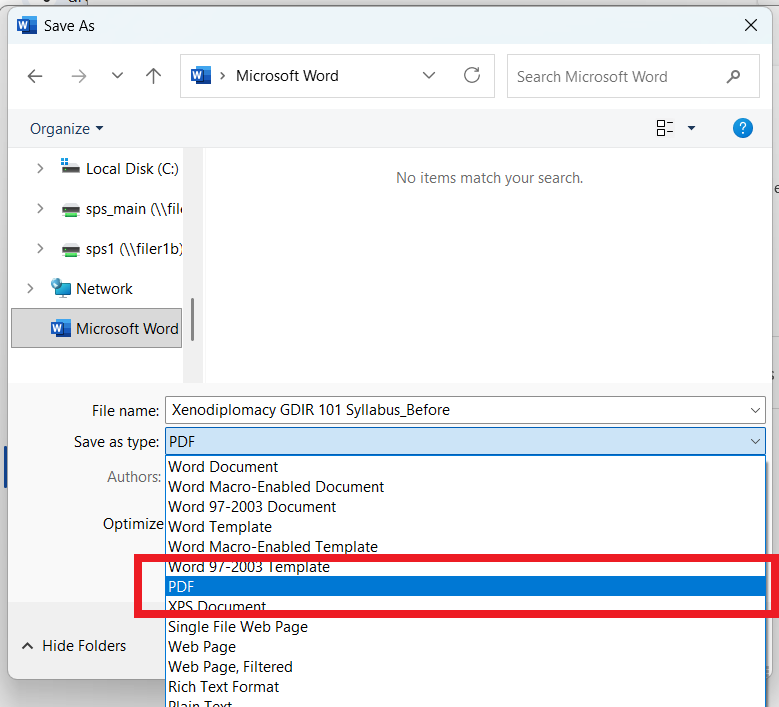
It is strongly recommended to save and share with students accessible Word documents as a .docx, not as PDF. If you need to share the document as a PDF, don’t just “Print to PDF.” Do this instead:
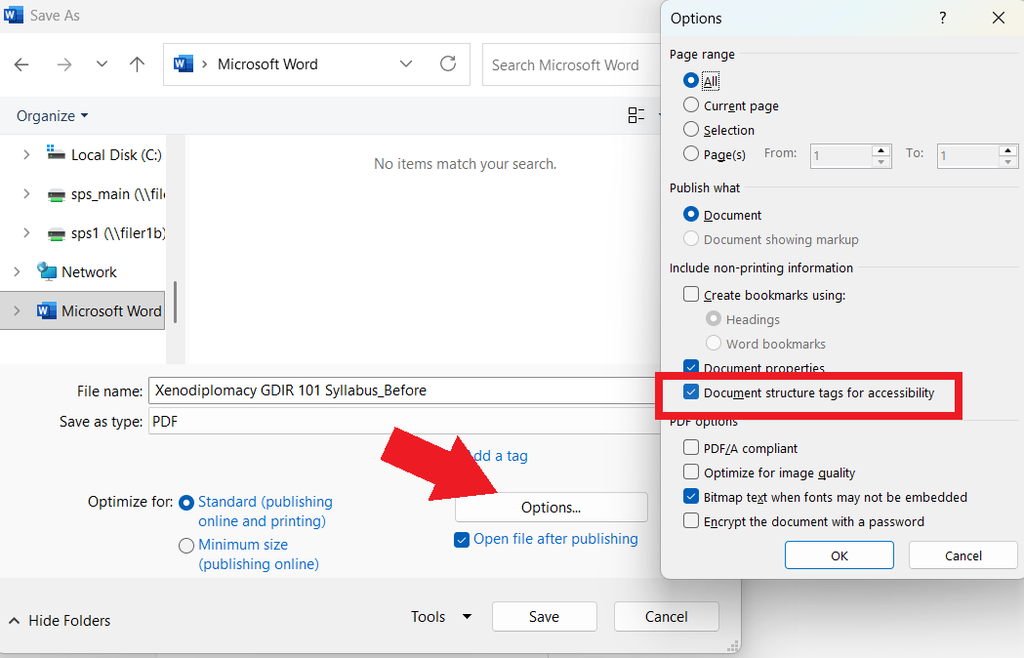
1. Go to File > Save As and select PDF.
2. Click Options and ensure “Document structure tags for accessibility” is checked. This preserves all the hard work you did with headings and Alt Text.
Further Resources:
CUNY SPS Accessibility Toolkit, specifically Appendix B: Software-Specific Accessibility
Level Up! Accessibility in Our Online Courses
Still have questions? Email us at FacultySupport@sps.cuny.edu. We’re here to help!
Was this helpful?
3 / 2