

Overview
Creating an accessible Word document ensures that your content is readable by everyone, including individuals using screen readers or other assistive technologies. By following a few structural rules, you can make your documents more inclusive and professional.
1. View your document’s heading structure
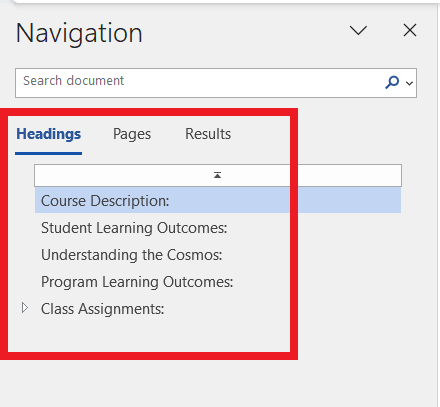
The Navigation Pane shows the headings and structures of the document. It is easy for you to find document sections if the headings are arranged logically. Here’s how:
1. Click on the View button on the menu bar
2. Check the box to show the Navigation Pane

3. Expand all the headings in the Navigation Pane to see the full document structure
2. Use Style Headings
Do not simply bold or enlarge text to create a title. Screen readers rely on the Styles gallery to navigate a document.
- Logical Order: Use Heading 1 for major sections, and Heading 2 for subsections.
- Benefit: This creates a “map” that allows users to jump to specific sections rather than listening to the entire document from the start.
Here’s how:
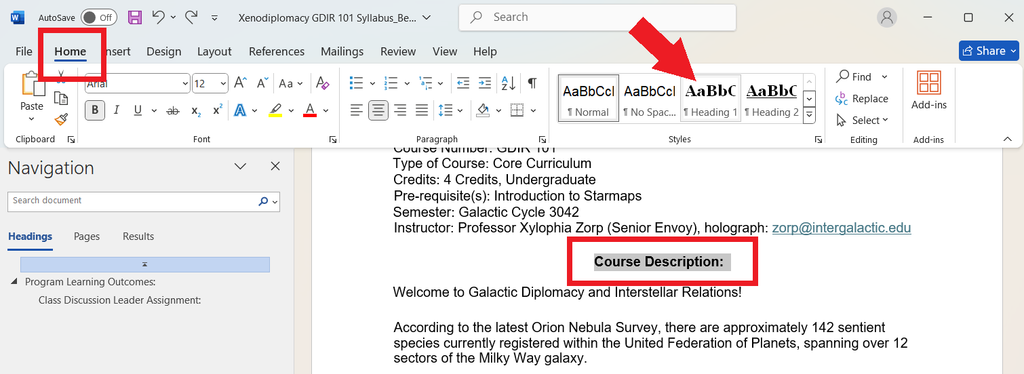
- Select the text you wish add a header style
- On the Home menu bar, click on Styles and choose your preferred sytle: Heading 1 / Heading 2 / Normal
Do not skip heading levels: Skipping heading levels breaks the logical structure of a document, which confuses screen reader users who rely on a consistent hierarchy to navigate and understand the relationship between content sections.
Note: You may customize defined heading styles to match the existing heading styles.
Still have questions? Email us at FacultySupport@sps.cuny.edu. We’re here to help!
Was this helpful?
3 / 2

[…] Check navigation structure ‘manually.’ See our guide Accessible Word Document: Structure and Heading […]